
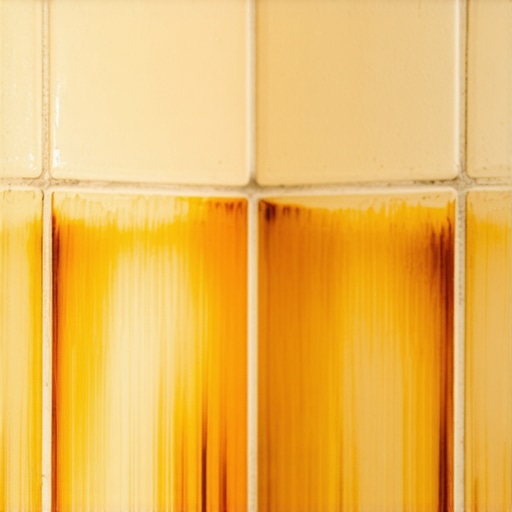
I remember stepping into my kitchen one morning and noticing that my bright, crisp white grout lines had turned a dull, unappealing shade of orange overnight. It was a lightbulb moment—a frustrating realization that my beautiful tile work was suffering from a problem I didn’t fully understand at the time. The worst part? I had no idea what caused it or how to fix it without ripping everything out and starting from scratch. Sound familiar?
The Hidden Culprit Behind Orange Grout
If you’ve ever faced this discoloration, you’re not alone. Many homeowners discover their pristine grout turning orange or rusty-looking, often without warning. The main culprit is the formation of iron oxide bacteria—a natural process accelerates in humid, moist environments like kitchens and bathrooms. These microorganisms feed on trace minerals in the water, gradually staining the grout and creating that unsightly hue. Interestingly, according to the Environmental Protection Agency, water containing iron is quite common and can lead to staining issues in porous materials like grout if not properly sealed or maintained.
What Makes Me Trust This Explanation?
Early on, I made the mistake of ignoring the importance of regular sealing and cleaning. I thought frequent mopping was enough, but without proper grout sealant, the minerals and bacteria had a clear path to set in. This oversight is a common mistake I see many homeowners make when trying to maintain their tile—don’t skip the sealing step. Want to learn more about avoiding typical flooring installation pitfalls? Check out this guide.
But don’t worry, fixing this problem doesn’t require a complete floor overhaul. In fact, with some simple cleaning techniques and preventive measures, you can bring back that fresh, white grout look and keep it that way. Ready to dive into how to restore and protect your grout? Let’s get started!
Getting Started with Your Grout Revival
Deep Cleaning of Grout and Tiles
Start by removing surface dirt with a thorough sweep or vacuum, similar to preparing a canvas before painting. Mix a cleaning solution with baking soda, hydrogen peroxide, and a few drops of dish soap, creating a paste that targets grime. Apply this paste to the affected grout lines using a stiff-bristled brush, pressing firmly and working in circular motions. This process dislodges embedded dirt and bacteria, much like scrubbing rust off metal. I recall tackling my grout after a buildup of mold and stains; the initial scrubbing revealed a startling brightening effect, motivating me to proceed further.
Use of Specialized Grout Cleaners
If stubborn stains persist, employ a commercial grout cleaner containing enzymes or oxygen-based formulas. Apply as directed, allowing agents to sit for 10-15 minutes before scrubbing. Rinse thoroughly with water, ensuring no chemical residue remains, which can attract dirt later. Think of it as giving your grout a detox session, resetting its natural white tone. Remember, always wear gloves and ensure good ventilation during chemical use—your safety is paramount.
Applying Effective Sealant to Prevent Future Stains
After cleaning, wait at least 24 hours for the grout to dry completely. Select a high-quality penetrating grout sealer suited for your tile type. Using a applicator or small brush, apply the sealer evenly along the grout lines, allowing it to soak in. Wipe off excess with a dry cloth to prevent haze formation. Sealing is like armor for your grout, resisting moisture and mineral deposits that cause staining. I learned this lesson the hard way when ignoring sealing resulted in rapid re-staining within months. For optimum results, consider recurring sealing every 1-2 years, especially in high-moisture areas.
Reinforce Routine Maintenance
Incorporate regular cleaning with pH-neutral tile cleaners to minimize residue buildup. Use a damp mop with minimal water—think of it like mopping a car’s windshield to maintain clarity. Avoid harsh chemicals or abrasive scrubbers that can degrade sealants and damage grout surface, similar to scratching a paint job. Establishing a weekly routine helps maintain that crisp white appearance, preventing grime from settling into the pores again. When I adopted a weekly cleaning schedule, I noticed my grout stayed brighter longer and saved money on costly restorations.
Addressing Underlying Water Quality Issues
If recurring staining persists, consider testing your water supply for iron content. High iron levels facilitate oxidation, causing persistent orange discoloration. Installing a water filtration system with iron removal capability can significantly reduce mineral presence, acting as a safeguard. Think of it as filtering impurities before they reach your appliance or surface—protecting your investment. For precise diagnosis and solutions, consult water treatment professionals through this contact page. Addressing water quality not only benefits your grout but also prolongs the lifespan of your entire plumbing system.
Monitoring and Preventing Future Discoloration
Set reminders every 6-12 months to repeat the cleaning and sealing process. Consider applying a color-enhancing grout sealer that maintains brightness over time. Similar to skincare routines, consistency yields the best results, ensuring your grout stays vibrant. Keep an eye out for early signs of discoloration—quick action prevents extensive restoration work later. Remember, proactive maintenance is more cost-effective and less stressful than reactive repairs, saving you from the frustration I once experienced dealing with stubborn stains.
Many homeowners assume that installing hardwood, tile, or leveling floors is a straightforward task, but there are subtle complexities and common misconceptions that can trip up even seasoned DIYers. One widespread myth is that a perfectly flat subfloor isn’t absolutely necessary for a successful tile installation. In reality, even minor dips and humps can cause lippage, cracking, and uneven grout lines, leading to costly repairs later. Expert installers use precise tools like laser levels and string lines, along with techniques like self-leveling compounds, to ensure a flawless surface. Skipping these steps might save time initially, but it jeopardizes the durability and aesthetic of your floor over time. Want to see how proper leveling impacts longevity? Check out this comprehensive guide.
Another nuance that many overlook is the grain direction in hardwood flooring. While running planks along the longest wall might seem intuitive, experts suggest considering natural light and room flow, which can dramatically influence how the floor looks and feels. Improper orientation can highlight gaps or unevenness, especially in wide planks. Additionally, acclimation of wood before installation is often underestimated. Failing to give the material adequate time to equilibrate humidity can lead to buckling or gaps down the line. According to studies from the National Wood Flooring Association, proper acclimation reduces the risk of these issues significantly. For an in-depth walkthrough, visit this resource.
A common mistake related to flooring adhesives and thinset is using the wrong type or applying it at incorrect thicknesses. For outdoor tile work, epoxy-based thinsets are recommended for their bonding strength and flexibility, but some installers still opt for standard cement-based mortars, risking premature failure. Applying thinset too thick can also trap air pockets or bubbles, leading to hollow spots and eventual cracking. A pro’s tip is always to follow manufacturer guidelines precisely, and for complex projects, consulting with a flooring professional can save you from costly rework. Learn more about expert installation strategies at this detailed article.
What about the role of expansion gaps? Many neglect these crucial spaces or set them too small, thinking they are unnecessary. However, in fluctuating climates, lack of proper gaps can cause tiles and hardwood to buckle as the material expands. Similarly, during installation, improper spacing can limit natural movement, leading to potential damage over time. Think of it like a car tire—if you don’t allow room for expansion, you risk blowouts. Advanced installers use spacers and monitor environmental conditions meticulously to prevent such pitfalls. Are you aware of how climatic factors influence your flooring choice? Dive into this article.
In summary, beneath the surface of every quality floor is a set of nuanced decisions and techniques that differentiate amateurs from professionals. Skipping meticulous leveling, ignoring material acclimation, or misunderstanding expansion needs can compromise your floor’s integrity. As always, investing in proper preparation and expert guidance, where needed, ensures your flooring investment pays off in durability and beauty. Have you ever fallen into this trap? Let me know in the comments.
Maintaining the visual appeal and structural integrity of your floors demands more than routine sweeping and mopping. Investing in the right tools can save you time, money, and headaches down the line. Personally, I rely on a combination of precision instruments and specialized cleaning products to keep my floors pristine and functional. Let’s explore some essential equipment and methods that I recommend for long-term flooring care.
Using a High-Quality Laser Level for Accurate Alignment
Precision starts with proper leveling. A laser level is an indispensable tool I use to ensure tiles and hardwood planks are perfectly aligned during installation and touch-ups. Unlike traditional spirit levels, laser levels provide a 360-degree projection, allowing me to spot minor dips or humps that can cause lippage or structural issues. I prefer models like the Cross-Platform Laser Level for its durability and clarity. Regular use of a laser level during maintenance helps detect unevenness early, preventing costly repairs later.
Employing a Moisture Meter for Humidity Control
Moisture content is a silent culprit behind buckling hardwood or delaminated vinyl. I use a high-precision moisture meter, such as the Tramex MEP, to monitor subfloor and material moisture levels periodically. This allows me to decide whether additional drying, ventilation, or adjustments are necessary before proceeding with repairs or installations. Accurate moisture readings are vital; misjudging humidity can lead to wood warping or adhesive failure. For more details on moisture management, consult resources like this article on floor leveler issues.
Specialized Cleaners Tailored for Different Surfaces
Not all cleaning products are suitable for every floor type. For example, I rely on pH-neutral cleaners for ceramic tiles to prevent sealant degradation, while gentle wood cleaners preserve the finish of hardwoods. For stubborn grout stains, oxygen-based formulas like those in commercial grout cleaners work wonders. Using the wrong cleaner can compromise surface finishes or promote future staining. If you need guidance on selecting cleaning agents, information in this guide is incredibly helpful.
Power Sanders and Buffers for Restoring Shine
Over years, hardwood floors can develop a dull or scratched surface. I recommend using a random orbital sander equipped with a fine grit pad or a floor buffer with proper polishing pads to restore gloss. Always test in a small inconspicuous area first, as overdoing it can remove finish prematurely. A professional-grade buffer, like the Festool RTS series, offers control and efficiency. Incorporating this step periodically maintains the appearance and prolongs the need for full refinishing. For comprehensive refinishing techniques, check out this expert guide.
How Do I Keep My Floors in Top Shape Over Time?
The key lies in consistent monitoring and timely intervention. Regularly check for signs of moisture, wear, or damage and address issues before they escalate. Establish a maintenance schedule that includes resealing grout lines, inspecting expansion gaps, and cleaning with appropriate tools. Investing in quality equipment upfront pays off; for instance, a good moisture meter or laser level can help you catch problems early and apply targeted solutions. Looking ahead, trends indicate increased adoption of smart sensors and automation to monitor moisture and movement, leading to even smarter maintenance routines. To start, try incorporating a high-precision laser level into your next maintenance session; it can make an immediate difference in achieving long-lasting results. Need assistance or expert advice tailored to your specific flooring type? Reach out through this contact page and get professional support.
What I Wish I Knew About Proper Floor Preparation
One of the most impactful lessons I learned was the importance of meticulous subfloor assessment before starting any flooring project. Skipping this step led to unforeseen issues like uneven tiles and squeaky hardwood. Using a laser level and a straightedge during planning could have saved me from costly adjustments later, emphasizing that precision upfront pays dividends over patchwork fixes.
Why Relying on Convenience Can Cost You
I used to believe that regular mopping was enough to maintain my grout and hardwood, but neglecting sealing and proper cleaning was a silent contributor to staining and wear. Investing time in sealing and choosing gentle, pH-neutral cleaners proved to me that careful routine maintenance preserves the beauty and longevity of floors longer than reactive repairs.
Never Underestimate Water Quality’s Role in Longevity
Testing my water for iron content revealed why my grout kept discoloring despite cleaning efforts. Installing an iron removal system was a game-changer, preventing future stains and protecting my investment. This experience underscored how understanding and improving water quality is a crucial, often overlooked, element of flooring durability.
The Hidden Power of Proper Acclimation and Expansion Gaps
One mistake I made was installing hardwood without allowing the material to acclimate properly. Gaps and buckling appeared months later, causing frustration. Learning that acclimation and adequate expansion gaps are vital has helped me maintain my floors in pristine condition, teaching that patience and respecting material needs are core to successful flooring.
Recommendations That Transformed My Approach
I curated a toolkit of my trusted resources, including a high-quality laser level for precise installation checks, a moisture meter to monitor humidity, and eco-friendly cleaners tailored to each surface. These tools empowered me to troubleshoot issues early and improve my DIY projects, proving that investing in reliable equipment elevates craftsmanship and reduces costly errors.
Sparking Confidence for Your Flooring Journey
Mastering hardwood and tile care is a continuous learning process, and embracing these lessons has rekindled my confidence. Whether you’re tackling fundamental installation or routine maintenance, remember that attention to detail, patience, and the right tools make all the difference. Don’t let fear hold you back—every project is a step toward creating the beautiful, durable floors you deserve.
Have you ever encountered a flooring challenge that taught you an unexpected lesson? Share your story below—I’d love to hear how you’ve navigated your flooring adventures!
,