

I remember the moment vividly—standing in my living room, staring at that stubborn, uneven hardwood floor, and feeling a mixture of frustration and determination. It was a project I thought would be straightforward, but the ugly dips and squeaks told a different story. That’s when I realized I needed a secret weapon: shims. Not just any shims, but the right way to use them under a floating subfloor to achieve that perfectly level, squeak-free surface we all dream of.
Why Proper Use of Shims Transforms Your Flooring Experience
When I first started my flooring journey, I underestimated the importance of shimming correctly. I assumed a few scraps of wood or cardboard would do the trick, but I quickly learned that improper shim placement can lead to more problems than it solves—uneven surfaces, delicate tiles cracking, or worse, a floor that feels unsteady underfoot. The key is understanding the secret to using shims effectively, ensuring your floating subfloor remains stable and perfectly aligned.
Not only does proper shimming prevent future issues, but it also saves you time and money—the kind of value that turns a DIY headache into a satisfying success. Whether you’re installing hardwood, tile, or vinyl, mastering shims is essential for lasting results. For a comprehensive guide on leveling techniques that encompass more than just shimming, check out this resource on precise floor leveling methods. It’s helped me avoid common pitfalls and elevate my home’s look and feel.
Is Shimming Truly Necessary, or Just a Fancy Term?
I used to think shims were optional fluff until I made a costly mistake early on—placing a large section of my subfloor without considering how uneven support could cause squeaks and cracks over time. That oversight taught me a lesson in patience and precision, a lesson I now share with anyone about to embark on flooring adventures. Trust me, proper shimming isn’t just a technique; it’s a safeguard for quality.
If you’ve faced issues with uneven floors or materials that just don’t sit right, chances are shimming correctly can be the game-changer you need. Ready to learn the step-by-step method that made my floors flawless? Let’s dive into the practical tips and tricks that will turn your project into a professional-looking finish.
Secure the Subfloor with Precise Shimming
When I tackled my uneven basement floor, I started by identifying the high and low spots with a long level. I used a chalk line to mark the worst dips. For each low area, I cut small pieces of hardwood shim wedges, roughly 1/8 inch thick. I placed them under the joists or existing substrate, stacking shims until the area was level. Tightening screws or nails through the shims into the subfloor kept everything in place.
How to Choose the Right Shims
Use shims made of stable, moisture-resistant materials like wood or plastic rather than cardboard or metal that can warp over time. When selecting shims, consider the gap size; larger dips require thicker or layered shims, but don’t go beyond 1/4 inch to prevent instability.
Ensure Evenness with Checks
After placing shims, double-check the surface with the long level and a straightedge. A good trick I used was to make a template with a straight piece of wood or metal to verify the entire surface — this helped me catch subtle dips I would have missed otherwise. 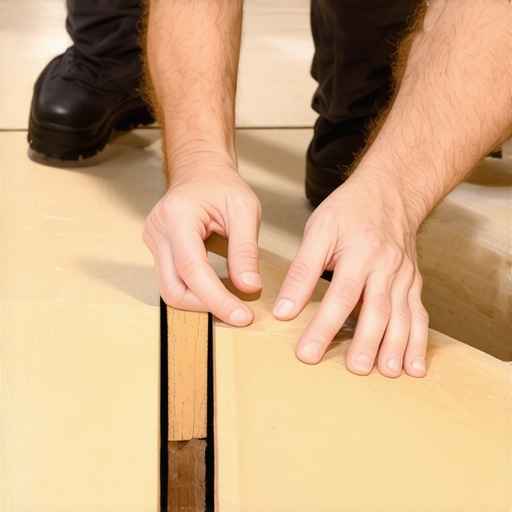
Fine-Tune with Adjustments
Once initial shimming is complete, walk across the area to feel for squeaks or unstable spots. If you notice any, add or adjust shims accordingly. Don’t forget to secure your shims with construction adhesive or screws for long-term stability. Repeat the process across the entire floor, especially in known trouble spots, until the surface feels uniformly solid underfoot.
Final Level Check and Preparation
Before moving on, it’s crucial to conduct a final check. Use a laser level or a string line stretched across the room to verify that the entire surface is within 1/8 inch tolerance. Address any remaining dips immediately by adjusting or adding shims. Proper shimming not only ensures a level surface but also reduces future squeaks and cracks. For more detailed leveling techniques, consult this guide for perfect results.Many homeowners and even seasoned DIYers often fall prey to myths surrounding hardwood and tile flooring installation. One widespread misconception is the belief that flooring issues like squeaks, uneven surfaces, or cracks are due to poor materials rather than installation techniques. In reality, even high-quality materials can fail prematurely if not installed with attention to nuance, such as proper subfloor preparation and precise leveling. For instance, skipping the step of thorough moisture testing or neglecting to use the correct flooring adhesives can cause long-term problems.
Another prevalent myth is that ‘more glue or thicker mortar always leads to better results.’ In truth, excess adhesive can cause lippage in tiles and prevent proper curing, ultimately weakening your entire setup. Understanding the nuances of proper thinset application and grout consistency can make the difference between a durable floor and a costly redo.
Are you aware of the subtle mistakes that can derail your project? For example, not accounting for expansion gaps in engineered hardwood or vinyl planks can lead to buckling over time. Advanced installation demands knowledge of environmental conditions like humidity fluctuations, which can cause wood to expand or contract—an often overlooked factor that guarantees future maintenance issues. According to industry experts, failing to adapt installation techniques to environmental factors results in up to 30% of flooring failures.
A common trap is mishandling subfloor imperfections—believing small dips aren’t impactful. But even minor discrepancies, like a 1/8-inch hump, can cause tiles to crack or hardwood to squeak. Mastering advanced leveling techniques, such as using self-leveling compounds correctly or employing laser-guided tools, significantly enhances finish quality. For expert tips on perfecting your leveling, I recommend reviewing this comprehensive guide on floor leveling.
Moreover, the myth that all subfloors are equally ready to handle installations can be dangerous. In fact, a detailed assessment of moisture levels and structural stability is essential before proceeding. Skimping on this step can lead to costly repairs caused by hidden slab moisture or unstable joists.
Finally, the importance of acclimating materials cannot be overstated. Many underestimate the time required for wood to adjust to their home’s humidity, leading to gaps or buckling shortly after installation. Proper acclimation, typically 48-72 hours depending on the product, ensures dimensions remain consistent. For comprehensive advice on acclimation strategies, consider exploring this hardwood refinishing guide.
In essence, understanding these nuanced factors and avoiding common pitfalls can save you time, money, and frustration, resulting in a flawless, long-lasting floor. Have you ever fallen into this trap? Let me know in the comments.Maintaining flawless floors requires more than just initial installation skills; it calls for the right tools and a consistent routine. Personally, I rely on a high-quality digital moisture meter to monitor humidity levels before and during installation, because ignoring moisture can lead to warping or buckling over time. For leveling, I prefer using a self-leveling compound that I mix precisely following manufacturer instructions—this ensures a smooth, durable surface that minimizes future maintenance needs. Applying a primer designed specifically for your subfloor material enhances adhesion, preventing issues like peeling or uneven wear down the line.
A tool I recommend wholeheartedly is a vibration pad or low-frequency sander, which I use periodically to refresh the finish of hardwood floors without the need for full sanding. This method extends the lifespan of your finish and keeps your floors looking pristine, saving time and money. Equipment like laser levels also aid in regular checks to confirm the floor remains within the desired plane, especially after seasonal shifts that cause expansion or contraction.
Looking ahead, I believe floor maintenance technology will become more automated and integrated—perhaps smart sensors embedded beneath the surface to provide real-time data on humidity, temperature, and structural shifts. This synergy between manual tools and future tech promises more proactive upkeep.
So, how do I maintain hardwood or tile floors over time? The key is a disciplined routine of cleaning, monitoring, and addressing issues the moment they surface. For hardwood, I recommend periodic cleaning with pH-neutral products and reapplying protective finishes—like those discussed in [this hardwood care guide](https://tiletrendshop.com/hardwood-floor-care-secrets-to-longevity-and-shine)—to preserve the surface. Regular checks using a laser level help detect subtle dips or high spots before they turn into costly repairs.
For tile installations, inspecting grout lines and re-sealing them every couple of years maintains their integrity and prevents water ingress. Integrating these practices into your routine ensures your floors stay beautiful and functional for years. Practice using a level or a moisture meter to familiarize yourself with your floor’s behavior in different seasons—this proactive approach can save you from sudden, expensive fixes. Remember, consistent maintenance is the best insurance against deterioration, allowing your investment to pay off long-term. Ready to elevate your upkeep game? Start by trying out a laser level for your weekly checks and see how it transforms your ability to catch issues early.
What I Wish I Had Known About Floor Shimming from the Start
One of the biggest lessons I learned was that patience beats shortcuts. Rushing through shimming often leads to missed dips and squeaks later. I also realized that the quality of shims matters—using moisture-resistant, stable materials makes a noticeable difference in the long run. Lastly, I discovered that meticulous double-checks after each step save tons of trouble down the line, preventing minor issues from becoming costly repairs.
Tools and Resources That Elevated My Flooring Skills
Investing in a good laser level and a high-quality moisture meter transformed my approach. They provided precise data that guided my decisions, ensuring my floors stayed level and dry. I also leaned on expert guides like this comprehensive leveling resource. For inspiration and techniques, books such as “The Complete Guide to Flooring Installation” have become staples in my toolkit, offering both technical advice and confidence.
Your Next Step: Elevate Your Flooring Game Today
Knowing the ins and outs of proper shimming and floor leveling is empowering. Remember, a flawless, squeak-free surface isn’t just a pipe dream but a achievable goal with the right knowledge and tools. Be proactive—measure twice, shim once, and enjoy the satisfaction of a professional-looking floor that stands the test of time. Are you ready to put these tips into action and transform your space? Share your experience or ask questions below—let’s learn together!