
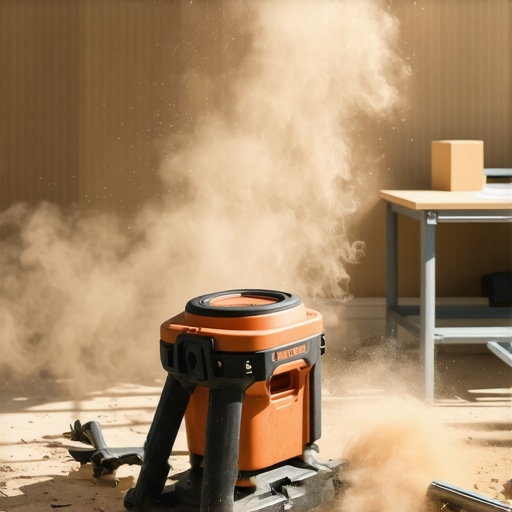
It was a frustrating Saturday morning when I realized my smooth, freshly poured self-leveling compound had transformed into a dusty, uneven mess overnight. I had meticulously prepared, carefully mixed, and poured that leveler, envisioning a flawless base for my new tile installation. But instead, I was greeted by a cratered surface filled with dust and tiny cracks. That moment of disappointment hit hard, making me wonder—what went wrong?
The Hidden Pitfall That Turns Floor Leveling Projects into Dusty Disasters
Honestly, I’ve been there more times than I care to admit. When I first started tackling floor leveling, I underestimated the importance of proper surface preparation and the right mixing techniques. I didn’t realize that a small mistake, like skipping a crucial primer step, could cause the entire project to crumble—literally. It’s a common trap among DIYers and pros alike, often leading to more dust and frustration than results.
But here’s the good news: avoiding this dusty nightmare isn’t hard once you understand the core issues. Today, I promise to share the lessons I’ve learned from personal blunders and countless projects. We’ll walk through the key steps to achieve a smooth, durable layer that stays put—no dust, no cracks, just a perfect foundation.
Is Floor Leveling Even Worth the Hassle? Surprising Facts That Might Change Your Mind
You might be skeptical about all this fuss—after all, floor leveling seems straightforward, right? Well, according to recent studies, improperly leveled floors can cause tile cracks, uneven surfaces, and even structural damage over time, leading to costly repairs (source: The Ultimate Guide to Floor Leveling). That’s why getting it right the first time is worth every bit of effort.
Early on, I made a costly mistake—assuming that pouring and letting it set without proper surface prep would do the trick. That mistake taught me a vital lesson: prepping the subfloor, choosing the right self-leveler, and understanding the correct mixing ratios are non-negotiable. Want to learn how to dodge those pitfalls? Keep reading, and I’ll take you through everything you need to know to make your project a success, not a dusty mess.
Prepare the Subfloor Meticulously
Start by inspecting your subfloor for cracks, dust, or debris. Remove loose particles with a vacuum and sweep thoroughly. Repair any cracks or holes with a suitable patch. If moisture issues are present, address them before proceeding. Remember, a clean and dry surface is essential for optimal adhesion and leveling success.
Prime the Surface Properly
Applying a primer designed for your subfloor material enhances bonding and prevents the self-leveling compound from pinholing or peeling. In one of my recent projects, skipping primer led to bubbling and unevenness, forcing me to redo the pour. Always follow the manufacturer’s recommendations for primer application—more isn’t better, but proper coverage is non-negotiable.
Mix the Self-Leveling Compound Correctly
Achieving the right mix is critical. Use a clean, large mixing bucket and add water gradually to the powder, stirring continuously with a drill-mounted paddle. I once accidentally used too much water, resulting in a runny mix that didn’t level properly and shrank as it dried. Refer to the product’s specific ratio — typically, 4:1 (powder to water)—and measure precisely to ensure consistent results.
Remove Air Bubbles During Pouring
After pouring the mix onto the prepared surface, eliminate trapped air by lightly bouncing a Many homeowners and even seasoned pros believe that following basic instructions guarantees perfect flooring installations, but in my experience, there’s more beneath the surface. One common myth is that proper leveling is purely about pouring the self-leveling compound and letting it set. Actually, neglecting the subtleties like substrate preparation and moisture control can lead to subtle issues—like pinholing or surface imperfections—that undermine the entire project.
Another widespread misconception is that larger tiles are always better for quick installations, but the truth is, larger tiles are more sensitive to subfloor imperfections. Without meticulous surface flatness, large-format tiles will crack or lift prematurely. This nuance often trips up even experienced installers who overlook the critical need for an ultra-flat surface, which you can verify with the straight edge test.
Why do so many installers struggle with adhesion in complex situations? The answer often lies in primer application. Many skip or underestimate this step, assuming the substrate’s cleanliness alone suffices. But a poorly applied primer can cause pinholing and bond failures, especially on problematic surfaces like ply or polished concrete. Remember, the primer’s role is to ensure a strong chemical bond. For more insights, see this detailed guide.The real trick is in advanced substrate assessment
Focusing only on visual inspection misses hidden issues like high spots, subtle unevenness, or moisture content that can sabotage your project. Using a 2-foot level or a moisture meter can uncover problems you didn’t sense. For example, even minor high spots can cause lippage in tiles, which is visually unappealing and structurally problematic. My tip? Always perform a comprehensive flatness check and take corrective action before proceeding.
Additionally, understanding the internal nuances of protocol—such as wait times after primer, proper mixing ratios, and curing conditions—can make or break your installation. For technical mastery, I recommend reviewing precise leveling techniques that many overlook in their rush to finish.
Have you ever fallen into this trap? Let me know in the comments.
Essential Equipment for Long-Lasting Results
Investing in the right tools makes all the difference when maintaining or scaling your flooring projects. I highly recommend a high-quality laser level, such as the DeWalt DW088K, which I use regularly to verify flatness over large surfaces. Unlike traditional spirit levels, laser levels project straight lines across the room, ensuring precise measurements and alignment, reducing errors that can cause future issues like tile lippage or uneven hardwood seams.
Why a Moisture Meter Should Be Your Best Friend
A dependable moisture meter, like the Tramex CME4, helps monitor subfloor moisture levels over time, preventing issues like buckling or delamination. I’ve found that periodic checks with a moisture meter, especially in high-humidity months, help catch problems early, saving expensive repairs down the line. Consistent moisture management is vital for hardwood floors, which are particularly sensitive to underlying moisture variations.
Tools That Make Maintenance Easier
For ongoing care, I rely on a soft microfiber mop and a pH-neutral wood floor cleaner. Regular cleaning prevents dust accumulation that can scratch surfaces and diminishes the lifespan of finishes. Additionally, a dedicated hardwood floor buffer, like the Bona Deep Clean Machine, can extend the appearance and durability of your floors — a worthwhile investment if you want long-term results without frequent refinishing.
Automating Long-Term Monitoring with Software
While manual inspections are essential, embracing technology can streamline maintenance. I use a simple moisture data logging app paired with my moisture meter to track changes over months. There are also specialized flooring management programs that can schedule reminders for periodic checks and maintenance routines. Such tools help you stay proactive, ensuring your flooring remains pristine and functional for years.
Scaling Your Flooring Operations
As your project grows, so should your tool kit. Modular floor grinding systems, like the Klindex LST Model, allow for efficient surface preparation when dealing with larger areas. These machines save time and produce uniform results, which are critical for successful upscale installations or refinishing jobs. Remember, combining high-grade equipment with skilled techniques enhances your capacity to deliver quality consistently.
Where Do You Go From Here?
Predicting future trends, I see a surge in smart tools that integrate IoT sensors to monitor flooring conditions remotely. These innovations will provide real-time data, helping prevent issues before they manifest visibly. To stay ahead, start incorporating reliable tools and software now. For example, try using a laser level for your next project or schedule routine moisture checks with a digital logger—you’ll be surprised at the difference it makes. Want to learn more about mastering your tools? Check out this comprehensive guide on precision techniques.
What I Wish I Knew Before Mixing Self-Leveler
One of the most eye-opening lessons I learned was the importance of precise water-to-powder ratios. A slight deviation can lead to cracks or uneven settling. It taught me to measure meticulously and to always follow the manufacturer’s instructions for mixing ratios.
Why Proper Surface Prep Saves You From Future Headaches
I underestimated the impact of a clean, dry subfloor. Skipping thorough cleaning and moisture checks often resulted in pinholes or bubbling later. I now see that surface prep isn’t just a step—it’s the foundation of a successful project.
How Investing in Tools Elevates the Finish
Using a laser level changed my approach entirely. It ensured flatness over large areas, saving me time and headaches. Reliable tools like moisture meters and high-quality trowels are invaluable for achieving professional results and durability.
My Biggest Mistake and the Lesson It Taught
I once poured self-leveler without priming and watched it peel off after drying. That mistake taught me the critical role of primer—it’s like glue for your compound. When properly applied, it guarantees stronger adhesion and smoother surfaces.
Going Beyond the Basics: Embracing Continuous Learning
After years in the field, I realized that staying updated with new products and techniques is vital. Reading trusted resources like this guide and attending workshops sharpen my skills and keep my projects flawless.
My Essential Arsenal for Long-Lasting Results
From moisture meters to diamond grinding tools, my toolkit keeps evolving. I trust products like the DeWalt DW088K laser level and the Tramex CME4 moisture meter because they provide consistent, accurate data—key to avoiding costly errors and achieving durable floors.
What’s Next? Turning Knowledge Into Action
The future of flooring installation involves smarter tools and better techniques. My advice? Start integrating reliable equipment and continuous education into your workflow. For comprehensive strategies, check out this in-depth resource. Your floors—and your confidence—will thank you.
Comments are closed.