
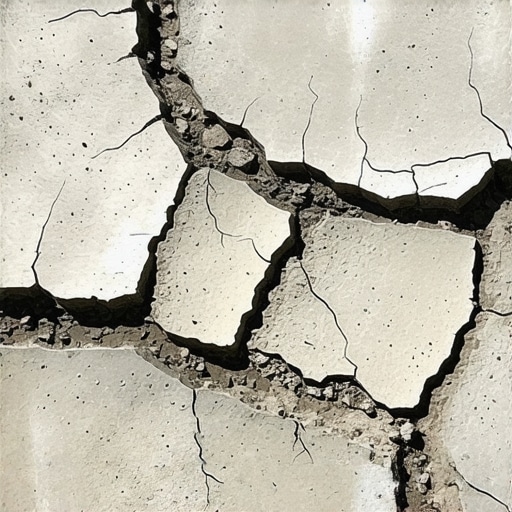
I remember the moment vividly. I had just poured a generous batch of self-leveling compound over my recently prepared subfloor, eager to lay down new tiles. Hours later, I walked into the room—and there they were. Cracks, spiderwebbing across the surface like dried mud baking under the intense summer sun. I felt my stomach tighten. Why had my perfect pour turned into a nightmare?
Getting to the Heart of Self-Leveling Compound Cracking
That lightbulb moment was a wake-up call. I learned that cracks in self-leveling compounds aren’t just an aesthetic issue—they can compromise the entire flooring project. If you’re facing similar frustrations, you’re not alone. Many DIYers and pros alike have battled this problem, and understanding the root cause is key to a lasting fix.
Is Skimping on Prep the Real Issue?
Early on, I made the mistake of rushing the prep work. Skipping primer, ignoring subfloor moisture, or neglecting to level uneven surfaces can turn a smooth pour into a crack-filled mess. The truth is, proper surface preparation is the secret to success. If you’re serious about avoiding cracks that look like a dried-up creek bed, it’s worth reviewing the detailed steps at precise floor leveling methods.
Also, humidity plays a bigger role than most realize. High moisture levels in the subfloor can cause the compound to dry unevenly, leading to cracks. According to industry experts, controlling ambient and subfloor moisture is vital for a flawless finish (humidity control tips).
Understanding these factors offers a roadmap to prevent future issues. But what about fixing the cracks that have already appeared? That’s where the real learning begins—and that’s exactly what we’ll explore next.
}>Angie, from personal experience, have you ever faced a self-leveling mess that looked more like a cracked desert floor? If so, don’t worry—you’re in good company, and there’s a fix that can save your project. Let’s dive into practical strategies to repair and prevent these cracks once and for all.
Seal the Subfloor Thoroughly Before Pouring
My first fix involved applying a high-quality primer to my subfloor, which acted like a primer coat on a wall—creating a bonding surface for the self-leveler. I cleaned the surface meticulously, removing dust and debris that could hinder adhesion. Think of it like preparing a cake pan—if you skip greasing it, the cake sticks and ruins the shape. Proper priming ensures an even, crack-free pour, similar to how a solid foundation keeps a building stable. For best results, follow the manufacturer’s instructions and consider using a moisture barrier if your subfloor is susceptible to humidity (see detailed leveling techniques). #IMAGE_PLACEHOLDER_B#
Keep the Pour Thin and Consistent
Use the Right Trowel Size and Technique
Next, I moved to the actual pour. Using a ¼-inch notched trowel often works best for self-leveling compounds. It’s like spreading butter evenly on bread—too thick, and it pools; too thin, and it won’t fill gaps. I poured the compound in small sections, working quickly to prevent it from setting unevenly. I also used a gauge rake to spread it smoothly, avoiding thick spots that could crack as it dried. The key is to maintain a uniform thickness—around 1/8 to ¼ inch—to prevent stress and shrinkage that cause cracking. Remember, thicker pours are more prone to issues, much like a thick pancake batter that stays gooey in the middle. Mastering trowel angles for perfect pours.
Use a Spike Roller to Remove Bubbles
After pouring, I employed a spike roller—a tool designed to eliminate entrapped air. This part is crucial; bubbles trapped under the surface can cause cracks as they expand and contract. I rolled the compound gently but thoroughly across the surface, similar to popping bubbles in a setting plaster. This process ensures a dense, uniform layer, reducing stress points. For best results, do this immediately after pouring before the compound begins to set. Think of it as pressing out the air in a mattress—no lumps, no weak spots. For an extra touch, I started in the center and moved outward, ensuring full bubble removal (see spike roller techniques here).
Control the Environment Rigorously
Temperature and humidity play pivotal roles. On my project, I used a portable heater and dehumidifier to keep the atmosphere consistent—just like controlling temperature in a cake oven. Sudden temperature drops or high humidity cause uneven drying, leading to cracks. I aimed for a room temperature of around 70°F (21°C) and humidity below 50%. During the drying process, I avoided walking on or disturbing the surface. Patience here saves headaches later, much like waiting for paint to cure before recoating. For layered projects, consider applying curing compounds or plastic sheeting to trap in moisture and prevent rapid drying that causes stress cracks. For comprehensive advice on humidity control, visit humidity management strategies.
Allow Proper Curing Before Moving Forward
Once the pour was complete, I let it cure undisturbed for at least 24 hours—or longer if recommended. Rushing this step is like trying to walk on wet cement: it causes damage, including cracks. I kept the environment stable and avoided any vibrations or impacts. If I needed to do additional work, I scheduled it after full curing, ensuring the compound had contracted and gained strength. Remember, patience here translates into a durable, crack-free surface—saving you from costly repairs later. Always check the manufacturer’s specifications for curing times.
By following these precise steps—thorough surface preparation, controlled pouring, bubble removal, environmental regulation, and proper curing—you establish a solid foundation for a crack-free floor. Mastering this process transforms a potential disaster into a flawless finish, similar to how a seasoned chef turns simple ingredients into a culinary masterpiece. For more expert insights, explore home flooring tips.
,When it comes to flooring and tile installation, many homeowners and even professionals often fall victim to misconceptions that can lead to costly mistakes. While basic principles are widely understood, the devil is in the details, and overlooking these nuances can compromise the longevity and appearance of your floors.
A frequent myth is that any subfloor naturally provides a perfect surface for tile or hardwood. In reality, even seemingly flat concrete or plywood substrates can harbor high spots, dips, or moisture issues that subtly undermine your project. For example, a study by industry experts highlights that unaddressed slab irregularities are one of the leading causes of tile cracking and hardwood gaps over time. Proper pre-installation testing and leveling, such as using the mirror test or the 2-foot level trick, are crucial steps many neglect, leading to uneven tones and potential future damage. To learn more about preparing the perfect foundation, check out this guide on floor leveling techniques.
Another widespread misconception is that all adhesives and grouts are created equal. While many think that any mortar or sealant will do, the truth is different—using the wrong type or application can cause adhesion failure, grout cracking, or discoloration. For instance, certain natural stone tiles require specialized, pH-neutral thinsets, which many overlook. Selecting inappropriate products not only jeopardizes aesthetics but also shortens the lifespan of your installation.
A common oops happens during the curing process of self-leveling compounds. Many assume that once poured, they can forget about it—but environmental factors, such as humidity and temperature, heavily influence curing quality. Rapid drying caused by drafts or temperature spikes can lead to pinholing or pooling, defeating the purpose of a level surface. Controlling ambient conditions and following manufacturer curing times are vital; otherwise, you risk creating hidden weak points that become cracks or shifts later. For detailed tips, see this ultimate guide on floor leveling.
Now, you might wonder, how do these advanced mistakes manifest in everyday projects? For example, relying on a spreader trowel without adjusting for tile size or substrate profile can result in uneven lippage and grout lines. Moreover, neglecting environmental controls during installation or curing stages might seem minor at first but results in unanticipated repairs. These subtleties underscore the importance of an expert eye and meticulous attention during every phase.
Let me share a quick tip: always perform a compass test or perform spot-checks to detect hidden dips or humps beneath your substrate. These small steps can save you from big headaches. Do you have any experiences where ignoring these nuances caused issues? Share your stories or questions in the comments!
Remember, mastering these hidden aspects doesn’t just improve aesthetics—it prolongs the lifespan of your floors and saves you money in the long run. If you’re looking to elevate your skills, check out home flooring installation tips for professional insights and techniques.
Tools That Keep Your Floors in Top Shape
Investing in the right tools is crucial for maintaining and scaling your flooring projects over time. I personally rely on a high-quality digital moisture meter, such as the Tramex CME5, to regularly assess subfloor humidity levels before any renovation. This device provides quick, accurate readings, preventing moisture-related issues that can cause cracks or warping in hardwood and tile installations.
For surface preparation and smoothing, a random orbital sander equipped with fine-grit pads is a game-changer. It ensures that your floors stay level and free of scratches, especially when you need to refinish or repair existing surfaces. Additionally, I recommend a professional-grade floor buffer with appropriate pads to buff hardwood finishes, maintaining their shine and durability over the years.
When it comes to tile installation, a laser level such as the Bosch GSL2 Professional Laser Distance Measurer helps achieve precision in layout and leveling. Consistent leveling minimizes lippage and ensures a seamless appearance, which is vital for high-traffic areas. Using a quality notched trowel, like the Edging Tools ¼-inch V-Notch, guarantees optimal thinset application, resulting in stronger bonds and fewer cracks.
Quality Maintenance Practices for Longevity
Proper maintenance extends the life of your floors significantly. Regular cleaning with pH-neutral cleaners preserves surface finishes without causing degradation. For hardwoods, I follow the advice outlined in hardwood floor care secrets, which emphasizes avoiding excess moisture and using felt pads under furniture to prevent scratches.
Periodically inspecting your flooring for signs of wear or damage allows for early intervention. Hardwood floors benefit from light buffing and refinishing every few years, especially in high-traffic zones. For tile, resealing grout lines every 2-3 years prevents staining and moisture intrusion, maintaining both appearance and structural integrity.
How do I maintain my flooring systems over time?
Implementing a routine of gentle cleaning, prompt repairs, and environmental control—such as regulating humidity and temperature—ensures your floors remain durable and beautiful. For hardwood, controlling humidity between 40-60% is vital, as fluctuations can cause expansion or contraction leading to gaps or cracks. Using a dehumidifier or humidifier as needed, based on seasonal changes, is a simple yet effective practice. For detailed strategies, consult hardwood floor maintenance tips.
Anticipate the Future of Flooring Maintenance
Emerging technologies, such as IoT-connected sensors, are poised to revolutionize flooring upkeep. Imagine having a smart sensor embedded beneath your hardwood or tile that alerts you when moisture levels rise or when wear becomes evident—allowing preemptive action before costly failures occur. Staying informed about these innovations can give you an edge in maintaining a flawless surface long-term.
One advanced tip I recommend trying is regularly scanning your subfloor moisture with a digital meter before installing new flooring or refinishing. This proactive step can prevent many issues, saving time and money. For expert advice and tools, visit expert flooring installation tips—your future self will thank you for it.
The Hardest Lesson I Learned About tile,flooring installation,hardwood floors,floor leveling
One of my biggest surprises was realizing that even a tiny misstep in surface prep can snowball into major cracks. I once skipped testing moisture levels, expecting the best, only to discover that hidden dampness caused my self-leveler to pool and crack. The lesson? Never underestimate the importance of comprehensive substrate testing before pouring. This understanding transformed how I approach every project, ensuring I prioritize thorough evaluation over assumptions.
3 Myths About tile,flooring installation,hardwood floors,floor leveling That Held Me Back
- Myth: All substrates are equally ready for leveling.
Reality: High spots and dips can lurk beneath seemingly flat surfaces, demanding specific correction measures. - Myth: Moisture isn’t a big deal if I dry things quickly.
Reality: Rapid drying often traps moisture or causes pinholing, weakening the finish. Accurate moisture testing is essential. - Myth: Big tools mean better results.
Reality: Precision tools like laser levels and spike rollers offer control without chaos, especially in tight spaces.
What Experts Won’t Tell You About tile,flooring installation,hardwood floors,floor leveling
They often overlook the subtle environmental factors that impact drying and adhesion. For example, controlling room temperature and humidity during curing can mean the difference between a flawless finish and future splits. Investing in accurate moisture meters and environmental controls isn’t just smart—it’s a game-changer that elevates your craftsmanship. For trusted tools, I recommend the trusted digital moisture meters and laser levels I’ve used for years, which help me catch problems early and work with confidence.
Where to Go from Here
If you’re serious about perfecting your flooring projects, start by assessing your current toolkit and knowledge base. Seek out comprehensive guides, like the one on precise floor leveling techniques, and invest in quality tools. Remember, patience during curing and meticulous prep are your best allies. Your floors will thank you with years of beauty and durability, making all the effort worthwhile.
Embrace the Journey and Elevate Your Skills
Every project is an opportunity to learn, refine, and master the art of tile,flooring installation,hardwood floors,floor leveling. Don’t shy away from challenging surfaces or complex environments—these are your best teachers. Trust in your preparation, use the right tools, and stay patient through the curing process. With each success, you’ll build confidence and create environments that truly stand the test of time. What’s one technique you’re eager to try next? Share your thoughts below and keep pushing your limits!
**Final Question:** Have you ever faced a stubborn crack or uneven surface that seemed impossible to fix? How did you overcome it? Let me know in the comments!