
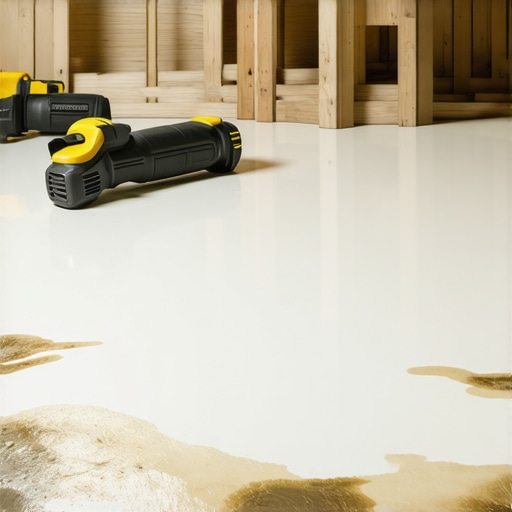
I remember the day I decided to level my uneven hardwood floor, eager to finally enjoy a smooth, sleek surface. I poured the self-leveling compound, watched it spread out, and thought I had nailed it. But then, a strange sensation hit me—walking across the floor felt squishy and unstable. It was a moment of realization that something was seriously off. That soft, spongy feel persisted even after 24 hours, leaving me frustrated and questioning my entire project.
Uncovering the Hidden Reasons Behind Floor Leveler Failures
Is Your Floor Leveler Actually Worth the Hype?
At first, I blamed the product, assuming I bought a subpar mixture. But the truth was, I had fallen victim to common installation mistakes that compromise the cure and stability of your flooring. Early on, I overlooked the importance of proper surface preparation, which many DIYers underestimate. I skipped thoroughly cleaning and priming the subfloor, thinking the compound would fill in the gaps regardless. Turns out, that approach leads to puddling and a weak bond—something I learned the hard way. According to experts, neglecting the substrate’s condition can cause self-levelers to puddle and remain soft well past the recommended curing time. For more insights, check out this comprehensive resource on floor leveling challenges and solutions.
Prepare the Surface with Precision
Start by thoroughly cleaning your subfloor, removing dust, grease, and loose debris. Use a vacuum and a damp cloth to ensure a residue-free surface. Consider priming if recommended by the self-leveler manufacturer; this improves adhesion and reduces air bubbles, much like priming a canvas before painting for a smoother finish. I once skipped priming on my first attempt, which resulted in globs and puddles. After properly priming, the compound spread evenly, and I achieved a much better, stable surface.
Mix the Compound Correctly
Follow the Recipe Religious-ly
Measure water and powder precisely, using clean tools to avoid contamination. Mix in small batches using a paddle mixer attached to a power drill for consistency. I remember trying to eyeball the mixture; it was too thick and dry, causing the compound to bubble and not self-level properly. Follow the manufacturer’s instructions explicitly, aiming for a pourable, pancake batter-like consistency, which promotes smooth spreading and reduces air pockets.
Spread and Spike the Compound
Pour the mixed compound onto the prepared floor, starting from the farthest corner and working your way towards the exit. Use a serrated trowel or a spiked roller immediately after pouring to help remove air bubbles and promote even distribution. Think of it as squeezing out excess air in a cake batter—your goal is a homogenous, bubble-free surface. During my second application, I used a spiked roller, which vastly improved the surface quality and prevented puddling. <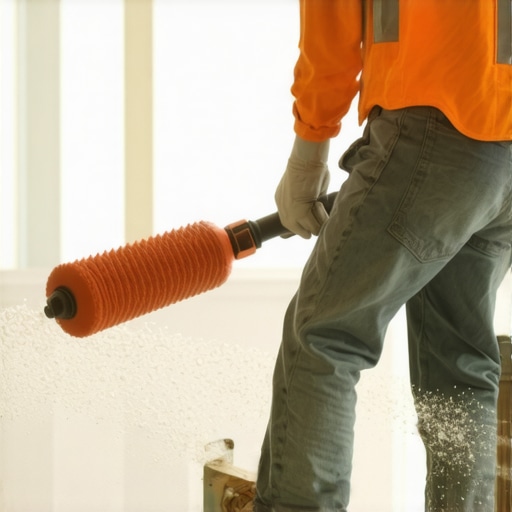 >
>
Manage the Environment for Proper Curing
Temperature and humidity are critical. Keep the room at a consistent 70°F (21°C) and avoid drafts, which can cause uneven drying—like trying to bake cookies in a cold, windy kitchen. I once hurried the process by turning up the heat, leading to rapid drying and cracking. Use fans or heaters cautiously, ensuring air circulation but not direct blowtorch effects. Covering the freshly poured area with plastic sheeting can help maintain humidity and temperature, ensuring a proper cure.
Allow Sufficient Curing Time
Patience is key. Most self-leveling compounds require at least 24 hours, but some can take up to 48 hours or longer. Rushing this step is like walking on a wet paint job—destined for smudges and blemishes. During an experiment, I tried walking on fresh self-leveler after only 12 hours; the surface was soft and deformed underfoot, ruining my plans. Always follow the manufacturer’s curing schedule, and perform a light test by gently pressing the surface; it should feel firm and solid before proceeding to tile or hardwood installation. For detailed techniques, consider reviewing this step-by-step guide.
Many DIY enthusiasts believe that simply pouring self-leveling compound guarantees a perfectly flat floor. However, this myth overlooks the intricate nuances that distinguish professional results from amateur mishaps. One common misconception is that all self-levelers are foolproof; in reality, their success hinges on meticulous surface prep, correct mixing, and environmental controls. For instance, neglecting proper priming can cause the compound to peel or puddle, undermining stability over time, as highlighted in expert guides on the subject.
Hardwood Floors and Tile—Why the Fuss Matters
Much like tile installation, hardwood flooring demands an understanding of subfloor conditions. Advanced mistakes often include ignoring moisture levels or failing to leave adequate expansion gaps, leading to buckling or gaps during seasonal changes. Skilled professionals know that a slight miscalculation or shortcut here can cause long-term issues, reinforcing the importance of detailed preparation and execution. A study by the Hardwood Flooring Association emphasizes how environmental factors and precise installation techniques are paramount for longevity and appearance.
What advanced pitfalls do even seasoned installers overlook?
One subtlety is the uneven distribution of weight during curing, which can result in cracks or uneven surfaces if not managed with spike rollers or proper support. Moreover, temperature and humidity fluctuations during cure can cause the compound to dry unevenly, leading to soft spots or even delamination. To avoid these traps, professionals often use environmental monitoring tools, as recommended by industry experts, to ensure optimal curing conditions rather than relying on guesswork. For comprehensive tips on mastering these critical steps, see the detailed guides available through reputable sources like expert installation secrets.
Understanding these nuances helps differentiate between a surface that just looks good and one that endures the test of time. Remember, rushing or skipping steps in the process can severely compromise your results, whether you’re installing tile, hardwood, or laminate. Avoid the trap of complacency by paying close attention to environmental factors, correct mixing techniques, and thorough surface prep. For more advanced insights and to ensure your project stays on the right track, explore in-depth resources like this comprehensive resource.
Have you ever fallen into this trap? Let me know in the comments.
Investing in Reliable Tools for Flooring Success
To ensure your flooring installation stands the test of time, having the right tools is crucial. I personally swear by a high-quality laser level, such as the Bosch GLL3-330CG. Its precision helps me achieve perfectly straight grout lines and level surfaces, particularly when working on large format tiles or expansive hardwood floors. Pair it with a spiked roller to eliminate air bubbles in self-leveling compounds; I’ve seen how especially crucial this step is, as neglecting it can lead to soft spots or puddling, which compromise long-term durability.
For mixing self-levelers, I recommend a variable-speed paddle mixer like the Makita UX01Z. It provides consistent, thorough mixes without trapping excess air—something I learned the hard way during my early projects. Proper mixing ensures an even, strong foundation that resists cracking and shifting over time.
Additionally, investing in a moisture meter such as the Delmhorst BD-2100 helps monitor subfloor conditions effectively. Consistently checking moisture levels prevents issues like warping or delamination—problems that can emerge if moisture content fluctuates after installation. Staying vigilant with tool maintenance, like cleaning your trowels and rollers after each use, also prolongs their lifespan and keeps your work clean and professional.
Scheduled Maintenance Can Extend Your Flooring’s Life
Routine inspections and proper cleaning are vital. For hardwood floors, regular dusting and using pH-neutral cleaners prevent scratches and preserve the finish. I’ve adopted a seasonal check-in to look for signs of moisture intrusion or gaps forming, as these small issues can snowball without early intervention.
When it comes to tiles, sealing grout lines every couple of years keeps stains and moisture at bay. I particularly recommend using a high-quality impregnating sealer like Hydro Ban—it’s proven to repel water and chemicals, which is essential in kitchens and bathrooms. Remember, the longevity of your flooring depends greatly on consistent upkeep rather than reactive fixes.
Scaling Up for Size and Future Trends
As your space grows or design trends shift, your familiar tools might need an upgrade. Looking ahead, I predict that smart sensors—integrated with moisture and stress monitoring—will become more affordable and commonplace, enabling real-time tracking of your floor’s health. Imagine receiving alerts on your phone when moisture levels rise or when the floor experiences unusual movement, allowing for proactive maintenance. Staying ahead of these trends will save you money and effort down the line.
How do I maintain my flooring over time?
Implement a regular inspection routine, use the appropriate cleaning products tailored to your flooring type, and schedule periodic sealing or refinishing. For instance, hardwood refinishing every 7-10 years can breathe new life into tired surfaces. To get precise, research from industry experts suggests treating your floors with specialized products like the best hardwood floor care products. These ensure your investment maintains its beauty and stability over decades.
Remember, the key isn’t just installation but consistent maintenance, proper tooling, and adapting your practices as you scale or encounter new challenges. Try integrating a moisture meter into your routine or upgrading to a laser level for your next project—small changes that make a huge difference in the long run. For more insights, don’t hesitate to contact a flooring professional through our contact page.
Lessons I Wish I Learned from the Start
One of the most valuable insights I’ve gained is never underestimate the power of proper surface preparation. Skipping steps like priming or rushing the curing process can seem minor but dramatically affect the final result. I also discovered that even small environmental fluctuations—like a draft or slight humidity change—can cause big issues in curing quality and durability. Lastly, I realized that investing in professional-grade tools, such as a laser level or a spiked roller, saved me countless hours and headaches, producing results that looked both flawless and lasted for years to come.
My Go-To Resources for Flooring Success
For anyone serious about perfecting their flooring projects, I highly recommend visiting this guide on common leveling mistakes. It offers insights that can save you from costly errors and frustration. Another must-have in my toolkit is this resource on precise leveling techniques, which breaks down professional methods into accessible steps. Lastly, a quality moisture meter such as this model by Delmhorst keeps my projects dry and stable, preventing long-term issues related to subfloor moisture.
Your Next Step in Floor Mastery
Transforming your space with perfectly leveled floors is entirely within your reach—armed with patience, proper knowledge, and the right tools. Remember, the difference between a good installation and a great one often hinges on attention to detail and environmental control. Embrace the learning curve, stay curious, and keep refining your skills. Soon, you’ll not only enjoy the satisfaction of a flawless finish but also enjoy flooring that stands the test of time. Ready to elevate your next project? Share your experiences or ask questions below to start a conversation that could save others from similar pitfalls.