
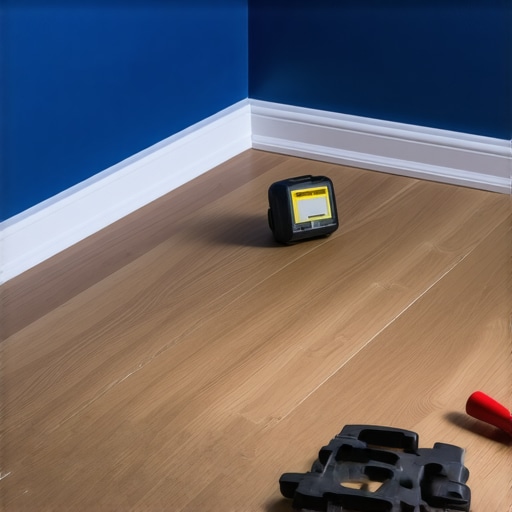
I remember the moment vividly—standing in a room my neighbors had just finished flooring, only to notice a tiny, unsightly gap along the perimeter. It was so small I almost missed it, but it threw off the entire look. That lightbulb moment made me realize what I had overlooked in my own projects: a crucial rule about the perimeter that DIYers often forget during vinyl installation.
Why Overlooking this Perimeter Gap Rule Can Cost You Big
As a passionate DIYer, I’ve learned that addressing the perimeter gap isn’t just about aesthetics; it’s about the longevity and stability of your flooring. Many people, myself included early on, focus so much on the main installation that they neglect this tiny yet essential detail. Missing it can lead to issues like buckling, warping, or even premature damage. With vinyl floors especially, which are sensitive to temperature and humidity changes, leaving the perimeter unaddressed can be a recipe for disaster.
Research shows that improper expansion gaps can cause up to 30% of floor failures, including peeling and buckling, within just a few years. Properly managing these gaps ensures your floor can expand and contract naturally, preventing costly repairs or replacements down the line.
Is the Perimeter Gap Rule Really That Important?
When I first learned about this rule, I was skeptical—thought it was just a small detail that wouldn’t make a difference. I even skipped it on my first few projects. The mistake? Not leaving enough space around the edges, which seemed insignificant at the time. But the truth is, I was setting myself up for future problems, and I paid the price.
If you’re like me, you might be wondering whether this tiny detail is really worth the extra effort. Trust me, it is. Failing to accommodate the perimeter gap can lead to uneven flooring, creaking, and even cracks. It’s one of those lessons that only a seasoned DIYer learns after expenses and frustration pile up.
Ready to learn how to master this rule? In the next section, I’ll walk you through the practical steps to ensure your vinyl installation is flawless from edge to edge. Want expert advice? Feel free to reach out via our contact page. Let’s get started on making your floors last for years to come.
Measure and Prepare the Space Exactly
Start by thoroughly measuring your room, including all corners and irregularities. Use a tape measure and chalk line to mark the perimeter accurately, leaving an expansion gap of at least ¼ inch (6mm). Think of this step like setting the foundation for a building—precision here prevents future problems.
Choose the Right Underlayment and Materials
Select an underlayment suitable for vinyl flooring that can accommodate slight shifts—this acts like a shock absorber, giving your floor room to breathe. Additionally, get plastic spacers to maintain consistent gaps while laying out planks or sheets, ensuring uniformity and space for expansion.
Apply the Underlayment and Set the Base
Lay down your underlayment across the entire subfloor, overlapping edges as recommended. Secure it properly to prevent shifting. Think of this as rolling out a protective blanket that supports your flooring—any wrinkles or misalignments can lead to uneven surfaces or stress points that eventually cause cracks.
Install Flooring with Expansion Clearance
Begin laying the vinyl from the wall opposite the door, placing spacers along the perimeter to uphold the ¼ inch gap. Use a tapping block and a rubber mallet to snugly fit planks or sheets together, avoiding force that can damage the material. Remember, this gap is like the equivalent of a gasket—necessary to allow for thermal expansion and contraction, especially in areas with fluctuating temperatures.
Micro-Story of My First Attempt
Once, I misjudged the gap on a large vinyl installation and skipped the spacers, thinking it unnecessary. Over a few months, the floor started buckling along the edges, leading to costly repairs. That experience taught me the hard way about the importance of the perimeter gap and how a simple spacing tool can prevent such failures. If you’re unsure about the process, check out this comprehensive guide for detailed leveling tips, which complement proper expansion joint installation.
Many seasoned DIY enthusiasts believe they have hardwood flooring or tile installation down to a science, but even experts can overlook subtle nuances that impact the longevity and appearance of their floors. One common misconception is that following the basic installation steps guarantees perfection; however, details like proper moisture management and specific subfloor conditions often get underestimated, leading to costly mistakes down the line. For instance, some installers focus solely on leveling the surface but ignore the importance of moisture barriers, which are crucial to prevent future warping or buckling. Incorporating advanced knowledge, such as understanding the moisture content of subfloors with a pin-type meter, can save you from preventable failures. Studies indicate that over 50% of flooring failures stem from inadequate moisture testing before installation, underscoring the importance of this often overlooked step. Moreover, many believe that the more adhesive used, the better the bond, but excess glue can cause uneven surfaces or slow curing, especially with large-format tiles. Properly measuring expansion and contraction gaps tailored to the material and climate is another nuanced detail frequently mishandled. For flooring projects that involve combining materials like hardwood and tile, understanding how each material responds to temperature changes prevents joint cracking or shifting. Advanced installers consider these factors and adapt their techniques accordingly, ensuring a flawless, durable finish. If you’re interested in avoiding these common pitfalls and elevating your flooring projects, I recommend exploring our detailed guides on self-leveling techniques and subfloor preparation. Want personalized advice? Feel free to reach out here. Remember, mastery lies in the details—so keep learning and refining your craft. Have you ever fallen into this trap? Let me know in the comments.Maintaining your flooring investment requires more than just initial installation expertise; it demands the right tools and a proactive maintenance routine. To keep hardwood and tile floors looking pristine and functioning flawlessly over time, I rely on a set of specialized equipment and methods that ensure precision and longevity.
Precision Leveling Tools for Consistent Results
One of my go-to investments is a laser level. Unlike traditional spirit levels, a laser level provides a 360-degree reference, allowing me to verify the flatness of subfloors with exceptional accuracy. This is crucial when addressing floor leveling challenges, as uneven surfaces can lead to cracks or hollow spots over time. For example, using a laser level to identify high and low points before applying self-leveler ensures a more stable foundation, reducing long-term maintenance needs. For detailed leveling, I consult this comprehensive guide.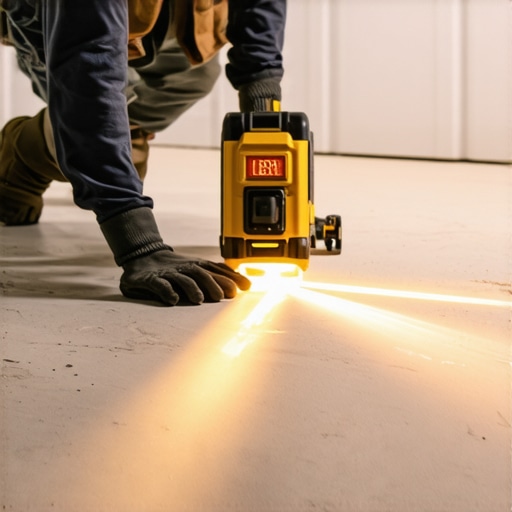
Including a high-quality dampness meter in your toolkit is equally important. Monitoring moisture levels in subfloors prior to installation can prevent issues like warping or mold growth. I personally use a pin-type moisture meter, which provides reliable readings essential for floors in basements or high-humidity areas. Regular moisture checks—especially before resurfaces or repairs—are part of my routine to maintain the integrity of hardwood and tile floors.
Cleaning and Preservation Equipment
For ongoing maintenance, I recommend investing in a microfiber mop with a suitable cleaning solution designed for your flooring type. For hardwoods, I use products aligned with these expert guidelines, ensuring the finish remains protected and shiny without buildup.
Additionally, a soft-bristled broom combined with a vacuum equipped with hardwood-specific attachments helps prevent scratches and debris accumulation. This simple yet effective routine minimizes wear and keeps floors pristine, ultimately reducing the frequency and cost of repairs.
Tools I Recommend for Repair and Long-Term Results
When minor damages occur, I turn to specialized products like wood dust fillers and grout renewers. Using a wood filler with a matching stain helps seamlessly repair scratches or gouges, extending the lifespan of hardwood floors without professional intervention. For tiles, a grout saw and color-matched grout restore the surface easily, preventing moisture ingress.
Looking ahead, technology is advancing towards smart floor monitoring systems that alert homeowners to issues like moisture intrusion or structural shifts. While still emerging, integrating such tools could revolutionize how we maintain floors, leading to even longer-lasting installations.
How do I maintain hardwood and tile floors over time?
Consistency is key. Regular inspections, prompt repairs, and correct cleaning techniques are vital. Schedule annual deep cleaning and examine grout lines or sealants for wear. Moreover, adjusting your routine based on climate—such as increasing humidity in dry seasons—can prevent expansion or contraction issues.
By incorporating the right tools and methods, you make a proactive investment in your flooring’s future. Remember, preventive maintenance not only preserves your floors’ beauty but also saves significant money in repairs. To explore more advanced techniques, I encourage you to try implementing a moisture meter check before your next surface upgrade or repair. For tailored advice, reach out through our contact page and ensure your floors serve you well for decades to come.
Lessons Hidden in Plain Sight That Transformed My Flooring Skills
One of the biggest revelations was realizing that every detail counts — from moisture testing to precise expansion gaps. I used to rush through these steps, thinking they were trivial, only to face costly repairs later. Now, I understand that dedicating time to measure accurately and use the right tools is what sets a professional apart. That lightbulb moment taught me that patience and attention to minute details ensure longevity and beauty.
Tools and Resources That Changed My Approach to Flooring
Investing in a laser level and a reliable moisture meter was an eye opener. These tools have prevented countless issues like uneven flooring and warping. I also found that consulting sources like this guide on perfect leveling techniques helped me troubleshoot challenges effectively. Additionally, I trust brands like Johnson Level and General Tools because they’ve consistently provided accurate, durable equipment that I rely on for critical steps.
Embrace Better Outcomes by Trusting the Process
The journey from novice to confident DIYer is paved with learning from mistakes and seeking out quality guidance. Don’t get discouraged by initial setbacks; instead, see them as opportunities to refine your craft. Remember, mastering hardwood and vinyl flooring installation isn’t about shortcuts but about respecting the nuances that guarantee lasting, flawless results. Take the plunge—start measuring with care, use the right tools, and watch your floors transform into timeless beauty. What step in flooring installation has challenged you the most? Share your experience below, and let’s learn together!