
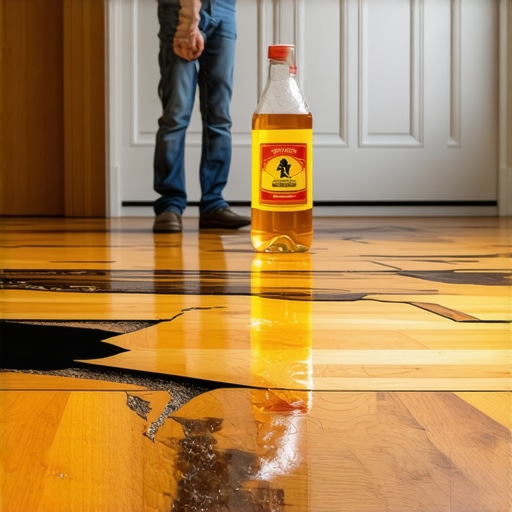
I vividly remember the moment I spilled a splash of vinegar and water onto my gleaming hardwood floor, thinking I was giving it a natural, streak-free shine. Instead, I watched in horror as the finish dulled and water spots formed, turning my beautiful floors into a patchwork of dull patches and stains. That lightbulb moment made me realize that what I thought was a harmless cleaning remedy had actually been harming my floors all along.
Why Your Cleaning Routine Could Be Doing More Harm Than Good
Over the years, I’ve learned that many well-meaning homeowners fall into the trap of using vinegar and water on hardwood floors, believing it’s a safe and eco-friendly solution. But the reality is quite different. Hardwood floors are delicate, and their finishes are engineered to withstand specific cleaning methods. Using the wrong products can lead to a host of problems — from dullness and scratches to premature wear.
Today, we’re going to delve into why this common misconception exists and how you can protect your investment. You don’t have to sacrifice cleanliness for the health of your floors. The key is understanding what truly works and what pitfalls to avoid. If you’re wondering whether your current cleaning habits might be damaging your floors, you’re not alone. Many homeowners face this dilemma, often realizing too late that their routine may be causing long-term harm.
Is Vinegar and Water Really Safe for Hardwood Floors?
My early mistake was thinking I was doing the right thing because vinegar is a natural cleaner. However, I overlooked the fact that vinegar is acidic, which can erode the protective coating on hardwood floors over time. Research shows that exposure to acidic solutions can break down finishes, leading to dullness and even scratches. According to professionals at [Tile Trend Shop](https://tiletrendshop.com/hardwood-floor-care-secrets-to-longevity-and-shine), using the wrong cleaning agents is among the top mistakes homeowners make that shorten the lifespan of hardwood floors.
So, before grabbing that mop and bucket, let’s explore why this practice is more harmful than helpful, and how you can maintain your floors without risking damage. Are you tired of dull, scratched hardwoods? Keep reading, because I’ll share proven cleaning tips that protect your floors while keeping them spotless. This will set the stage for a simple, effective routine that ensures your hardwoods shine for years to come, avoiding costly refinishing or repairs down the line.
Mastering Floor Preparation for Perfect Results
Start by clearing the space and removing existing flooring debris, ensuring a clean, level surface. Use a floor leveler to fill any dips or bumps; mix it thoroughly following the manufacturer’s instructions. Spiked rollers are invaluable here—they eliminate trapped air and smooth out the self-leveler for a flat base. I once spent an entire afternoon applying and then spiking self-leveler on my living room subfloor, watching it settle into a perfectly smooth surface without bubbles, which made laying tiles much easier and faster.
Ensuring Subfloor Stability and Flatness
Check the subfloor with a long straightedge or a laser level to identify high and low spots. Sand down any protruding areas and fill low spots with additional self-leveler. For large or uneven areas, a professional can grind the subfloor to achieve maximum flatness—this step prevents tile lippage and uneven floors. When I skipped this, I found uneven tiles and a lot of rework, so I now prioritize careful subfloor prep, referencing detailed techniques at floor leveling fundamentals.Many homeowners believe that sticking to generic installation guidelines guarantees flawless results, but in my experience, this isn’t always the case. For instance, a widespread myth is that all adhesives work equally well for every flooring material. However, using the wrong adhesive, like applying standard glue on engineered hardwood, can lead to delamination and premature wear. Industry experts, such as those at Tile Trend Shop, warn that understanding specific product compatibilities is crucial to long-term success.
Another mistake is assuming that a perfectly level subfloor is enough for any installation; in reality, the type of flooring determines how precise the leveling must be. For tile, even minor deviations can cause lippage, affecting both aesthetics and durability, as discussed in their comprehensive guide.
Advanced installers recognize that improper moisture mitigation can be a hidden trap leading to warping or mold growth, especially in basements and high-humidity areas. Research indicates that failure to install vapor barriers or proper sealing can dramatically reduce a floor’s lifespan. For example, see the detailed strategies at floor leveling fundamentals.
A critical nuance that even seasoned pros often overlook involves the timing of acclimation. Many forget that hardwood should acclimate to room humidity and temperature for at least a week before installation to prevent post-installation expansion or contraction. According to expert refinishing tips, neglecting this step can lead to gaps and buckling that compromise the entire project.
Don’t fall into the trap of rushing these steps just to save time. Proper preparation — from moisture testing, correct product selection, to diligent acclimation — is what separates a professional-looking result from a costly mistake. Remember, a well-executed installation offers beauty and durability that lasts for decades, but only if you understand and respect these subtle nuances.
Have you ever fallen into this trap? Let me know in the comments! For a detailed walkthrough of how to avoid common pitfalls, check out this guide.Maintaining your flooring’s pristine condition over time requires more than just good cleaning; it demands precision tools and proactive care routines. I personally rely on a high-quality moisture meter, like the Protimeter Surveymaster, to regularly assess subfloor moisture levels—this prevents future warping or mold issues, especially in basements. For hardwood floors, I swear by a microfiber dust mop paired with a pH-neutral cleaner recommended by industry experts at Tile Trend Shop, ensuring gentle yet effective upkeep without dulling the finish.
When it comes to tile, a rubber float and a grout saw are indispensable for periodic grout refreshes, which maintain both the appearance and hygienic integrity of your surfaces. I’ve also invested in a quality wet-dry vacuum with a soft brush attachment to pick up debris without scratching delicate finishes. These tools, combined with consistent visual inspections—checking for cracks, loose tiles, or uneven areas—help catch issues early.
Looking ahead, the trend is moving toward smart maintenance systems. Devices that monitor humidity and detect subtle shifts in flooring conditions will become standard, enabling homeowners to act before small problems become costly repairs. For long-term results, scheduling annual inspections with a flooring professional ensures that hidden issues are addressed proactively, preserving your investment. I recommend setting up a maintenance calendar that includes tool calibrations and cleaning routines, much like a car service schedule—this cultivates long-lasting beauty and functionality.
**How do I maintain hardwood and tile floors over time?** Regularly utilize moisture meters to prevent warping, perform routine cleaning with recommended products, and schedule professional check-ups. Don’t forget to try my tip of investing in a microchip moisture meter for real-time monitoring—an advanced, game-changing move that can save you hundreds in future repairs. For detailed maintenance strategies, explore this comprehensive guide and elevate your flooring care routine.
Little Tricks That Changed Everything I Thought I Knew
One of the most vital lessons I stumbled upon was recognizing that perfection in flooring isn’t achieved by shortcuts or generic advice. Instead, it’s about understanding the subtle nuances—like the importance of proper acclimation or selecting the right leveling tools—that have a profound impact on the longevity and beauty of your floors. My breakthrough came when I realized that small details, often overlooked, can prevent costly mistakes and extend the life of your investment.
Resources That Made Me a Confident Installer
Over the years, I’ve trusted several tools and sources, such as the comprehensive installation guides, which demystified complex procedures. The hardwood care tips from Tile Trend Shop helped me understand maintenance routines that preserve my floors’ luster. And for precise moisture testing, tools like the Protimeter Surveymaster empowered me to address problems before they escalated. These resources have been transformative in elevating my flooring projects from amateur to professional quality.
Embracing the Journey—Don’t Wait for Perfection
Transforming your space with beautiful hardwoods and tiles is a rewarding process, but it demands patience and deliberate effort. Your dedication now will pay off with floors that stand the test of time, both in style and durability. Remember, every expert started as a beginner, and the key is to start today—armed with knowledge, trusted tools, and the confidence that you can create stunning results. Are you ready to take the first step toward flooring mastery? Feel free to share your thoughts or questions below, and let’s build a community that thrives on learning and sharing experiences.