

Imagine this: you’ve just installed beautiful engineered wood flooring, feeling proud of your work. A few months later, you notice tiny cracks snaking along the ends of your planks. It’s frustrating, right? I know the feeling all too well. Early on, I made a common mistake—ignoring moisture levels—that led to those dreaded splits, and I wasted hours trying to fix what could have been prevented.
Cracks That Spoil the Look—and How to Stop Them
Engineered wood is admired for its stability and beauty, but those pesky end splits can ruin the entire effect. The truth is, these cracks often result from one overlooked factor: improper acclimation and moisture control. When I first began my flooring projects, I underestimated how critical it is to let the wood adjust to the environment before installation. That oversight made my floors vulnerable to expansion and contraction, especially at the ends where stress is highest.
But here’s the good news: understanding the root causes can help you avoid those costly splits. Today, I’ll walk you through the key reasons engineered wood splits at the ends and share practical solutions I’ve learned from personal experience and expert advice. By the end, you’ll be equipped to tackle this issue head-on, saving time, money, and your peace of mind.
Does Your Flooring Project Deserve These Problems?
You might be skeptical—”I’ve seen floors with minor cracks, and they look fine.” Trust me, I’ve been there. It’s tempting to ignore small signs, but those tiny splits can expand and compromise your flooring’s stability. A major mistake I made early on was rushing the installation without proper moisture testing, which led to those splits. According to industry standards, moisture imbalance is a primary culprit in flooring failures, and neglecting it can lead to long-term damage. For more insights, check out [this guide](https://tiletrendshop.com/flooring-installation-mistakes-to-avoid-for-lasting-results) which highlights common pitfalls and how to prevent them.
No one wants to see their investment crack and crumble. So, let’s set the stage for the practical steps I’ll share next, ensuring your engineered wood stays flawless and stunning for years to come.
Prepare the Subfloor Carefully
First, always assess the subfloor with a straightedge or laser level to identify dips or humps. For example, I once ignored a slight slope in my concrete slab, which caused my engineered wood to flex and crack at the ends later. To avoid this, reference this comprehensive guide on proper leveling techniques. Use a 4-foot level or a laser level for accuracy, and mark low spots to target for correction.
Address Uneven Areas Before Installation
Apply Proper Subfloor Patching
If you find dips or high spots, use a high-quality self-leveling compound. Mix it according to manufacturer instructions, and pour it into the low areas, spreading with a trowel. Push the compound into corners and seams to ensure full contact. Remember, patience is key; let it cure fully before proceeding. As I learned from my messy first attempt, rushing this step results in unstable surface and eventual cracks. Follow this guide for detailed patching strategies.
Use a Flat Trowel for Final Walk-Through
After the patching compound dries, run a straightedge over the surface to confirm smoothness. Fill any remaining imperfections with additional compound. Achieving a flat surface is crucial for a seamless flooring result and to prevent end splits. In my experience, taking this extra time saved me hours of repair work later.
Control Moisture Levels Rigorously
Moisture imbalance is a primary cause of cracking. Use a moisture meter to test the subfloor and engineered wood planks. Expect readings below 4% for wood subfloors and below 2% for concrete. If levels are too high, delay installation and improve ventilation, or consider a moisture barrier. My early mistake was ignoring moisture readings, which led to end-warps and splitting within months. To understand more about moisture control, check this article.
Acclimate Wood Properly Before Installation
Never skip the acclimation process. Store the engineered planks in the installation environment for at least 48-72 hours. During this period, keep humidity levels between 35-55% and temperature around 60-80°F. I once hurried the acclimation, which caused my floor to expand after installation, creating stress that led to cracks. For best results, follow the detailed procedures outlined here.
Implement Expansion Gaps Thoughtfully
Leave appropriate expansion gaps along walls and fixed structures—usually ¼ to ½ inch depending on your local climate. Use spacers during installation to maintain consistent gaps. When I neglected this, the wood expanded in summer heat and cracked at the ends during the colder months. Remember, the gap is your safeguard against seasonal movement, much like a shock absorber in a car suspension.
Many homeowners believe that a perfectly level subfloor is just about smoothing out bumps, but in my experience, this overlooks critical subtleties that can make or break your installation. For instance, a common myth is that using a standard self-leveling compound guarantees a flawless surface. However, without proper preparation—such as cleaning and priming the base—you risk air bubbles and pinholes that compromise the integrity of your floor. This is why experts emphasize meticulous surface preparation, as detailed in this comprehensive guide.
Another misconception revolves around the assumption that moisture testing is only necessary for concrete slabs. In reality, wood subfloors can also harbor hidden moisture issues, especially in basements or areas with poor ventilation. Failing to measure moisture levels accurately can lead to adhesive failure or wood warping down the line. Modern tools like their moisture meters and proper acclimation routines, discussed here, are essential to prevent these pitfalls.
Now, let’s address a sophisticated question that advanced DIYers often ask: How do I ensure the expansion joints I install remain effective over time, considering seasonal fluctuations? It turns out that many overlook the importance of properly planning for these joints during the initial layout. Using flexible sealants and choosing the right placement along with the engineered material’s specifications can help accommodate expansion without cracking. Industry standards recommend an expansion gap of at least ¼ inch along walls, but understanding the building’s thermal behavior and choosing suitable materials is vital. For an in-depth exploration, check this resource.
Remember, the devil is in the details. Avoiding these advanced mistakes can save you headaches and costly repairs. Have you ever fallen into this trap? Let me know in the comments.
How do I keep my flooring in top shape over time?
Investing in quality tools for maintenance ensures your floors remain stunning and durable for years. Personal favorite is the cordless oscillating tool equipped with a soft pad attachment. I use this to gently buff out scratches and clean grout lines without damaging the surface. Its versatility allows me to address tight corners and delicate edges, which are challenging with traditional scrubbers.
For deep cleaning and stain removal, I recommend a steam cleaner designed for hardwood and tile. It effectively disinfects while preserving the integrity of your finish. I prefer models with adjustable steam levels, so I can tailor the cleaning intensity based on the surface—saving me from unnecessary wear.
Maintaining your flooring isn’t just about cleaning; monitoring moisture levels is crucial. I rely on a digital moisture meter that provides instant readings of subfloor and surface moisture. This helps me catch potential issues early, preventing issues like cupping or warping. Regular checks, especially after seasonal shifts, keep surprises at bay.
Where should I focus my effort to sustain long-term results?
Consistent inspection of expansion gaps and sealing areas helps prevent water ingress and humidity-related damage. Applying a specialized floor polish once a year enhances the protective layer, making scratches less visible and restoring shine. Additionally, using felt pads under furniture reduces movement marks and wear.
As I predict, the trend toward smart home sensors will extend into flooring maintenance, with moisture and wear sensors that alert you via your smartphone. Embracing these innovations now can make a significant difference in managing your floor’s health without excessive effort.
Advanced tip: Use a weighted roller for even adhesive spread
For those undertaking repairs or installations, don’t overlook the importance of pressing down with a weighted roller. This ensures uniform adhesive contact and minimizes air pockets, which could lead to delamination or cracks later. I’ve found that a roller with adjustable weight settings offers greater control, especially on uneven surfaces. Implementing this simple yet effective tool can dramatically improve your results.
Start by applying the recommended adhesive evenly across the surface using a notched trowel. Then, go over the area with the roller—moving it systematically to cover all spots. This technique helps maintain a level surface and enhances the bond strength, preserving your investment for the long haul.
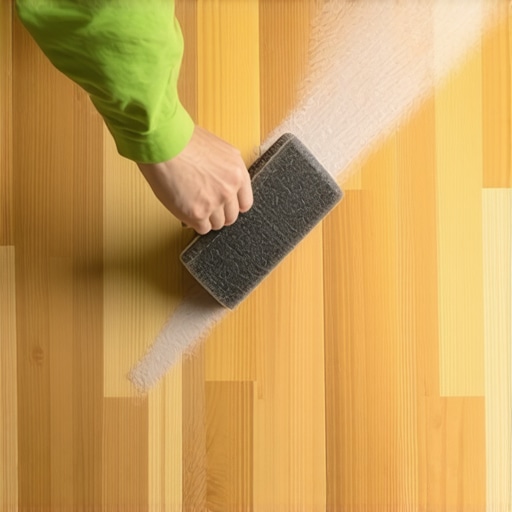
The Hardest Lesson I Learned About Floor Leveling and Hardwood Floors
Think I had my subfloor perfectly leveled? Turns out, my biggest mistake was overlooking seasonal moisture variations—something I only realized after my floors developed uneven gaps. This taught me that even the best tools and techniques need to be complemented with an awareness of environmental changes to truly succeed.
3 Myths About Flooring Installation That Held Me Back
Believing that a quick acclimation process was sufficient or that moisture testing could be skipped led to avoidable cracks and warping. It’s vital to challenge common assumptions—like assuming concrete slabs always require less prep—by doing thorough research or consulting trusted resources.
What Experts Won’t Tell You About Achieving Perfect Floor Uniformity
Surprisingly, the secret isn’t just in the tools; it’s in understanding how subtle subtleties, like expansion gaps and detailed subfloor assessments, interact over time. Embracing these nuanced practices can make the difference between a good job and a truly professional finish.
My Essential Toolkit for Flooring Success
Over the years, I’ve come to rely on a few trusted tools: a high-precision moisture meter, a laser level for accuracy, and a weighted roller to ensure even adhesive spread. These aren’t just gadgets—they’re vital companions that elevate your craftsmanship, and I recommend investing in quality versions to enjoy reliable results.
Where to Go from Here
If you’re serious about avoiding costly mistakes and achieving stunning results, keep learning. Dive into comprehensive guides like this resource for advanced techniques or consult expert advice regularly. Remember, mastery doesn’t come from shortcuts but from consistent effort and curiosity.
Your Turn to Take Action
Have you ever faced unexpected challenges with moisture levels or subfloor preparation? Share your experiences or questions below—your insights could help others avoid common pitfalls in floor leveling and installation.