
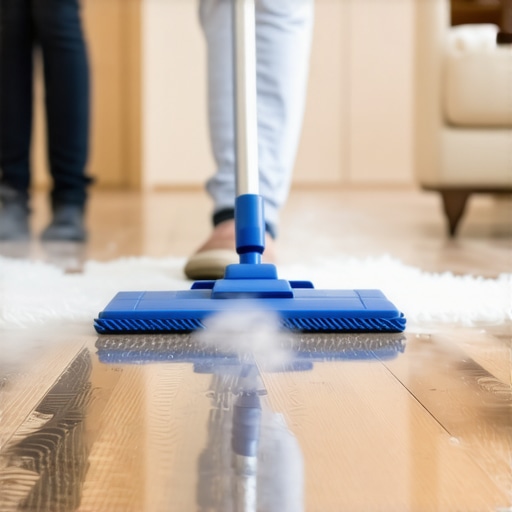
It was a typical Saturday morning when I overheated my frustration—my beautiful newly installed engineered wood floors had the mirage of cleanliness, but beneath the surface, I was unknowingly setting myself up for disaster. I vividly remember the cold, odd sensation when I realized I had been using a steam mop, thinking it was the perfect quick fix for the dirt and stains. Within weeks, those shiny planks started warping, warping that I later learned was caused by excess humidity and heat—thanks to my relentless steam-cleaning routine. That lightbulb moment made me reevaluate almost everything about hardwood and engineered wood care.
Why the Fuss About Steam Mops and Engineered Wood?
Engineered wood floors are celebrated for their durability and stunning appearance, but they have critical vulnerabilities—especially to excessive moisture and heat. Unlike solid hardwood, engineered planks often contain a core of plywood or high-density fiberboard, layered to resist expansion and contraction. However, steam mops emit a lot of water vapor and heat, which can seep into these layers, causing swelling, warping, and long-term damage. The risk is substantial—what seems like an easy cleaning method can actually be a silent contributor to irreversible damage.
Many seasoned flooring experts point out that even when manufacturers claim their products are “water-resistant,” this doesn’t mean “waterproof,” especially against the intense moisture pressure from steam. Preserving the beauty of your floors isn’t about glamour; it’s about understanding their unique needs and limitations. I found that many early mistakes, like neglecting to read the manufacturer’s guidance or assuming all cleaning methods are equal, can lead to costly repairs in the long run.
If you’ve ever faced the heartbreak of seeing your meticulously installed floors develop unsightly cupping or buckling, then you’re not alone. I wish I had known earlier how much harm a steam mop could do—that’s why I’m committed to sharing the truth. Protecting your investment starts with understanding what *not* to do.
Are you still battling stubborn stains or dirt on your hardwood or engineered floors with harsh cleaning tools? If so, it’s time to rethink your approach. But before you reach for that steam mop again, let’s explore the science behind why it might be more damaging than you think. You can also learn about effective strategies to care for your floors without risking damage—because a little knowledge can save you a lot of trouble.
To dive deeper into proper cleaning methods and longer-lasting results, consider reading [hardwood floor care secrets](https://tiletrendshop.com/hardwood-floor-care-secrets-to-longevity-and-shine). Ready to protect your floors? The next steps will help you avoid common mistakes and extend their lifespan with confidence.
Start with a Clean, Dry Surface
Before installing new hardwood or tile, ensure the subfloor is spotless and free of debris. I remember a DIY project where I neglected this step; the result was uneven tiles that cracked soon after. Use a vacuum and a damp mop to remove dust and moisture, then let the surface dry completely to prevent future issues.
Level the Subfloor Accurately
An uneven subfloor leads to cracked tiles and squeaking floors. To address this, I used a laser level and spiked the self-leveling compound where necessary, carefully following this step-by-step guide. Pay special attention to high spots and dips, filling gaps with the right underlayment or self-leveler. Remember, even minor imperfections can magnify over time, so precision is key.
Identify and Correct High and Low Areas
Check your floor with a long straightedge or level. I once discovered a 1/4-inch dip in a corner that caused tiles to settle unevenly. Using a high-quality self-leveling compound, I spiked the mixture with a spiked roller to prevent air bubbles, ensuring a flawless finish. This approach dramatically improved the final look and durability.
Choose the Right Materials for the Job
Material selection impacts longevity and appearance. I selected engineered wood for its stability, especially since it offers better performance in radiant-heated spaces (more on that here) and pairs well with tile accents for a modern touch (see stylish combinations). Use the appropriate adhesive and grout, considering the manufacturer’s specifications, to ensure a secure and long-lasting installation.
Use Precise Troweling Techniques
The right trowel size and proper application are fundamental. For large-format porcelain tiles, I used a 1/4″ notched trowel, spreading thinset in a consistent, back-and-forth motion. This method prevents lippage and ensures full contact. Applying too much or too little can cause tiles to loosen or crack, so measure the consistency by performing the trowel notch test.
Maintain Proper Humidity and Temperature
Temperature fluctuations and humidity levels influence both installation and ongoing maintenance. Keep the environment within the recommended range—generally 45-65% humidity for hardwood. I installed a dehumidifier during the humid season to prevent expansion, which minimized future cupping or buckling. Avoid using steam mops on engineered wood to prevent introducing excess moisture, which can lead to warping (learn more about this here). Consistent climate control is vital to preserve the floor’s integrity over years.
Seal and Protect the Surface
After installation, seal the surface appropriately to prevent moisture ingress and staining. I applied a low-VOC finish, which provides durability and ease of cleaning. Regular maintenance prevents dirt buildup and preserves the sheen. For cleaning tools, always opt for soft cloths and avoid harsh chemicals that can degrade your sealant, prolonging the floor’s appearance and lifespan.
Many homeowners and even seasoned professionals fall prey to misconceptions when installing or maintaining hardwood and tile floors. While beginner guides cover the basics, there are nuanced pitfalls that can sabotage your project’s success if not addressed properly. One prevalent myth is that using standard self-leveling compounds without meticulous surface preparation guarantees a flawless finish. In reality, improper substrate conditioning can lead to uneven surfaces, cracks, or delaminations—issues that often require costly rectifications. For optimized results, refer to this detailed guide on proper leveling techniques.
A common trap involves misjudging material compatibility. For example, selecting the wrong adhesive or grout over engineered wood or large-format tiles can cause long-term bonding failures. Advanced installers employ specific products tailored to substrate and material type, ensuring durability and aesthetic appeal. It’s worth noting that even experts sometimes overlook the significance of environmental conditions. Maintaining precise humidity and temperature levels during and after installation—generally 45-65% humidity—is crucial. Failure to do so can induce expansion or contraction, leading to warping or cracking over time. The comprehensive guide to floor leveling emphasizes climate control for superior results.
What advanced mistakes should I avoid during tile and hardwood installation?
Overlooking the importance of substrate assessment can be your first misstep. Subfloors with hidden issues like gapping, contamination, or moisture can undermine entire installations. Expert-level practices include conducting moisture testing and preparing the surface with appropriate primers or membranes. Neglecting these can cause delamination or mold growth—problems often mistaken for poor craftsmanship, but fundamentally rooted in overlooked prep work. An insightful resource is this article on mastering floor leveling.
Another nuance is the incorrect use of expansion joints—these are vital in large or complex layouts to accommodate natural material movement. Ignoring or improperly installing these can result in unsightly cracks or buckling. For a deeper understanding of strategic joint placement, see this guide on challenges and solutions. Additionally, many enthusiasts underestimate the importance of proper joint spacing and sealant application, leading to moisture ingress and deterioration.
Finally, a less obvious error involves the finishing touches: using inappropriate sealers or neglecting routine maintenance can drastically reduce a floor’s lifespan. Regular cleaning using gentle, pH-neutral products and periodic resealing, especially for hardwoods, preserves aesthetic appeal and structural integrity. For expert maintenance strategies, consult the care secrets article.
Don’t let these advanced pitfalls undermine your flooring goals. Instead, approach your project with a meticulous plan rooted in deeper understanding. If you’ve ever fallen into any of these traps, share your experience in the comments. Want personalized advice? Contact us through this form to elevate your flooring project to professional standards.Maintaining impeccable flooring over the years requires more than just regular cleaning; it demands the right tools, precise methods, and a proactive approach. As someone deeply involved in flooring installation and care, I can attest that investing in high-quality equipment not only streamlines your workflow but also significantly extends the lifespan of your floors. For example, I rely on a variable-speed orbital sander with fine-grit pads for spot refinishing hardwood surfaces, ensuring smoothness without removing excessive material. This tool allows me to restore gloss and remove minor scratches effectively, avoiding costly refinishing jobs later. When it comes to leveling subfloors, I swear by a self-leveling underlayment mixed with the specific gravity secret — it gets the mixture just right for perfect application (learn more here).
The Hardest Lessons I Learned About Hardwood Floors and Tile Installation
One of my most profound realizations came from a simple mistake—ignoring the subtle signs of subfloor issues before laying new flooring. It taught me that every squeak, crack, or uneven spot is a message from your foundation. Mastering precise floor leveling not only saves time and money but also ensures your floors stand the test of time, as detailed in this guide.
Deceiving Myths That Held Me Back and How I Overcame Them
For years, I believed that a quick sweep with a steam mop was enough to maintain my engineered wood floors. I later discovered that even seemingly minor moisture exposure accelerates damage. This myth about water resistance being synonymous with waterproofing led to costly repairs. Learning to choose the right cleaning methods, like gentle dusting and avoiding excess moisture, transformed my maintenance routine, as discussed here.
Why Some Seemingly Small Details Cost a Fortune
Skipping the importance of climate control during and after installation can cause significant issues. I once failed to monitor humidity levels, resulting in warped planks that took months to fix. Implementing a proper heating and dehumidifying setup, guided by this resource, made a world of difference in my projects and minimized surprises down the line.
Where True Expertise Became Clear to Me
My exposure to advanced self-leveling techniques revealed that patience and attention to detail in preparing surfaces are essential. Rushing the process often leads to cracks or uneven tiles. Embracing a meticulous approach, with tools and tips from this expert guide, elevated my craftsmanship and boosted my confidence in tackling complex layouts.