
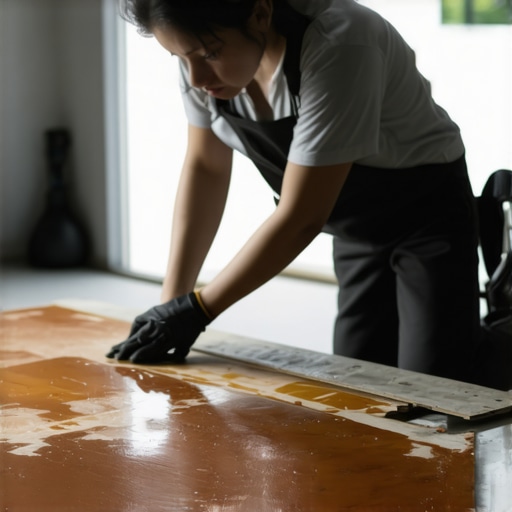
Ever had a moment during a tile job where it seemed like the tiles just wouldn’t sit right? Maybe they wobbled, or a few started to peel up after a week. I remember one gut-wrenching project where I thought I was smooth sailing until I laid down a batch of large format tiles, only to discover they were uneven and hollow-sounding once cured. That lightbulb moment hit me hard: I had skipped a vital step—back-buttering. It’s a simple technique that can make or break your tile installation.
Why Neglecting Back-Butter Can Lead to Big Problems
When I first started installing large tiles, I figured spreading the thinset on the subfloor and pressing the tile in was enough. How wrong I was. Turns out, large format tiles are a different beast—they require a meticulous approach to ensure a uniform bond. Without back-buttering, it’s easy to end up with weak spots, lippage, or even tiles that don’t adhere properly over time.
Research shows that properly applying thinset to both the subfloor and the back of tiles significantly reduces the chances of future cracks or delamination. According to industry standards, applying a layer of thinset directly on the tile’s back—known as back-buttering—is essential, especially for large format tiles. It not only ensures better adhesion but also helps prevent hollow spots that can cause tiles to loosen or crack prematurely.
Is Back-Butter Necessary for All Large Tiles?
Absolutely. The larger the tile, the more critical back-buttering becomes. For versions over 15 inches, there’s no excuse to skip this step. Think of it like buttering both sides of a slice of bread—it’s about creating a solid, even contact surface. Skipping this can lead to uneven pressure distribution, resulting in those unsightly lippage and long-term durability issues. If you’re curious about other common mistakes that impact tile longevity, check out this guide for details.
Early in my career, I made the mistake of believing that the thinset alone could carry all the load—big mistake. I learned the hard way that back-buttering was my secret weapon for a consistent, high-quality finish. So, if you’re serious about achieving professional results and sidestepping common pitfalls, mastering this simple technique is your first step. Ready to learn how to do it effectively? Let’s dive into the practical steps that will transform your tile game and save you headaches down the line.
Apply Thinset to Both Tile and Subfloor
Start by mixing your thinset mortar according to manufacturer instructions. Use a notched trowel to spread an even layer on the back of your tile, pressing firmly to ensure full coverage without air pockets. Then, lay a bed of thinset on the prepared subfloor, smoothing it out with the same trowel. This dual application creates a strong, uniform bond—akin to sandwiching the tile between two layers of adhesive for maximum grip.
Use the Right Trowel and Consistency
Choose a notched trowel size appropriate for your tile size—larger tiles typically require a 1/4″ to 1/2″ notch. The thinset should have a peanut butter-like consistency, neither too runny nor too stiff. A consistent layer ensures even transfer of adhesive and prevents voids, much like spreading butter evenly on bread to prevent dry spots.
Press and Wiggle for Solid Contact
Set the tile onto the thinset on the floor, pressing down with steady, even pressure. Use a slight rocking motion to aid in compressing the adhesive. Similar to bedding a nail, this ensures the tile makes full contact with the mortar, avoiding hollow spots that can cause lippage or cracks.
Check for Full Coverage and Adjust as Needed
After placing the tile, lift a corner gently to inspect the back. You should see an even, thin layer of thinset covering the entire surface. If there are thin spots or gaps, scrape off excess and reapply. Think of it like sealing a window; consistent coverage prevents leaks—here, it prevents tile failures.
Maintain Proper Tile Spacing and Alignment
Use spacers to keep tiles evenly spaced, ensuring consistent grout lines. Regularly verify alignment with a level or straightedge. This step is crucial for a professional finish and prevents uneven surfaces, much like laying bricks in a straight wall.
Handling Large Format Tiles
For tiles over 15 inches, back-buttering isn’t optional; it’s essential. Large tiles tend to warp or bend, making proper adhesion critical. During my own project, I applied back-butter and noticed an immediate difference: the tiles seated perfectly without wobbling, and there were no hollow sounds once cured. This technique eliminated future lippage issues and saved hours of troubleshooting.
Remember, the key to flawless installation is attention to detail during this step. For more advanced tiling strategies, visit this comprehensive guide and elevate your craftsmanship to pro level.
Final Tips for Success
Before grouting, let the thinset cure fully—typically 24 hours. Use a damp sponge to remove excess thinset from tile surfaces and joints, ensuring a clean finish. Properly back-priming and sealing newly installed tiles can further enhance longevity, especially in moisture-prone areas. Mastering this core step ensures your tile jobs stand the test of time, reducing callbacks and costly repairs.
Implementing consistent back-buttering practices transforms a good tile install into a professional one, eliminating common issues like lippage, hollow tiles, and uneven surfaces. Grab your notched trowel, follow these simple yet crucial steps, and watch your results improve dramatically.
Many homeowners and even seasoned DIYers believe they understand flooring installation thoroughly, but several nuanced errors can undermine their efforts. Unlike the popular myth that laying flooring is merely about measuring and cutting, advanced practitioners know that minor lapses in technique, such as neglecting moisture testing or improper subfloor prep, can cause long-term issues. For instance, a common mistake is assuming that a level floor is always flat enough; however, precision in floor leveling is crucial to prevent tiles or hardwood from cracking or warping over time. This is why mastering floor leveling techniques is essential to achieve a flawless finish. One trap many fall into: trusting the naked eye instead of using specialized tools like laser levels or moisture meters. An overlooked detail like moisture content in concrete can cause slabs to shift or the floor covering to buckle months after installation. According to industry experts, ignoring proper moisture testing is among the leading causes of failure in flooring projects. Have you ever fallen into this trap? Let me know in the comments.
Another widespread misconception involves the assumption that all adhesives are interchangeable. In reality, selecting the wrong type of thinset or underlayment based on your specific flooring material can result in bond failure or uneven surfaces. For example, porcelain tiles require a particular diamond blade during cutting to prevent chipping, which many installers overlook, leading to costly mistakes. Advanced installers know that proper adhesive application, such as back-buttering large tiles, ensures better adhesion and reduces hollow spots—this technique is often misunderstood or skipped by beginners but can save significant headaches later on. To elevate your skills, consider reading this guide to professional tile installation or mastering floor leveling for a perfect finish. Recognizing these subtleties transforms a simple job into a durable, high-quality installation. Let’s explore what often goes unnoticed underneath the surface—the hidden nuances that can make or break your project.
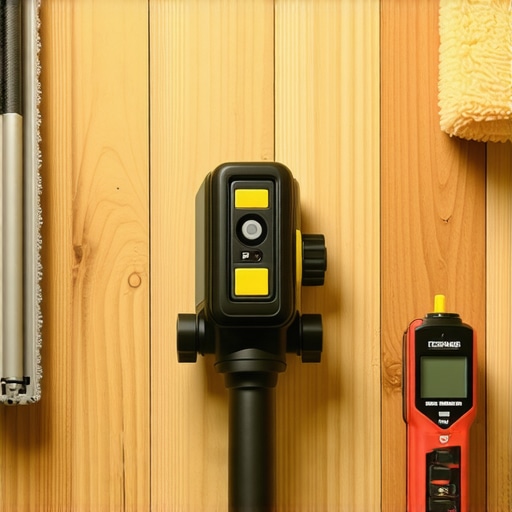
Keeping your tile, hardwood, or other flooring types in top condition over the years requires more than just proper installation; it demands regular maintenance and the right set of tools. As a seasoned professional, I’ve found that investing in high-quality equipment and adopting disciplined routines can significantly extend your floors’ lifespan. For example, using a laser level ensures your installations are perfectly flat, preventing future lippage issues. These devices, like the laser level, give precision that manual tools simply can’t match, especially on large surfaces. In my experience, pairing laser levels with moisture meters, such as the moisture meter, profoundly reduces the risk of flooring failure due to unseen excess moisture in the slab or subfloor. Regularly checking moisture levels is crucial, especially if you’re dealing with concrete subfloors, which are notorious for unseen moisture migration that can cause delamination or mold growth.
Another vital maintenance aspect involves cleaning tools. I recommend a damp mop with a microfiber pad, which effectively lifts dirt without scratching sensitive surfaces like hardwood or polished tiles. Avoiding overly harsh chemicals preserves the finish and prevents deterioration over time. For hardwood floors, employing specialized cleaning solutions, such as those outlined in hardwood floor care secrets, ensures an enduring shine and prevents dullness.
How do I maintain my flooring’s beauty and integrity over time?
Implementing a consistent cleaning routine paired with periodic inspections is key. I suggest scheduling quarterly checks to identify early signs of wear or damage—whether it’s a loose tile, scratched hardwood, or uneven surface. Addressing these issues promptly, often with simple tools like shimming wedges or patching compounds, prevents small problems from escalating into costly repairs. Additionally, investing in protective pads for furniture and using entry mats will limit debris and scratches, maintaining your floors’ pristine look. For more advanced modifications or repairs, such as re-sanding hardwood or re-grouting tile, consulting detailed guides like flooring renovation tips can be invaluable.
Looking ahead, I believe the trend in flooring maintenance will intersect heavily with smart technology. Future developments might include IoT-connected sensors that monitor moisture and wear in real time, alerting homeowners before visible damage occurs. This proactive approach will make upkeep more straightforward and efficient, giving floors a longer, healthier life.
For those ready to elevate their flooring game, try implementing a regular check with a moisture meter combined with a laser level during your next project. These tools foster precision and prevent future headaches, ensuring your investment continues to shine for years to come. Want to get started? Visit this guide on floor leveling techniques to perfect your approach and set the stage for long-term durability.
Lessons That Changed My Approach to Flooring
- Never underestimate the power of proper surface preparation. I once rushed through leveling a subfloor and faced uneven tiles for years. It taught me that taking extra time to ensure a truly flat surface prevents endless headaches later, making techniques like floor leveling your best friend.
- Back-buttering isn’t just a recommendation—it’s a must for large-format tiles. My initial mistake was skipping this step, leading to hollow spots and lippage. Learning this lesson elevated my installation quality instantly.
- Tools and measurements are your allies in precision work. Using laser levels and moisture meters saved me from costly errors, especially in high-humidity environments, emphasizing the importance of moisture testing.
Tools and Guides That Make a Difference
- Professional-grade tools like laser levels ensure your surface is perfectly flat. My go-to is the laser level, which gives me confidence during large installations.
- Comprehensive guides on tile installation offer step-by-step strategies that saved me from guesswork. Check out this resource to refine your technique.
- Moisture meters help prevent future flooring failures caused by hidden dampness. I trust brands recommended in expert advice.
Keep Moving Forward With Confidence
Ultimately, mastering tile and hardwood flooring is a journey of continual learning and attention to detail. The investment in quality tools, combined with proven techniques, transforms a tedious task into a rewarding craftsmanship. Whether you’re tackling your first DIY project or refining your professional skills, remember that every mistake is a step toward mastery. Ready to elevate your flooring projects? Dive into innovative design ideas or perfect your skills with this cleaning tip. Keep pushing your limits, and your floors will thank you for it!