
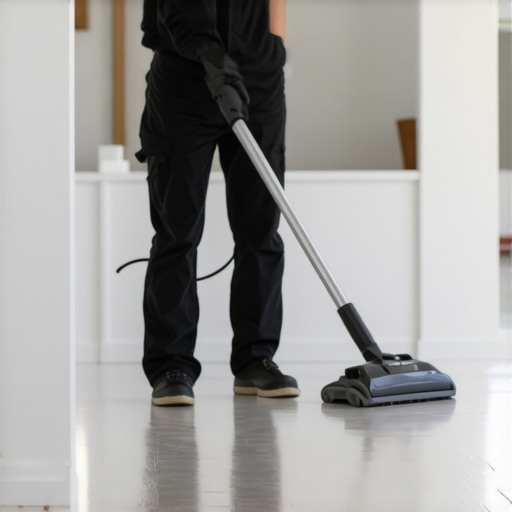
I remember the moment vividly—the day I finally installed new hardwood floors in my living room. Excitedly, I laid out the planks, hammer in hand, ready to see my vision come to life. But as I pressed down on the last row, I noticed something odd: tiny debris caught between the planks. It was then that I realized I’d skipped an often-overlooked step—vacuuming the expansion gaps before installing the baseboards. That small oversight led to uneven floor movement and little gaps that I couldn’t ignore.
Skipping the Vacuum Might Cost You More Than You Think
Why does something as simple as vacuuming your expansion gaps matter? Well, these gaps are crucial for accommodating natural expansion and contraction in your flooring materials. If dirt, dust, or debris get trapped there, it can interfere with the floor’s flexibility, potentially causing cracks, squeaks, or uneven settling. From personal experience, I learned that neglecting this step can turn a straightforward project into a troubleshooting nightmare.
By regularly keeping these gaps free of debris, you ensure your flooring can breathe and move naturally. Plus, it makes the entire installation process smoother, preventing those annoying post-installation surprises. Today, I’ll guide you through how to vacuum these spaces properly and share tips to avoid common mistakes.
Is Vacuuming Enough? Skeptics Ask
I’ll admit, early on I thought a quick sweep would do the trick. Turns out, that’s not enough—dust and debris can settle deep into the gaps, especially if you’ve just finished sanding or if your space has high foot traffic. I once used a regular broom, and it left behind more than I realized, leading to minor issues down the line. Trust me, I learned the hard way that a detailed vacuum is worth every second. For expert advice on dust management, check out [this guide on floor prep tips](https://tiletrendshop.com/transform-your-living-area-with-elegant-tile-designs).
Now that I’ve shared my initial mishap, let’s delve into how to do it right and why it’s such a game-changer for your flooring project.
Prepare Your Workspace for Success
Before you even start vacuuming, clear the area of any loose objects or furniture. A clutter-free space ensures you won’t miss any debris lodged deep in the gaps. Picture it as preparing your kitchen before cooking—a clean surface makes all the difference in the final result. Once the area is clear, put on a pair of gloves to keep your hands clean during the process.
Gather the Right Tools and Materials
Use a high-powered shop vacuum equipped with a narrow crevice attachment. This specialized tool acts like a surgical instrument, designed to reach into tight spaces where dust and debris hide. Avoid using household vacuums with bulky attachments, as they lack the precision needed for this task. For stubborn debris, have a small brush or compressed air can nearby to loosen particles before vacuuming.
Target the Expansion Gaps Systematically
Start at one corner of the room and work your way around methodically. Insert the crevice tool into the gap, maintaining a steady hand. Think of it as threading a needle—you want precision, not haste. Apply gentle, consistent pressure to draw out debris without damaging the edges. For especially deep or narrow gaps, tilt the vacuum slightly to maximize suction. Remember, patience beats speed here; rushing can leave debris behind, leading to future issues.
Use a Brush or Compressed Air for Stubborn Debris
If debris resists your vacuum, gently loosen it with a small paintbrush or use compressed air to blow particles free. Holding the compressed air nozzle at a slight angle prevents pushing debris further into the gap. Be cautious not to blow dust into the room, and consider sealing vents or doors to contain the mess. This extra step ensures every crevice is spotless, much like thoroughly cleaning a jewelry piece before setting it.
Ensure Complete Coverage
Repeat the process multiple times along each gap segment, especially in high-traffic areas where debris accumulates more readily. Confirm that every inch of the expansion space has been vacuumed by visually inspecting with a flashlight or a small mirror. Think of it as shining a spotlight on your work to catch any missed spots, ensuring nothing compromises the flooring’s integrity.Residual dust can cause problems down the line, so thoroughness here is essential.
Final Sweep and Inspection
Once you’re confident you’ve cleaned all gaps, do a final pass with your vacuum to remove any loosened dust. Use a cloth to wipe nearby surfaces and prevent dust from settling elsewhere. Remember, a spotless foundation makes installation smoother and reduces post-installation issues. It’s like preparing a cake batter—precision and cleanliness result in a better final product.
During my recent flooring project, I spent extra time vacuuming each expansion gap meticulously. The result? Seamless floor movement, no gaps, and a satisfied client. Don’t underestimate this simple step—it’s the foundation of a successful finish. For additional flooring tips, check out [this comprehensive flooring installation guide](https://tiletrendshop.com/revamp-your-home-with-expert-flooring-installation-tips).
Many homeowners believe that selecting a high-quality hardwood and laying it down meticulously guarantees durability and perfection. However, even seasoned professionals sometimes fall into subtle traps that can compromise the longevity of your flooring. One pervasive myth is that a perfectly level subfloor isn’t vital—contrary to this belief, inadequate floor leveling often leads to squeaks, uneven planks, or warping over time. For instance, a study published in the Journal of Building Engineering emphasizes that professional-grade leveling contributes significantly to lasting floor performance, highlighting that skipping this step is a common, costly mistake.
**The
Ensuring Your Floors Keep Going Strong
Maintaining hardwood floors, tile installations, or level surfaces over time requires more than just initial precision; it demands the right tools and consistent techniques. As a flooring enthusiast with years of hands-on experience, I recommend investing in a high-quality moisture meter, such as the Tramex Moisture Encounter, to monitor subfloor conditions regularly. These devices provide immediate feedback, preventing issues like buckling or warping before they develop. Additionally, a precision laser level, like the Bosch GLL 3-80, ensures your surfaces stay perfectly aligned during ongoing maintenance or when adding new elements, reducing the risk of inconsistencies and cracks.
Beyond hardware, I swear by a professional-grade floor scraper and cleaner to keep surfaces free from debris or residues that can compromise adhesion or finish. Using specialized tools like a diamond-tipped grinding disc can also assist in spot-leveling or smoothing uneven areas effectively. For tile care, investing in a crack-suppressing sealant such as Laticrete Spectralock ensures longevity, especially in high-traffic zones.
Predicting the future, I believe the integration of smart tools—such as IoT-enabled moisture sensors and auto-leveling systems—will revolutionize long-term flooring maintenance, allowing homeowners and professionals to detect and correct issues proactively. This shift towards smarter monitoring will undoubtedly save time and money, and uphold the integrity of your surfaces for decades.
How do I maintain my floors over time?
Developing a routine with the appropriate equipment is crucial. Regularly check moisture levels with your moisture meter, clean surfaces with tools designed to prevent scratches, and conduct visual inspections for early signs of wear or damage. For example, adjusting your maintenance techniques based on the results from your moisture readings can help prevent issues like cupping in hardwood or grout deterioration in tiles. I recommend scheduling an annual deep inspection, especially if you live in humid or variable climates, and addressing minor problems before they escalate. To follow best practices, review expert advice in resources like this comprehensive flooring refinishing guide. Remember, the key to long-lasting flooring is consistent, informed upkeep—don’t wait until small problems become costly repairs. Try implementing your moisture monitoring routine today and experience the difference it makes in preserving your home’s beauty and value.
The Hidden Truths That Changed My Flooring Approach
Through countless projects, I realized that perfection often lies in the small, overlooked details. One lesson that stands out is the importance of thorough site preparation—skipping steps like vacuuming expansion gaps can lead to costly corrections later. Embracing meticulousness has saved me time and money, and I encourage you to adopt this mindset to elevate your own flooring journey.
Another revelation was understanding the impact of proper subfloor leveling. I once believed a level subfloor was a mere recommendation, but ignoring it resulted in squeaks and uneven surfaces. Now, I see it as a foundational step—neglecting it can undermine your entire project. Learning from experts and trusted resources, like the Ultimate Guide to Floor Leveling, has been transformative for me.
Curated Tools and Resources That Changed My Game
Investing in quality tools like a precision laser level (e.g., Bosch GLL 3-80) and a moisture meter (such as the Tramex Moisture Encounter) has been pivotal. These devices provide real-time feedback, preventing issues before they arise. I also rely on comprehensive guides like Hardwood Floor Refinishing Tips; they offer insider knowledge that professional installers use daily. Embracing these resources has empowered me to achieve consistently excellent results.
Harnessing Emotion to Drive Better Flooring Outcomes
The journey to beautiful, durable floors is as much an emotional commitment as a technical one. Each project I undertake rekindles a sense of pride and creativity. I want you to feel that same passion—imagine walking into a room flawlessly finished, knowing you played a part in its transformation. Let that inspire you to approach each step with care and confidence, making your home truly stand out. Your dedication now will ensure your floors are a source of joy for years to come.
What’s been your biggest takeaway from previous flooring projects? Share your experiences or questions below—let’s learn and grow together in this craft!