
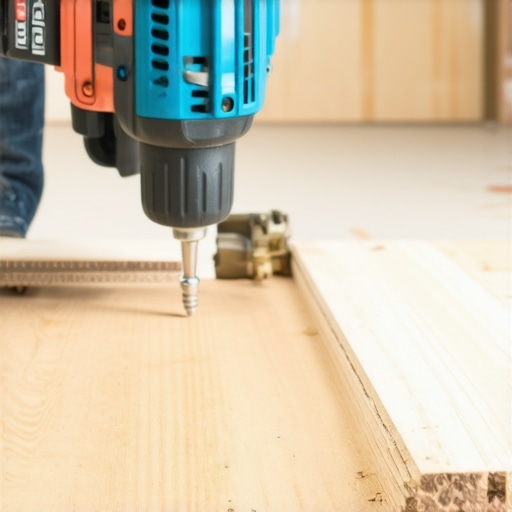
It was a frustrating morning when I realized halfway through my hardwood flooring project that my standard drill just wasn’t cutting it. Screws stubbornly refused to tighten, slipping out or getting stripped, and the entire process felt like battling with a stubborn mule. That lightbulb moment made me realize—there’s a secret weapon most DIYers overlook: an impact driver.
Unlocking the Power of an Impact Driver for Flooring Projects
Many homeowners and weekend warriors underestimate how crucial the right tools are when tackling subfloor installation. Using a regular drill might seem sufficient, but when it comes to driving long, tough screws into dense wood or concrete, an impact driver can make all the difference. Promise, I’ll show you exactly why this tool has become my go-to for flooring prep and how it saved me hours of frustration.
Is the Impact Driver Worth the Hype? My Early Mistake
Early in my renovation journey, I made the mistake of relying solely on my trusty drill without realizing its limitations. The drilling power paled in comparison, especially when dealing with stubborn subfloor screws. I wished I had known earlier that an impact driver delivers torque with ease, reducing fatigue and preventing stripped screw heads. According to a study by the Equipment World, impact drivers can generate up to three times the torque of traditional drills—significantly improving efficiency and durability in heavy-duty applications.
Have you ever faced the struggle of driving screws that just won’t budge? If so, stick around. We’re about to dive into how an impact driver can transform your flooring projects, ensuring they’re quicker, easier, and more professional-looking.
Start with Precise Subfloor Preparation
Ensure your subfloor is clean, dry, and free of debris. Use a floor scraper to remove old adhesive or carpet remnants that might interfere with leveling. Check for any loose areas and secure them with appropriate fasteners. A stable, flat subfloor is the foundation for flawless flooring results. For detailed techniques on leveling uneven substrates, visit floor leveling challenges.
Apply Proper Floor Leveling Techniques
Identify uneven spots by using a long straightedge or a level across the entire surface. Mark high and low areas with chalk or a crayon. When applying self-leveling compound, first mix it thoroughly according to manufacturer instructions—use a slow-speed mixing paddle to prevent air bubbles that can compromise adhesion. Pour the compound starting from the lowest point, allowing it to naturally flow into dips. Use a gauge rake or notched trowel to spread it evenly, pushing the compound into edges for a seamless finish. After curing, verify flatness with a straightedge, aiming for a maximum variation of 3/16 inch over 10 feet. For comprehensive guidance on achieving a level surface before tile or hardwood installation, refer to flawless floor leveling.
Use Proper Troweling and Adhesive Techniques
Select the right trowel notch size based on tile size—larger tiles require deeper notches to ensure full coverage. Hold the trowel at a consistent 45-degree angle and apply adhesive in uniform, firm strokes. For large-format tiles, use a smooth, back-and-forth motion to prevent air pockets. Regularly check adhesive coverage with a check gauge or by lifting a tile before setting. Proper adhesive application prevents uneven surfaces and tiles that sink or rock. When installing hardwood floors, use a gap sensor or a pull bar to ensure tight joints without damaging the material. For effective methods tailored to your project, explore flooring installation success.
Achieve Seamless Transitions Between Flooring Types
When transitioning from tile to hardwood or between rooms, use transition strips or threshold molding. Measure exact heights to avoid trip hazards or gaps. For doorways, consider a floating installation with an expansion joint to accommodate temperature-induced expansion or contraction. Use spacers to maintain uniform gaps for expansion around the perimeter, especially when working with materials like bamboo or engineered wood, which are sensitive to humidity changes. Proper planning here prevents future cracking or buckling, which can be costly to repair. To master this, visit doorway transitions.While many DIYers focus on the basics of floor leveling and tile installation, a deeper understanding reveals nuanced pitfalls that can compromise your project’s longevity and appearance. One common myth is that using standard adhesives and unprepared subfloors suffices for flawless results. In reality, neglecting proper surface preparation and the specific properties of bonding agents can lead to uneven tiles, grout cracking, or even structural failure over time. For instance, applying an adhesive without considering humidity levels or substrate compatibility often results in poor adhesion—a mistake even seasoned installers can make if they overlook expert guidelines. To avoid this, consult detailed resources on floor leveling principles and ensure you select the appropriate materials for your environment.
A hidden nuance is the importance of mastering the cure times and application techniques of leveling compounds. Many assume that a quick-setting product is always better, but rushing curing can trap air pockets or prevent proper bonding, leading to uneven surfaces that cause tiles to crack or loosen. Advanced practitioners often test for flatness with a straightedge after curing and perform spot corrections, a step that significantly improves results. The key is understanding that each product has specific curing protocols; thus, consulting manufacturer instructions and leveraging precise leveling techniques is essential.
Beware the trap of over-applying grout or thinset, which, while seemingly providing margin for error, can create excess that oozes into joints or beneath tiles. This not only wastes material but also necessitates painstaking cleanup, risking damage to your carefully laid surface. Employing the right trowel notch size and spreading technique ensures optimal coverage without excess. Remember, more isn’t better—precision matters.
For advanced tile enthusiasts, considering the subtle effects of tile expansion and contraction due to temperature fluctuations during installation is crucial. Overlooking these factors can lead to cracked grout lines or even tile delamination over time. Installing expansion joints and choosing materials with compatible coefficients of thermal expansion minimizes these risks. To fine-tune your approach, review detailed strategies in floor leveling challenges and their solutions.
Have you ever fallen into this trap of underestimating the complexity? Share your experiences or tips in the comments to help others elevate their flooring projects. Remember, mastery lies in attention to detail and understanding the hidden intricacies that turn a good installation into an exceptional one.
Keep Your Flooring Projects Rolling with Precision Tools
Maintaining the quality and longevity of your flooring installations hinges on the right equipment and diligent upkeep. From impact drivers to leveling compounds, investing in high-quality, purpose-built tools ensures your work not only looks professional but endures the test of time. I personally rely on a corded impact driver, like the Makita XT248, for its consistent torque and durability during screw-driving tasks. This tool significantly reduces fatigue and prevents stripping — crucial for securing subfloors and hardwood planks effectively. Regularly inspecting your tools for wear and tear, lubricating moving parts, and storing them properly prolongs their lifespan, saving you money and frustration in the long run.
How do I keep my tools and materials in top shape over time?
Establish a routine maintenance schedule that includes cleaning dust and debris after each project, checking for loose or damaged components, and replacing worn bits or blades promptly. For leveling compounds and adhesives, store in a cool, dry place and monitor expiration dates to ensure optimal performance. Using high-quality products like self-leveling compounds from reputable suppliers guarantees better adhesion and smoother surfaces, making subsequent flooring steps easier and more reliable. To refine your process further, consulting resources on floor leveling principles can help you understand material behavior and application techniques better. Future trends suggest an increasing adoption of smart tools equipped with connectivity features, enabling remote diagnostics and real-time health monitoring—making maintenance even more straightforward.
The Long Road to Durable Floors
Consistent maintenance isn’t just about preserving tools but also about ensuring your flooring remains beautiful and resilient over decades. Periodic inspections of expansion joints, cleaning grout lines with gentle, pH-balanced cleaners, and resealing hardwood surfaces prevent minor issues from escalating. Upgrading to automated monitoring systems that detect humidity levels and air quality can preempt warping or cracking caused by environmental fluctuations. As technology advances, more homeowners will leverage these innovations, reducing costly repairs and rework. For in-depth strategies on upkeeping your flooring, explore flooring maintenance techniques.
Remember, the key to a lasting, beautiful floor is a combination of the right tools, proactive upkeep, and staying informed about emerging innovations. Try integrating a comprehensive tool maintenance ritual and proactive inspection schedule today—your floors will thank you for it!
The Hardest Lesson I Learned About Flooring Projects
One of the most eye-opening lessons was realizing that even the best tools can’t compensate for proper preparation. I once rushed the subfloor cleaning, only to regret it when tiles cracked prematurely. This taught me that meticulous surface prep isn’t just tedious—it’s the foundation of a durable, professional-looking finish. A small investment in time upfront saves countless headaches later.
Secrets I Wish I’d Discovered Sooner
- Using impact drivers for stubborn screwing tasks isn’t just a convenience; it’s a game-changer. I wasted so much time with stripped heads before embracing this tool’s torque power.
- Understanding the nuances of curing times for leveling compounds prevented me from rushing the process—and from having to do touch-up work later.
- So many issues I faced could have been avoided if I had considered expansion gaps and temperature effects during installation. These details matter more than I initially thought.
Tools and Guides That Transformed My Approach
- Impact Driver Recommendations: I trust Makita’s XT248 for its consistent torque and durability. Investing in quality tools means smoother projects and lasting results.
- Guides for Flawless Results: The in-depth articles at Floor Leveling Principles and Precise Floor Leveling Techniques have become my go-to references, constantly pointing out pitfalls I’d otherwise overlook.
- Maintenance Routines: Regular inspection and cleaning of my tools, along with careful selection of materials, have extended their lifespan and improved my project quality.
Keep Building, Keep Improving
The journey to perfect flooring isn’t a one-time effort but a continuous learning process. By embracing expert advice, investing in quality tools, and paying attention to subtleties like expansion gaps and curing times, you can elevate your projects from good to exceptional. Make a habit of sharing your experiences and insights; every challenge you overcome adds to your mastery. The future of flooring is bright, and your next project can be a testament to what careful planning and learning can achieve.
What’s the most surprising thing you’ve learned about flooring installation? Let me know below—your story could inspire someone else to keep pushing their limits.