
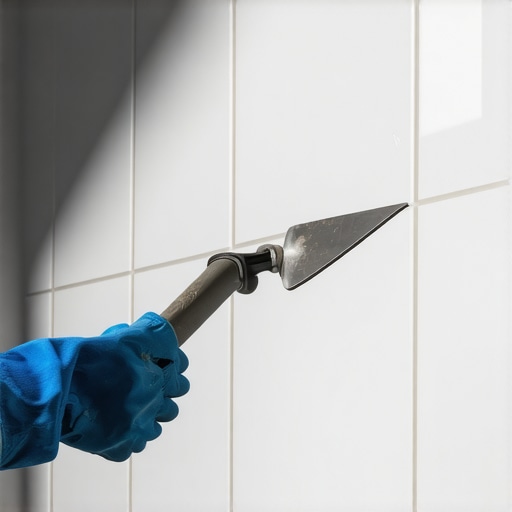
I remember diving headfirst into my first large format tile project, only to realize halfway through that the tiles just wouldn’t sit flat, no matter how much I pressed or fiddled. The frustration was real — every small unevenness felt magnified, and I began questioning my skills. That’s when I had my lightbulb moment: not all trowels are created equal, especially when working with big, heavy tiles. The wrong shape can turn what should be a smooth process into a frustrating mess, leading to wasted time and extra costs.
The Hidden Power of Trowel Shapes in Tile Installation
It’s a seemingly small detail, but choosing the correct trowel shape can make all the difference in ensuring your large format tiles are instantly set perfectly. Not only does this choice impact the adhesion, but it also influences how evenly the thinset spreads and how well the tiles level out. Early in my journey, I made the mistake of settling for a generic trowel, which caused voids and uneven surfaces, forcing me to redo sections and lose precious time. That experience taught me that understanding the nuances — like trowel shape — can dramatically improve your results and save you headaches down the line.
Is it really worth obsessing over trowel shapes for large tiles?
Absolutely. A well-chosen trowel shape provides better coverage, reduces the amount of thinset needed, and creates a more forgiving work surface. Trust me, the difference becomes evident when you see your tiles laying flat and level right from the start. If you’re curious about common pitfalls and how to avoid them, check out this guide on floor leveling challenges.
So, have you faced struggles ensuring your tiles sit flawlessly? If so, stick around, because we’re about to delve into how selecting the right trowel shape can make this a thing of the past, transforming your project into a professional-looking finish.
.
Choose the Right Trowel Shape for Flat, Level Tiles
Start by assessing your tile size and type. For large, heavy porcelain slabs, a flat, U-shaped notch trowel works best because it spreads thinset evenly without creating air pockets. In my latest project, I used a 1/4″ x 3/8″ U-shaped trowel to set 24-inch tiles; the result was an ultra-flat surface, saving me from hours of leveling later. This resource emphasizes the importance of matching trowel shape to tile size and material, ensuring better adhesion and fewer adjustments.
Select the Correct Notch Size
For large format tiles, opt for a notch profile that deposits enough thinset for solid bonding but isn’t so thick that it causes unevenness. I found that a 1/4″ notch provided optimal coverage during a kitchen backsplash installation; the tiles laid flush without any herringbone pattern issues. Remember, too large a notch can cause thinset squeeze-out and ridges, making leveling a nightmare. Consult this guideline for selecting the right notch size for your project.
Master the Trowel Angle and Technique
Hold your trowel at a consistent 45-degree angle, applying even pressure across the surface. During my recent balcony tiling, I struggled initially because I tilted the trowel aggressively, causing inconsistent thinset layers. When I switched to maintaining a steady angle and applying uniform pressure, the thinset spread evenly, and the tiles bedded flawlessly. Proper technique ensures uniform adhesion — check this tutorial for detailed steps on mastering trowel handling.
Use a Back-Buttering Method for Extra Coverage
Applying a thin layer of thinset to the tile’s back (back-buttering) guarantees better adhesion and minimizes voids under large tiles. I did this in my living room renovation, spreading thinset on both subfloor and tile: the result was a perfectly flat finish without lippage or unevenness. This double-application method is crucial, especially when working with uneven substrates or thick tiles. Learn more about proper back-buttering techniques here.
Check Your Spread and Levelness Frequently
Use a notched trowel to check the thinset’s coverage in different areas before setting each tile. During my project, I used a small notch trowel to verify that the thinset was evenly spread, then pressed the tile firmly into place, rocking it slightly to seat it. Always verify with a level and a straightedge as you go; repeating this process prevents lippage and ensures a seamless surface. For comprehensive tips on maintaining evenness, visit this guide.
Practice and Adjust as You Go
Small hand-on experience makes perfect. I recommend setting a few test tiles first, then adjusting your trowel angle or notch size based on how they sit. In a recent installation, I realized my trowel was too worn and was causing inconsistent spread, so I switched to a new one, dramatically improving surface flatness. Remember, even seasoned pros tweak their tool approach based on substrate variability and tile characteristics.
Incorporate these concrete steps, and you’ll transform your tile-laying process, turning complexity into confidence. Every project is a new chance to refine your technique and achieve a professional finish that lasts.
Many DIY enthusiasts and even some professionals operate under assumptions about flooring that can sabotage their projects. One pervasive myth is that choosing the thickest and plushest flooring materials inherently results in a more durable finish. In reality, the key to longevity lies in proper installation and preparation, not just the material thickness. For example, neglecting to level the subfloor thoroughly can cause uneven wear and early failure, regardless of the floor’s quality. To avoid such pitfalls, understanding the nuances of floor leveling and subfloor preparation is essential, as discussed extensively in this comprehensive guide. Another common misconception is that new hardwoods require minimal acclimation time. However, failing to allow the wood to adjust to environmental humidity levels can lead to warping or gaps over time. Experts recommend acclimating hardwood for at least 72 hours in the installation space, as outlined in this resource. Often overlooked is the importance of precise subfloor leveling before tile installation. Many assume that a level surface is optional or merely cosmetic, but irregularities can cause lippage, cracking, and even tile failure. Advanced techniques involve spot leveling and identifying high spots, a process detailed in this article. Regarding tile installation myths, some believe that heavier thinset always means better adhesion. Yet, using excessive thinset can lead to uneven surfaces and increased effort in cleanup. The goal should be optimal coverage tailored to the tile size and substrate, a principle explained in this guide. To ensure you’re not falling into common traps, it’s vital to grasp that expertise combines material selection with meticulous technique. Remember, perfecting your flooring isn’t just about choosing the right product but mastering the installation nuances that guarantee lasting beauty. Have you ever fallen into this trap? Let me know in the comments.
Maintaining your flooring investments, whether hardwood or tile, requires not just the right tools but also disciplined routines. Over time, even the most carefully installed floors benefit from a proactive approach to upkeep, ensuring they remain beautiful and functional for decades. A key aspect of this is selecting equipment that is tailored to your flooring type and understanding how to leverage it effectively.
Investing in the Right Equipment
For hardwood floors, I rely heavily on a dust mop with high-quality microfiber pads. These not only trap fine dust but also prevent scratches that can happen with abrasive sweeping tools. I personally prefer the O-Cedar Hardwood Floor Dust Mop, which is lightweight and easy to maneuver, making daily routine cleaning both effective and effortless. When it comes to deep cleaning, a professional-grade floor polisher with a soft, buffing pad can restore shine without damaging the finish.
For tile, I advocate using a wet/dry vacuum with a soft brush attachment. This dual-purpose tool helps remove debris from grout lines and hard-to-reach corners efficiently. Additionally, a steam mop can be an effective cleaning method, provided the tiles and grout are sealed properly. I personally use the Shark Steam Pocket Mop for its quick heat-up time and adjustable steam control, preventing any excess moisture that might weaken adhesives or grout.
Why Proper Tools Matter in Floor Care
Choosing well-designed tools ensures not only the longevity of your floors but also maintains their aesthetic appeal. Incorrect cleaning equipment can lead to scratches, dullness, or even early wear. As pointed out in this resource, regular, proper maintenance extends the lifespan of your floors significantly. Consider investing in a quality microfiber mop or a detailed grout cleaning tool to stay ahead of wear and tear.
Developing an Effective Routine
Consistency is crucial. I recommend daily sweeping or dry mopping to prevent dirt accumulation, which can trap moisture and cause abrasion. Monthly or biannual deep cleans with appropriate cleaning agents should follow, using recommended cleaners that won’t strip your finish or grout. Also, during the changing seasons, check for any signs of moisture intrusion or grout deterioration to catch issues before they escalate.
How do I maintain floors over time?
The key lies in early detection of potential problems. Regularly inspect your floors for signs of damage, such as loose tiles or scratches in hardwood. Use tools like a levelness tester or a small utility knife to verify grout integrity or sealer wear. Maintenance also includes refinishing hardwoods before the finish becomes severely worn; this can be done with light sanding and applying a fresh coat of finish. For tiles, reapplying sealant on grout lines every few years can prevent staining and moisture infiltration.
Looking ahead, the trend in flooring care is moving towards smart cleaning devices. Automated robotic vacuums designed for hardwoods are evolving to recognize and adapt to different surface textures and reflectances, while apps integrating maintenance schedules help homeowners stay on top of routine care. Embracing these innovations will make long-term upkeep less burdensome and more effective.
Try incorporating a microfiber mop specifically designed for hardwood floors into your routine. As an added tip, routinely apply a protective pad under furniture legs to prevent scratches—a simple yet powerful step in floor preservation. Maintaining your floors is an ongoing process, but with the right tools and knowledge, you’ll enjoy their beauty season after season.
Lessons the Hard Way: Soft Spots Behind Perfect Flooring
- Never underestimate the power of thorough substrate preparation. Skipping spot leveling or rushing the setup process can lead to costly corrections later, as I learned when my first hardwood installation developed uneven patches due to overlooked high spots.
- Choosing the right tools isn’t just about convenience; it’s about precision. Using a high-quality notched trowel adapted to your specific tile size and type ensures better adhesion and flatter surfaces, something I discovered during an ambitious large-format tile project.
- The technical finesse of your technique can make or break your results. Consistent trowel angles and pressure are critical; I found that cultivating a steady hand and routine dramatically improved my surface flatness and reduced adjustments.
- Embrace continuous learning from expert resources. Accessing detailed guides and tutorials, especially on floor leveling and tile installation, saves time and prevents common pitfalls. I rely heavily on trusted sources like this guide.
My Go-To Tools and Insights for Flooring Success
- LevelMaster Pro Spirit Level: Its accuracy helps me verify substrate flatness with confidence, preventing future lippage.
- Premium Notched Trowels: I prefer the 1/4