
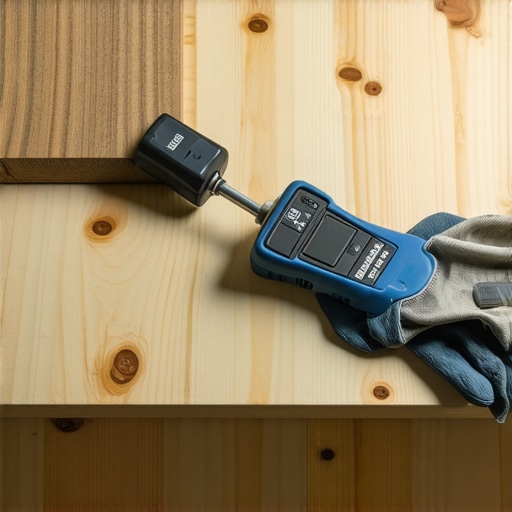
I remember the shock I felt when I first decided to sand down a beautiful piece of reclaimed wood in my home, only to hear a strange, alarming clang—like metal hitting metal. It was a harsh reminder that even the most charming, rustic-looking wood can hide a hidden danger. That moment made me realize something crucial: **reclaimed wood can be a treasure trove of surprises, including hidden nails, staples, or even bits of metal that can ruin your project—or worse, cause injury.** Today, I want to share why every DIY enthusiast or professional should use a metal detector before sanding reclaimed wood, and how I finally cracked the code for safe, smooth finishes.
The Hidden Risks Lurking in Reclaimed Wood
Why Ignoring Metal Detection Could Cost You More Than Just Time
Have you ever experienced a scratchy, uneven sanding surface that just refuses to smooth out? That unpleasant surprise is often caused by unseen metal fragments embedded deep within the wood. These relics of the wood’s past life—whether from old nails, screws, or machinery—don’t always come out during demolition or initial inspection. If you ignore these hazards, the consequences can be costly: damaged sanders, ruined finishes, or even injuries. In my early days of working with reclaimed wood, I overlooked this step once—and wound up replacing my entire sander after it was severely damaged by a hidden nail.
The good news is, detecting these metal bits is easier than you think, thanks to affordable, user-friendly metal detectors that can save you from a lot of trouble. Plus, they help preserve your tools and ensure your project finishes looking as flawless as imagined.
If you want to avoid my rookie mistake, I recommend checking out this comprehensive guide on flooring installation mistakes that can also help you identify common hazards early.
By taking a few quick minutes to scan your reclaimed wood with a quality metal detector, you’ll safeguard your tools, your safety, and the beauty of your finished project. Ready to learn how to do it properly? That’s what we’ll cover next—because understanding the “why” is just the beginning. Are you familiar with the risks of working with old wood, or is this a new concern for you? Either way, let’s keep your project safe and smooth from start to finish.
Scan Thoroughly Before You Sand
Before starting any sanding, lay the reclaimed wood flat on your work surface and turn on your metal detector. Think of it as a security scan—you’re preventing a “metal surprise” from wrecking your tools or causing injury. Pass the detector slowly across the surface, overlapping each sweep to ensure all hidden metal bits are caught. Remember, this step is like screening for landmines—better safe than sorry.
Identify Zones of Hidden Hazards
Hold the detector at different angles and speeds to catch various metal types. Nails, staples, or screws might be lodged deep or protruding. Pay special attention to areas with telltale metallic sounds or signals—I once detected a rusty nail buried under a thick knot, which, if unremoved, could have shattered my sander’s disc. Mark these spots with a pencil or tiny tape for easy identification during removal.
Remove Metal Carefully
Use pliers or a magnetic pickup tool for extraction. Visualize the process like extracting buried treasure—deliberate and gentle. Once removed, re-scan the area to confirm clearance; remnants can be elusive, like hidden landmines. Ensuring all metal is out prevents damage to your equipment and reduces safety risks.
Double-Check and Test
After initial removal, run the detector again across the cleaned surface. If signals persist, re-examine those spots. It’s comparable to a second security check—your safety depends on it. Only when the detector registers no signals should you proceed with sanding or finishing.
Incorporate Technology for Precision
Investing in a professional-grade metal detector can improve detection accuracy. Models with adjustable sensitivity allow you to discriminate between benign metallic particles and genuine hazards. During a project, I upgraded my detector, which reduced false alarms and sped up the process—saving me time and preventing accidental tool damage.
For more insights on working smoothly with reclaimed wood, especially in flooring projects, check out this guide on flooring installation fundamentals. Proper preparation, including metal detection, is vital to achieving a flawless finish and ensuring safety throughout your DIY journey.
Many DIY enthusiasts and even seasoned pros often believe that straightforward methods are always sufficient for successful flooring projects. However, common myths and overlooked nuances can sabotage even the most well-intentioned efforts. For example, a prevalent misconception is that leveling a subfloor is a simple process, but in reality, improper leveling can lead to uneven floors, cracking tiles, or squeaky hardwoods. Rather than rushing into installation, investing time in understanding the specifics of your subfloor and using the right techniques can make a significant difference. To avoid costly mistakes, it’s vital to grasp that each subfloor type—whether concrete, plywood, or particleboard—demands tailored solutions. For instance, concrete slabs might require moisture mitigation before leveling, which many overlook, leading to future cracking and adhesion issues. Exploring floor leveling challenges can reveal nuances that most skip, resulting in a smooth, durable surface.
Another misunderstood aspect is the misconception that hardwood floors can be installed directly over existing tile or vinyl. This shortcut often appears enticing, but adhesives or fasteners might not provide long-term stability if the underlying surface isn’t properly prepared. A critical error is neglecting the importance of maintaining proper expansion gaps; neglecting this can lead to buckling or gaps over time. As expert installers emphasize, understanding the elasticity and movement of your flooring material is key—see expert installation tips to learn more.
What most people get wrong about hardwood floors is the assumption that they’re maintenance-free. However, without proper acclimation before installation or appropriate finish application, hardwoods can warp, cup, or develop gaps. For example, neglecting to allow wood to acclimate in the room’s environment can cause unforeseen issues once flooring is sealed. Advanced practitioners recommend paying close attention to environmental conditions and verifying moisture levels—an essential step often skipped. See hardwood refinishing tips to avoid common pitfalls.
Let’s answer a common question that trips up many: How do I correctly prepare an uneven subfloor prior to tiling? The answer involves more than just quick fixes; it requires understanding the tilt’s extent and using specific leveling methods. Over-application of self-leveling compounds can lead to weak spots or excessive height variations, especially if the substrate isn’t primed properly. To master this, study flawless leveling techniques and choose the right materials for your specific substrate.
Misconceptions in flooring installation often result from generalizations that don’t consider the unique nuances of each project. Rushing through or underestimating these details can lead to expensive redo’s or compromised finishes. Remember, expertise in flooring is rooted in understanding those subtle differences—like knowing when to use a moisture barrier or how to scribe tiles accurately to fit irregular surfaces. Have you ever fallen into this trap? Let me know in the comments and share your experiences. For a comprehensive walk-through on essential steps, check out this installation guide that covers everything from preparation to finishing touches.
Keep Your Floor in Peak Condition with the Right Tools
Maintaining beautiful and durable flooring requires more than just initial installation; it demands the right tools for ongoing care and early detection of issues. I personally swear by a high-quality, adjustable cordless rubber mallet. Its ergonomic design and controlled force make it indispensable for installing or retightening hardwood planks without damaging the finish. For tile work, I’ve found that a precision-notch trowel—not the typical one-size-fits-all—ensures even thinset application, preventing hollow spots and long-term cracking. Investing in a good grout float with a non-slip handle lets me work efficiently, saving time and reducing fatigue.
Leveraging Technology for Long-Term Results
Today, digital moisture meters have become essential. They enable me to monitor environmental conditions and ensure subfloor dryness before installing flooring, which is critical for preventing warping or delamination down the line. I use an infrared thermometer to check for temperature variations across the surface, indicating potential structural issues early—saving me costly repairs later. As the industry advances, integrating laser leveling tools has revolutionized how I verify surface flatness—achieving perfect levels in minutes, not hours. For example, during large tile projects, a laser level with remote control ensures my work remains within a 1mm tolerance, dramatically improving quality.
The Secret to Easy Maintenance and Scaling
Regular cleaning with pH-neutral products, paired with protective pads on furniture and thresholds, extends the life of hardwoods and tiles alike. When scaling a flooring project, I recommend establishing a routine check zone at high-traffic areas, enabling quick detection of scratches or wear. Over time, maintaining a schedule of re-sealing or re-finishing helps preserve the aesthetic and structural integrity—think of it as giving your floor a health check-up annually. Modern UV-cured finishes also provide a self-healing surface that can withstand minor scratches, reducing maintenance efforts and keeping your floors looking pristine for years.
How do I maintain my flooring tools over time?
Proper cleaning after each project is vital. For example, wiping down your trowel and float with a damp cloth prevents dried thinset or grout from hardening, which makes future work much easier. Lubricating moving parts of your power tools, like drills or sanders, with manufacturer-approved oils extends their lifespan. I also keep a small toolkit with replacement batteries, blades, and brushes on hand—you never know when a quick swap can keep your project moving smoothly. Upgrading to digital laser levels, which recalibrate themselves, means less calibration needed over time and more precise results. As technology progresses, expect these tools to become even more intuitive and integrated—for instance, smart sensors that alert you when surface flatness exceeds tolerances. Incorporate these into your routine now, and you’ll see your project quality and tool longevity improve significantly. For expert advice on tool upkeep, check out pro-level maintenance secrets.
Looking ahead, the trend is toward smarter, app-enabled tools that offer real-time diagnostics and remote control. Embracing these innovations now positions you to handle upcoming challenges with confidence. Try applying a laser level with remote adjustment for your next large-scale tiling or leveling project—it’s a game-changer that saves time and ensures precision. Ready to elevate your flooring craftsmanship? Dive into these advanced tips and make your next project your best yet!
Lessons Only Experience Can Teach About Flooring and Tile
One of the most valuable lessons I learned is that no matter how prepared you feel, unexpected challenges—like unseen metal in reclaimed wood or subtle subfloor shifts—can still catch you off guard. Embracing a meticulous, step-by-step approach, such as consistently scanning for hazards before sanding or leveling, saves you time, money, and frustration in the long run. I also realized that investing in quality tools and tech, from digital moisture meters to laser levels, can transform a complex project into an achievable masterpiece. Moreover, the importance of understanding your materials—be it the moisture content in hardwood or the composition of your subfloor—cannot be overstated. Recognizing these nuances turns a good project into a great one, highlighting that attention to the tiny details is what separates professionals from hobbyists.