
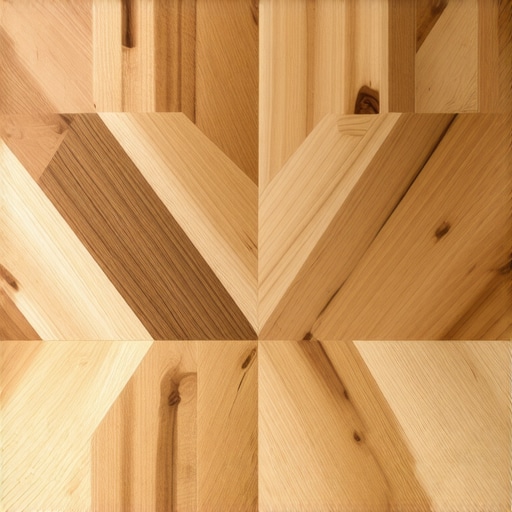
I remember the exact moment I realized I had bitten off more than I could chew with my first herringbone wood floor. After hours of painstakingly aligning strips, I stepped back to admire my work—and the pattern looked more like a jagged mountain range than the elegant zigzag I envisioned. It was frustrating, honestly. I had thought I had all the right tools and enough patience, but something was off. That lightbulb moment made me dig deeper, learn more, and eventually master the secrets to a flawless herringbone pattern.
Why Everything You Know About Wood Patterns Might Be Wrong
If you’re like me, you probably thought that aligning a herringbone pattern was just about patience and a good eye. But as I learned, the devil’s in the details—details that can make or break the entire aesthetic. What I didn’t realize initially was how critical the direction of the wood grain, the precise angles, and the subtle variations in each strip’s length and width are to achieving that seamless, high-end look. Trust me, skipping these steps can turn your project into a crooked mess—something no one wants, especially after investing time and money into your renovation.
According to the National Wood Flooring Association, proper installation techniques are vital to ensure the longevity and visual appeal of wood floors, especially in intricate patterns like herringbone. Ignoring these nuances can lead to uneven surfaces, gaps, and pattern distortion, which are difficult to fix once the flooring is laid down.
Are You Afraid Your Pattern Won’t Turn Out As Perfect As You Imagined?
Early on, I made the mistake of rushing through the layout phase. I thought I could just eyeball the pattern and fix issues as I went. Spoiler: that’s a surefire way to end up with a crooked, unprofessional-looking floor. But the good news is, with a few key techniques—like precisely measuring and using proper starter lines—you can turn your herringbone dreams into reality. Ready to discover the secrets that seasoned installers swear by? Let’s dive into the practical steps that will elevate your flooring game and give you results you’ll be proud of. And if you’ve faced any specific problems like uneven edges or misaligned planks, I’d love to hear your experiences—maybe I can help with some tips from my own journey.
Accurate Layout Launches Your Project
Begin by establishing your baseline: use chalk lines and a spirit level to mark the starting point of your pattern. A quick story—once, I spent hours eyeballing my initial line, only to realize it was slightly off. Instead, I used a combination square to set a perfect 90-degree angle, which dramatically improved the pattern alignment. Think of this as setting the foundation for a house; if it’s crooked here, everything else follows suit.
Measure and Cut with Surgical Precision
Marking the Strips
Measure the length of each plank meticulously, accounting for expansion gaps and pattern requirements. I once had a batch of planks cut almost perfectly—except for one that was slightly too long, throwing off the entire design. Using a tape measure and a carpenter’s square ensures each cut aligns perfectly with your layout.
Choosing the Right Tools
Equip yourself with a high-quality saw—preferably a miter saw with fine teeth for clean cuts. The right tool makes a difference: it reduces splintering and ensures precise corners, making your pattern look professional rather than jagged. Think of this as using a sharp knife for slicing bread versus a dull one; the difference is obvious.
Aligning and Securing the Pattern
Lay the first few rows without adhesive to check the fit. Once satisfied, apply your recommended adhesive—whether it’s a floating method or glue-down—according to the manufacturer’s instructions. I learned this the hard way when I skipped the adhesive step, and the pattern shifted over time, causing gaps. For locking patterns like herringbone, ensure each plank clicks into place securely, much like puzzle pieces.
Ensuring a Flat, Level Surface
A common mistake is neglecting subfloor preparation. Use a leveling compound to fill low spots and sand high areas. In my experience, neglecting this step led to uneven flooring that creaked and showed imperfections. For large projects, a good practice is to perform a dry run with a straightedge—think of it as checking the floor’s backbone before laying down the pattern. For detailed guides on this, visit this resource.
Fine-Tuning for Pattern Perfection
After initial installation, inspect the pattern for misalignments or gaps. Use a tapping block and mallet to gently nudge planks into perfect contact, maintaining consistent spacing. I once found a row slightly skewed, and with a few taps, I corrected it before adhesive set. This hands-on attention is crucial—remember, small adjustments can prevent big issues later.
Edge and Transition Details
Finish with careful trimming to fit along walls and doorways. Use a fine-tooth saw and a scribing technique—press a piece of scrap against the curve, trace it, then cut to match. During my last project, this method allowed me to create seamless transitions with minimal gap visibility, elevating the overall look.
For further tips on perfecting your flooring project, check out this article. Remember, patience and attention to detail are your best allies in achieving that flawless, high-end herringbone pattern.
Even seasoned DIY enthusiasts often fall prey to misconceptions about flooring installation, especially when it comes to ensuring a perfectly level subfloor or choosing the right materials. One pervasive myth is that a perfectly flat subfloor isn’t essential; in reality, even minor imperfections can cause uneven tile or squeaky hardwood over time, leading to costly repairs. Professionals emphasize that meticulous surface prep, including proper leveling techniques—like using an innovative self-leveling compound—can save you frustration and money in the long run, as detailed in [this comprehensive guide](https://tiletrendshop.com/mastering-floor-leveling-pro-secrets-for-perfect-installations).
Keep Your Floors in Top Shape with the Right Tools
Having the best tools is essential for maintaining your flooring’s appearance and longevity. I personally swear by the Miter Saw with Fine Teeth for any touch-up or repair work, because it offers precision cuts that prevent damage to delicate edges, especially when trimming hardwood or tile. Using a quality laser level ensures your surfaces stay perfectly aligned over time, which is crucial for large installations or when scaling up to multiple rooms.
Why I Recommend a Digital Moisture Meter
This device is indispensable for monitoring moisture levels in subfloors and hardwoods, helping prevent buckling or warping down the line. I regularly check moisture content before and after cleaning projects, ensuring the environment remains stable. Over-drying or excess moisture can wreak havoc on your floors, but a reliable moisture meter acts as your early warning system—saving you time and costly repairs. Check out this guide to understand optimal moisture levels before and after installation.
Routine Maintenance to Extend Flooring Life
Consistent cleaning with approved products, like pH-balanced wood cleaners, maintains the finish and prevents buildup. Avoid harsh chemicals that can degrade finishes; instead, use microfiber mops and soft brushes. For hardwood floors, applying a quality polish every six months restores luster and adds a protective barrier against scratches.
Scaling and Long-Term Care
If your project expands, consider investing in modular or floating flooring options. These systems are easier to install over existing surfaces and allow for expansion, which accommodates natural wood expansion caused by humidity changes. In the future, I see the trend leaning toward smart flooring materials embedded with sensors that can monitor conditions and alert you when maintenance is needed, as discussed here.
How Can I Keep My Floors in Peak Condition for Years?
Regularly inspecting for early signs of damage, such as loose tiles or minor gaps, allows you to address issues before they escalate. Use a set of precision tools like a Tapping Block and Mallet to gently realign misfit planks or tiles, preserving the pattern integrity. Remember, routine care combined with high-quality tools keeps your flooring looking and functioning beautifully for decades.
For detailed techniques on long-term flooring care, refer to this resource. And don’t forget—try implementing the tip of using a moisture meter regularly; it’s a game-changer in preventing costly repairs down the road. Ready to upgrade your maintenance routine? Grab that moisture meter and start monitoring your floors today!

What I Wish I Knew Before Laying My First Herringbone Floor
One of the most valuable lessons I learned was the importance of patience over speed. Rushing through measurements and cuts often led to misalignments that were hard to fix later, wasting both time and materials. Taking the extra time to double-check every step, especially the initial layout, pays off immensely in the final pattern’s perfection.
How Skipping Surface Prep Can Cost You Big
I underestimated the significance of a perfectly level subfloor early on. Skipping proper surface preparation meant I faced uneven surfaces and squeaks that marred the beauty of my finished project. Now, I know that thorough leveling is the foundation of a stunning, long-lasting floor—don’t skip this crucial step.
Why Details Like Grain Direction and Precise Angles Matter
At first, I thought matching planks was about visual similarity, but I quickly realized that the direction of wood grain and exact angles make a subtle but powerful difference in achieving that high-end look. Small adjustments here can elevate your work from good to professional-grade.
Reflections on Tool Choice and Technique
Using a high-quality miter saw and the right measuring tools dramatically improved my cut accuracy and pattern alignment. Investing in the correct tools isn’t just about convenience; it’s about ensuring a flawless finish that stands the test of time.
Concluding Wisdom for Fellow Floor Enthusiasts
Ultimately, every mistake taught me the value of meticulous preparation, attention to detail, and patience. These lessons become second nature with practice, and they’ll transform your flooring projects from amateur efforts into professional masterpieces. For further insights, exploring resources like this comprehensive guide can help solidify your skills.