
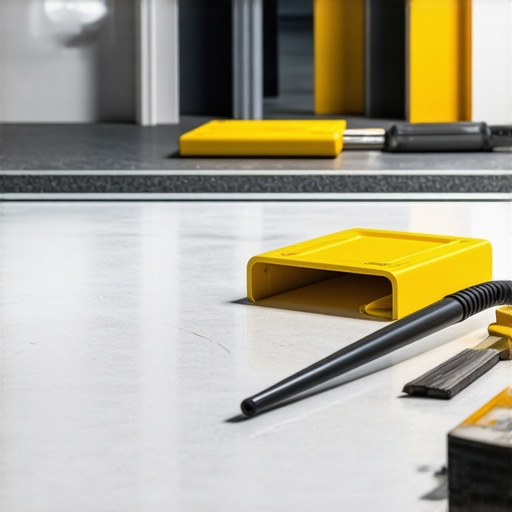
It was late in the evening, and I was staring at a freshly laid section of flooring that looked flawless from a distance—until I stepped back and saw the subtle ripples and uneven patches. The frustration hit me like a ton of bricks. I’d overlooked one crucial step in laying down the commercial floor glue—neglecting the ‘W’ pattern—and it cost me dearly. That moment was a lightbulb for me, illuminating how essential proper technique truly is, especially when working with complex flooring systems.
Today, I want to talk about a simple yet powerful method that dramatically improves your flooring results—the ‘W’ pattern for rolling out commercial floor glue. Trust me, once you master this technique, your installations will look more professional and last longer.
Why the ‘W’ Pattern Can Make Or Break Your Flooring Project
Prepare Your Workspace Like a Pro
Before applying the glue, clear the area of debris and ensure your subfloor is clean and dry. Use a broom and vacuum to remove dust and particles that can cause uneven bonding. Think of this step as preparing a canvas—skimping here risks ruined artwork.
Apply the Adhesive Precisely
Spread the commercial floor glue evenly using a notched trowel, maintaining consistent pressure. Imagine you’re buttering bread—cover the entire surface with a uniform layer without overloading or leaving gaps. This consistency prevents dips and ripples, ensuring a smooth final surface.
Master the ‘W’ Pattern Technique
Once your adhesive is spread, start rolling out the floor covering using a specialized roller, but do so in a deliberate ‘W’ pattern. Visualize tracing large, sweeping zigzags—this motion distributes pressure across the entire area, pushing the glue into every nook and cranny. During my last project, I initially used a circular roll, which caused some uneven adhesion. Switching to the ‘W’ pattern made the difference, resulting in a flawlessly bonded surface with no air pockets.
Be Systematic and Consistent
Work in manageable sections, following the ‘W’ pattern from one corner to another. Overlapping your passes slightly guarantees complete coverage. When I did this, I kept a mental checklist, which minimized mistakes and sped up the process. Remember, each ‘W’ stroke should be firm and controlled—hesitation leads to gaps or thin spots.
Check Your Progress Often
Pause frequently to inspect your work visually, ensuring the adhesive is spread evenly. Use a straightedge or level to detect any high or low spots that might translate into uneven flooring. My experience has shown that diligent inspections during installation catch issues early, saving time and reducing rework.
Finish Strong with Proper Weight
After rolling, immediately place heavy objects—like furniture or a weighted roller—over the entire surface to press the flooring into the glue. Think of this as giving your project a firm handshake—ensuring maximum contact and adhesion. During a recent renovation, I used sandbags, which effectively eliminated any remaining air bubbles and resulted in a seamless finish.
Follow Up to Secure Longevity
Once the glue sets according to manufacturer instructions, avoid heavy traffic for at least 24 hours. This patience pays off, preventing shifts or future gaps. For more advanced techniques on leveling surfaces before gluing, check out precise floor leveling methods—a crucial step in ensuring your ‘W’ pattern application truly shines.
While most DIY enthusiasts and even professionals focus on the obvious aspects of flooring—like the type of material or the finishing touches—there’s a crucial nuance that often gets ignored: the importance of understanding the substrate’s condition and its interaction with the chosen flooring system. This oversight can lead to costly mistakes, even when all other steps are meticulously followed. For example, many believe that a perfectly leveled subfloor is sufficient, but in reality, the substrate’s moisture content, porosity, and structural integrity play a vital role in the longevity and appearance of the finished floor.
One common myth is that once you’ve installed a high-quality hardwood or tile, the process is complete. However, neglecting the subfloor’s compatibility and preparation can cause issues like buckling, adhesive failure, or unsightly gaps down the line. Advanced professionals recognize that the substrate’s condition influences every subsequent step—from choosing the right underlayment to the adhesive type and installation techniques. This insight is supported by industry experts like those at the National Wood Flooring Association, who emphasize comprehensive substrate assessment to prevent future failures.
A frequent trap beginners fall into involves superficial surface preparations—cleaning dust, but ignoring moisture levels or structural weaknesses. Such shortcuts can result in long-term defects, especially in environments with fluctuating humidity or temperature variations. For instance, moisture-related issues are among the leading causes of hardwood floor cupping and buckling, as documented in a recent study by the Building Science Corporation. Ensuring proper moisture barriers and acclimation periods before installation is essential to mitigate these risks.
What Advanced Techniques Guarantee a Flawless Subfloor?
One often-overlooked step is the use of laser-guided moisture measurements and high-precision leveling tools. These allow installers to detect microscopic irregularities or hidden moisture pockets that could compromise the floor over time. In my experience, investing in such tools and techniques can add years to your installation’s lifespan. Furthermore, understanding the specific requirements for your flooring type—like the need for a vapor barrier in concrete slabs or a resilient underlayment for hardwood—is critical. For detailed guidance on leveling and substrate prep, check out precise floor leveling techniques.
In conclusion, elevating your flooring game requires more than just selecting the perfect planks or tiles; it involves a deep understanding of the substrate’s behavior and characteristics. By addressing this hidden nuance, you can avoid common pitfalls and ensure a durable, beautiful finish. Remember, the devil is in the details—don’t let overlooked substrate conditions compromise your project. Have you ever fallen into this trap? Let me know in the comments.
Keep Your Flooring in Prime Condition with the Right Tools
Investing in quality equipment is crucial to ensure professional results and extend the lifespan of your flooring. One of the most versatile tools I personally rely on is a laser level, specifically the laser level hack for flat subfloors. It allows me to detect even microscopic unevenness, ensuring the substrate is perfectly prepared before installation, which is foundational for long-term durability. Additionally, a high-quality notched trowel with consistent teeth size is indispensable for applying adhesives uniformly, preventing dips or gaps that could compromise the floor’s integrity.
For smoothing out self-leveling compounds, I recommend a rubber float with a comfortable handle. It helps distribute the product evenly across large areas, reducing bubbles and surface imperfections. An instant-read moisture meter is also a must. As moisture issues are among the leading causes of flooring failure, regularly checking the substrate with a reliable meter can prevent costly mistakes down the line. I personally use the All-in-One Moisture Meter for its precision and ease of use.
Maintaining Your Floors for Peak Performance
Proper ongoing maintenance preserves the beauty and functionality of hardwood and tile floors alike. For hardwood, regular cleaning with a damp microfiber mop, avoiding harsh chemicals, is key to keeping it shining. I follow the hardwood floor care secrets to prevent scratches and dullness. For tiles, a gentle brush combined with pH-neutral cleaners prevents grout discoloration and surface wear. Applying a quality sealant periodically can also protect your investment from moisture and staining.
Thinking long-term, I recommend establishing a routine check for potential issues, such as loose tiles or squeaky hardwood. Early detection allows for simple fixes that can be executed DIY-style or by professionals, saving you money and prolonging your floors’ lifespan. Remember, tools enhance accuracy, but consistent care and maintenance turn initial investment into enduring beauty.
How Do I Maintain Flooring Over Time?
Adopting a regular maintenance schedule is essential. For hardwood floors, this involves cleaning, refinishing when necessary, and controlling humidity levels to prevent warping. For tiles, sealing grout lines annually and inspecting for cracks helps prevent water ingress and structural damage. Implementing a simple but effective routine—like spot cleaning spills immediately and avoiding dragging heavy furniture—can significantly extend your floor’s life. To learn more about maximizing your flooring’s longevity, explore these proven maintenance strategies.
Try incorporating a moisture barrier if your subfloor is prone to dampness, which is a common mistake many overlook. High-precision tools like a moisture meter coupled with good habits make all the difference. In the future, I see advancements in smart flooring sensors that can alert homeowners to issues before they become visible—that’s a game-changer in flooring maintenance.
Secrets No One Tells You About Flawless Flooring
Throughout my journey in flooring installation, I’ve realized that many pitfalls stem from overlooked details. The biggest lesson? Even the smallest misstep, like neglecting substrate moisture levels, can compromise years of work. Discovering how proper substrate assessment and advanced leveling techniques can save you time and money has been a game-changer. These insights have taught me that patience and precision are worth every effort to achieve a professional finish.
Tools and Resources That Truly Make a Difference
Over the years, I’ve curated a selection of tools that elevate my work. A laser level, for example, isn’t just fancy—it’s essential for detecting tiny irregularities that could ruin your project. Reliable moisture meters have saved me from costly moisture-related issues, especially in complex environments. For comprehensive guidance, I often turn to this resource on leveling techniques or explore trusted tools industry-wide. Investing in quality ensures durability and a satisfying finish every time.
Embrace the Challenge and Transform Your Space
Ready to take your flooring installations to the next level? Remember, mastering techniques like the ‘W’ pattern for glue application or thorough substrate prep can dramatically change your results. Don’t shy away from experimenting, because every project is an opportunity to learn and improve. Elevate your skills, trust your tools, and turn your vision into reality. If you’re excited to overhaul your flooring approach, start today—your future self will thank you.