
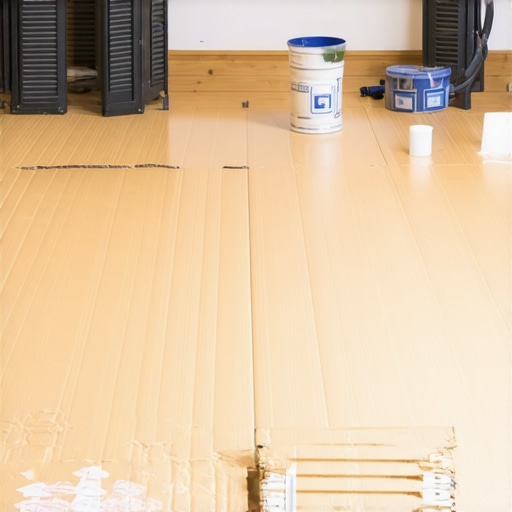
It was one of those mornings where I was halfway through painting my living room when I noticed it—tiny scratches, scuffs, and a stubborn paint drip had marred my brand-new hardwood floor. My heart sank. I’d spent so much time choosing the perfect color and prepping the walls, only to realize I’d overlooked a simple but crucial detail: protecting my floors. That moment was my lightbulb moment, realizing there had to be a better way to shield those gorgeous surfaces from the chaos of renovations.
The Secret Weapon You Never Knew You Needed for Paint Protection
For years, I relied on old sheets, flimsy plastic, or whatever was clean and draped around. Sure, it worked… kind of. But it often slipped, crumpled, or created more mess than it prevented. That’s when I stumbled upon the idea of using The Cardboard Shield—a game changer in floor protection. Made from sturdy, recycled cardboard, this simple yet effective barrier conforms to your space and keeps paint, scratches, and dents at bay during your projects.
What I love most? It’s affordable, easy to install, and can be cut to fit any shape or size. Plus, it won’t leave a sticky residue or stain your floors. After a few trial runs, I realized that this little hack saved me hours of cleanup and prevented costly repairs. If you’re tired of circling back to fix accidental damages, then keep reading. I’ll guide you through how to implement this approach seamlessly in your next big project.
Will a cardboard barrier really make a difference? That’s what I wondered at first, too.
Initially, I was skeptical. I thought, “It’s just cardboard—how effective can it be?” My early mistake was underestimating the importance of proper coverage and positioning. I didn’t secure the edges well, which allowed paint splatters to sneak through or for the shield to shift during work. Guess what? That led to more mess, not less.
I learned that for best results, the cardboard needs to be taped tightly along the edges, creating a seamless barrier. This small adjustment transformed my messy paint days into smooth, worry-free projects. It’s a simple tip, but one that makes a huge difference—trust me, I’ve been there. If you’re thinking about how to keep your gorgeous floors pristine during renovations, I recommend taking a look at [flooring installation mistakes to avoid for lasting results](https://tiletrendshop.com/flooring-installation-mistakes-to-avoid-for-lasting-results). It’s full of practical advice for homeowners like us who want the best outcome without breaking the bank.
Now, are you ready to discover how to implement this protective measure effectively? Let’s dive into the step-by-step process that will keep your floors looking new, even when chaos is just around the corner.
Prepare Your Space with Precision
Start by clearing the room of furniture and fixtures. Sweep and vacuum thoroughly to remove dust and debris, which can cause scratches or interfere with protective coverings. Lay down a sturdy, moisture-resistant underlayment if needed, especially for areas prone to spills or humidity. Think of it as laying a smooth, clean canvas before painting—every detail counts to ensure your floors remain flawless.
Cut and Position Cardboard Shields for Optimal Coverage
Measure the areas you want to protect, particularly high-traffic zones and corners. Using a utility knife, cut large pieces of recycled cardboard to fit these spaces snugly. When placing the cardboard, ensure it extends up the baseboards slightly to create a seamless barrier. Use painter’s tape or duct tape to secure the edges tightly, preventing any gaps where paint splatters or tools might sneak through. I remember once accidentally spilling a bucket of paint during a messy project; I had taped the cardboard so securely that the spill was contained entirely within the shield—saving me hours of cleanup.
Secure Edges to Prevent Shifting and Gaps
Apply tape along the perimeter of each cardboard piece, pressing firmly to eliminate any loose sections. Overlapping pieces slightly ensures no part of the floor is left exposed. This method is similar to sealing seams in waterproofing—it creates a barrier that holds up against splatters, drips, or accidental movement of tools. Skipping this step often led me to find paint on my floors days after, emphasizing the importance of a tight seal.
Protect Corners and Edges with Additional Layers
In areas where tools or ladders might brush against walls or corners, add extra cardboard flaps or foam edges. For corner junctions, angle the cardboard so it covers both the wall and floor, then tape firmly. This approach is like wrapping a gift—focused on protecting every vulnerable point. During my last project, a protruding ladder accidentally scraped the floor, but with layered shields secured properly, the damage was minimal.
Implement Oversized Coverings for High-Risk Zones
Use larger sheets of cardboard or thick plastic for zones with heavy foot traffic or where paint may accidentally splash beyond intended areas. Overlap these sheets onto the existing shields to prevent any gaps. Think of it as a raincoat over an umbrella—it provides an extra buffer against surprises. I learned that doubling up in these zones saved me from multiple touch-ups later.
Maintain and Adjust During the Work
Periodically check the taped edges and reposition if needed. If you notice any shifting, add more tape or weights—like small bricks or stones—on top of the shields. This is especially important when moving equipment or during extended projects. Once, I neglected this and found a cardboard piece shifted, exposing my floor; re-taping swiftly avoided a costly repair.
Final Removal with Care
After completing your project, carefully remove the tape and shields, pulling gently to avoid pulling up any finish from the floor. Dispose of or recycle the cardboard responsibly. Cleaning residual tape glue with a soft cloth prevents sticky spots and preserves your floor’s shine. Just as a painter lifts their canvas carefully to reveal their work, removing these shields carefully ensures your floors stay pristine.
Many homeowners assume that installing hardwood floors is straightforward or that once laid, they require minimal upkeep. However, even experienced DIYers often overlook nuanced aspects that can compromise the longevity and appearance of their flooring. One prevalent misconception is that all hardwoods are equally resistant to moisture; in reality, engineered hardwoods tend to handle humidity fluctuations better, making them suitable for basements or kitchens. Another advanced mistake involves improper acclimation of wood planks before installation—failing to allow the material to adjust to the room’s climate can lead to warping or gaps over time, a detail emphasized by experts in floor leveling techniques.
A common myth is that quality installation eliminates the need for regular maintenance. In fact, diligent care extends the life of your floors significantly. For instance, traditional sweeping may seem sufficient, but using a vacuum with a soft brush can prevent scratches from trapped debris. Over-mopping or using harsh cleaning agents is another mistake that can dull finishes or damage the wood; instead, opt for specialized hardwood floor cleaners outlined in our hardwood care guide.
**What Most People Get Wrong About Floor Leveling and Tile Installation**
One often overlooked nuance in floor leveling is the importance of assessing the subfloor’s condition meticulously. Many skip this step or rely solely on self-leveling compounds without addressing underlying issues such as moisture or structural instability. This oversight can cause gaps or uneven surfaces that become glaring once tiles are laid. Advanced installers utilize precise techniques, like moisture barriers and mechanical fasteners, to ensure stability, as discussed in floor leveling for a perfect finish. Conversely, relying strictly on self-levelers without proper surface preparation risks a soft, wobbly tile surface.
Understanding thermal expansion in tiled surfaces is another sophisticated consideration. Thinner, more brittle tiles may crack under temperature fluctuations if expansion joints aren’t incorporated. This concept is addressed in flooring installation challenges, which stresses planning for joint placement based on climate variations.
Some believe that choosing large-format tiles simplifies installation. While they can reduce grout lines, they demand extremely flat subfloors; even minor dips or humps become visible. Installing large tiles without proper leveling can cause lippage, an advanced mistake that ruins aesthetics and can damage tiles over time. Advanced techniques involve specialized trowels and careful substrate preparation to ensure the substrate’s smoothness, as elaborated in tile installation pointers.
Have you ever fallen into this trap? Let me know in the comments. Mastering these nuances can elevate your craftsmanship from good to professional-grade, ensuring your floors look flawless and last for decades.Maintaining your flooring’s pristine condition requires not only careful installation but also the right tools and consistent upkeep. Investing in quality equipment ensures your floors remain beautiful and functional for years to come. One indispensable device I’ve found invaluable is a professional-grade vacuum with a soft brush attachment. Unlike standard vacuums, this model prevents scratches by gently lifting debris without damaging delicate finishes, making routine cleaning more effective and less risky. Additionally, a moisture meter is crucial when assessing subfloor conditions or checking wooden planks, particularly if you’re addressing issues like warping or unevenness. Regularly monitoring moisture levels helps prevent long-term damage to hardwoods and tiles, which can be costly and time-consuming to repair. For tile installation or leveling projects, a laser level ensures precision, allowing you to achieve flawless surfaces with minimal guesswork. I personally rely on a laser for its accuracy and ease of use, especially when aligning large-format tiles or ensuring consistent grout joints. When dealing with self-leveling compounds, a mixing paddle attached to a variable-speed drill provides smooth, lump-free pours, critical for achieving the seamless finish you desire. Using a quality trowel with the appropriate notch size—commonly a 1/4-inch notch for large tiles—also plays a significant role in proper thinset application, reducing lippage and ensuring durability. Looking ahead, the trend is moving toward smarter, app-connected tools that can provide real-time feedback on moisture, leveling accuracy, and material application, streamlining the DIY process and reducing errors. Embracing these innovations, together with consistent maintenance routines, will keep your floors in top shape longer. To maximize your results, try incorporating a moisture meter into your routine or upgrading to a laser level; these simple steps can dramatically improve installation quality and long-term appearance. For expert advice on advanced leveling techniques, I recommend reviewing resources like precise floor leveling methods to help ensure every project is a success.
What I Wish I Knew Before Protecting Floors During Renovations
One of the most eye-opening lessons I learned was the importance of securing my protective barriers properly. Initially, I underestimated how even small gaps could lead to costly damage, and I had to redo some work. Now I tape every edge meticulously, understanding that a tight seal makes all the difference.
Another insight was that not all cardboard is created equal. Thicker, quality recycled cardboard holds up better against spills and foot traffic, prolonging its effectiveness. Choosing the right material at the start saved me hours and frustration in the long run.
Lastly, I discovered that regular inspection and adjustments during the project are essential. Shifting furniture, moving ladders, or even heavy tools can shift the shields. Quick re-taping or repositioning ensures consistent protection till the final sweep.
Tools and Resources That Transformed My Approach to Flooring
For precise and durable floor leveling, I rely heavily on techniques discussed here. They’ve helped me avoid common unevenness that plagues DIY projects. For caring for hardwood floors post-installation, this comprehensive guide has become my go-to resource, ensuring my floors stay pristine for years.
Additionally, I’ve incorporated a laser level into my toolkit—streamlining alignment and ensuring perfect flooring surfaces. Combining these tools with tutorials on installing and leveling has profoundly improved my craftsmanship.
Your Next Move in Creating Flawless Floors
Don’t let hesitation hold you back. Whether you’re embarking on hardwood refinishing or tile installation, the key is to prepare, protect, and execute with patience. Each project is an opportunity to learn and perfect your skills. Dive into expert resources, upgrade your toolkit, and approach each step with confidence. Your floors will thank you for it—and so will your future self.