
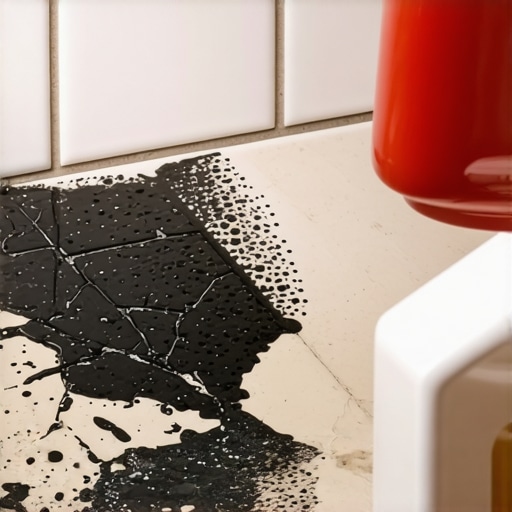
I remember the moment vividly—staring at my freshly installed tile floor, only to notice unsettling white stains and crumbling grout. It was a lightbulb moment for me. I had trusted a popular cleaning myth, using a vinegar mixture to keep my tiles sparkling, not realizing I was unwittingly sabotaging my grout’s integrity. That realization was a wake-up call and a lesson in how seemingly harmless household hacks can have hidden dangers.
The Hidden Dangers of Common Cleaning Hacks
Before I dive into the specifics, let me ask—have you ever used vinegar, lemon juice, or other acidic solutions on your grout without a second thought? If so, you’re not alone. Many homeowners swear by these natural cleaners, believing they’re gentle yet effective.
However, what many don’t realize is that acidic cleaners can erode the cement-based grout over time, weakening its structure and leading to cracks, discoloration, or even complete breakdown. This often happens gradually, so you may not notice the damage until significant issues arise.
Is Your Favorite DIY Cleaner Actually Worth the Hype?
One mistake I made early on was assuming that all natural or homemade solutions are safe for every part of my flooring. I didn’t realize that grout, being porous and cementitious, is particularly vulnerable to acids. This misconception cost me dearly—my grout’s lifespan was shortened significantly.
According to experts, using the wrong cleaning products can void warranties and cause long-term damage. If you’re interested in maintaining your tiles and grout durability, it’s crucial to understand which cleaning methods to adopt. For more reliable tips, check out [tile installation pointers that save time and money](https://tiletrendshop.com/tile-installation-pointers-that-save-time-and-money).
So, the question is: How do you protect your investment while keeping your floors spotless? That’s exactly what we’ll explore next. Keep reading to learn about safe cleaning practices and some proven solutions to prevent grout deterioration.
Choose the Right Cleaning Tools and Products
Start by selecting mild, pH-neutral cleaners specifically formulated for tile and grout. Avoid acidic solutions like vinegar or lemon juice, which can erode the cementitious material, especially over time. Use soft-bristled brushes or microfiber cloths instead of abrasive scrubbing pads to prevent scratching or damaging the grout surface.
Test in a Small, Hidden Area First
Before applying any new cleaning method, test it on a small, inconspicuous spot. Lightly scrub and observe for discoloration or deterioration. This prevents accidental damage to larger, visible sections of your floor. I once tested a homemade baking soda paste on a corner of my kitchen grout—initially successful, but it left a dull residue that was hard to remove, teaching me the importance of testing first.
Use Proper Technique for Stain Removal
Apply cleaning solutions with a gentle scrubbing motion, letting the cleaner sit for 5-10 minutes if necessary. Do not pour excessive liquid; instead, dampen your brush or cloth to avoid over-saturating the grout. Excess moisture can weaken grout bonds and promote mold growth. During my last grout cleaning, I used a spray bottle to control the amount of cleaner, which minimized the risk of over-wetting and ensured even cleaning.
Rinse Thoroughly and Dry Promptly
After cleaning, rinse the area with clean water to remove any residue. Use a damp microfiber cloth to wipe down the surface, then thoroughly dry with a soft towel. Leaving moisture on grout lines can cause deterioration and mold. I once hurried through a rinse, forgetting to dry properly, which led to a slight discoloration that took months to fade—an easy mistake to avoid with simple diligence.
Seal Grout Regularly for Extra Protection
Applying a high-quality grout sealer creates a protective barrier against moisture, stains, and chemical damage. Sealers should be reapplied every 1-2 years, especially in high-traffic areas. When I sealed my bathroom grout, I noticed a significant drop in stains and grime buildup, making future cleaning easier and preserving the integrity of the grout for years.
Schedule Expert Maintenance When Needed
For extensive damage or stubborn stains, consult a professional who specializes in tile and grout restoration. Expert techniques like deep cleaning, regrouting, or sealing can restore your floors without risking accidental damage. If your grout is severely deteriorated or cracked, don’t wait—mitigate further harm by reaching out via our contact page.
Many homeowners assume that flooring installation is straightforward: lay down the tiles or hardwood, level the surface, and enjoy years of durability. However, this oversimplification can lead to costly mistakes. A prevalent misconception is that standard subflooring is universally suitable for all types of flooring, but in reality, specific subfloor conditions demand tailored solutions. For example, using a generic leveling compound without considering the underlying subfloor’s condition can result in uneven surfaces, causing tiles to crack or hardwood planks to shift over time. To avoid these issues, it’s essential to understand the nuances of floor leveling. Proper assessment and meticulous application of precise leveling techniques, such as those outlined in our detailed guides, can save you headaches and money. A common myth is that thicker underlayment always leads to a better finish, but excessive thickness without proper bonding can create depressions and weak spots, leading to future damage. Furthermore, many believe that once a floor is installed, no further adjustments are needed—yet, even professionally laid floors benefit from periodic inspections and maintenance, especially in areas prone to moisture or temperature fluctuations. One often-overlooked aspect is the importance of understanding the specific requirements of your flooring material. For example, engineered hardwoods have different acclimation and installation needs compared to traditional solid wood, influencing long-term performance. Misjudging these details can cause ongoing issues such as warping or finish failure, which can be mitigated by consulting specialized resources like expert advice on hardwoods. An advanced tip is to recognize the critical role of expansion joints, especially in large open-concept areas. Neglecting expansion gaps can lead to buckling or gaps over time, a mistake that often appears after several seasons. According to industry experts, integrating these joints thoughtfully is key for longevity and structural integrity. Remember: flooring installation is as much an art as it is a science. Small oversights in planning or execution can compromise the entire project. So, the next time you consider installing or upgrading your floors, ask yourself—are you aware of these hidden nuances? Stay informed and work with professionals, and your floors will serve you well for decades. Ready to learn more about achieving flawless results? Dive into our comprehensive guides for the best practices. Have you ever fallen into this trap? Let me know in the comments.Achieving durable and flawless floors goes beyond initial installation. Keeping your flooring systems—whether tiles, hardwood, or level surfaces—working seamlessly requires the right tools, consistent maintenance, and a strategic approach to scaling your efforts over time. Personally, I rely on specific equipment that combines precision and ease of use to maintain top-notch results. For floor leveling projects, I swear by a high-quality self-leveling compound mixed with a variable-speed paddle mixer, which ensures an even pour and minimizes air bubbles. This setup, complemented by a rapid-setting grout removal tool, streamlines the process of fixing uneven joints without the mess of traditional chiseling.
How do I maintain my flooring systems over time?
One of my favorite investments is a digital moisture meter. Floors—especially hardwoods—are sensitive to fluctuations in humidity and moisture, which can cause warping or gaps. Using a moisture meter regularly helps me catch issues early, guiding me when it’s time to re-seal or adjust humidity levels in my space. For tile installations, I recommend a portable tile cutter with diamond blades, which offers cleaner cuts and reduces chipping—an essential when working with delicate porcelain or large-format tiles. Investing in tools like an oscillating multi-tool with grout removal attachments allows me to perform minor repairs swiftly without destructive demo, saving time and maintaining the structural integrity of the floor. By establishing a regular maintenance routine—such as sealing grout lines annually using a high-quality penetrating sealer—I can extend the lifespan of my floors significantly. Hardware like the Dewalt DW680K Tile Saw and the Bosch PSM 100A Multi-Tool have proven invaluable in my projects, thanks to their durability and precision. Moving forward, I predict that advances in IoT-enabled sensors will revolutionize floor maintenance, allowing homeowners to monitor subfloor moisture levels remotely and schedule proactive interventions. To truly master long-term flooring health, I encourage trying a comprehensive check using a moisture meter on different sections of your floor and then sealing vulnerable grout lines with a top-tier sealer. These small but impactful steps can prevent costly repairs down the line. For in-depth guidance, I suggest reviewing our detailed articles on tile maintenance and hardwood floor care secrets to keep your investment looking pristine for years to come.
Lessons Only the Pros Will Share
One of the most impactful lessons I learned was that not all DIY fixes are created equal. Using harsh chemicals or skipping proper testing can cause long-term damage, which sometimes isn’t apparent until years later. Ignoring subtle signs of subfloor issues during initial installation led to expensive repairs down the line, revealing the importance of meticulous prep work. I also discovered that patience is a virtue—rushing the curing process or skipping sealing steps in grout work will ultimately compromise the entire floor’s longevity. These lightbulb moments taught me that careful planning and respect for materials make all the difference in lasting results.