
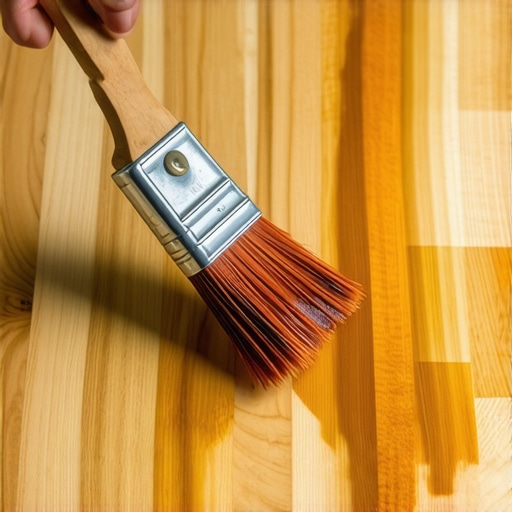
I’ll never forget the moment I stepped into my living room, hardwood floors gleaming beneath my feet, only to notice those stubborn streaks shimmering in the light. It was a lightbulb moment—after hours of painstaking staining, my perfect finish was marred by unsightly streaks that seemed impossible to fix. Frustration crept in, and I wondered if I’d wasted my time. Sound familiar?
Getting to the Heart of the Streaking Problem
Let me cut straight to the point: streaking happens when the stain isn’t applied evenly, and often, it’s due to common mistakes many DIYers make. But don’t worry—understanding why it occurs is half the battle won. What I learned early on is that the key to a flawless hardwood stain isn’t just about choosing the right color; it’s about mastering the application and blending techniques that prevent streaks from forming. In fact, a study by Flooring Installation Secrets reveals that uneven stain application is the leading cause of finish imperfections.
I’m here to tell you that resolving streaks is entirely achievable once you grasp the fundamentals. Today, we’ll explore practical strategies to avoid streaky finishes and achieve that smooth, professional look you desire. So, are you ready to tackle this challenge head-on? Let’s dive into the essentials of blending stain for a beautiful, streak-free hardwood surface.
Is Streaking Really That Bad—or Just a Material Quirk?
Early in my journey, I made the rookie mistake of rushing the staining process without proper prep, thinking I could fix imperfections later. Spoiler alert: it only made things worse. Trust me, when you see those streaks, it can feel like your project’s ruined. But here’s the truth: with the right techniques, streaks are fixable—and sometimes, they actually highlight the artistry in your work rather than diminish it.
Understanding the root causes of streaking helps you prevent them from happening in the first place. Whether it’s uneven stain application, inconsistent pressure, or improper blending, addressing these issues saves time, money, and frustration. Want to see how I turned my flawed project into a stunning finish? Keep reading—it’s easier than you think!
Prepping the Surface for Flawless Application
Begin by thoroughly cleaning your hardwood to remove dust, grease, and old finish residues. Use a vacuum or tack cloth to ensure no debris remains, as particles can cause uneven stain absorption, leading to streaks. Next, ensure the surface is perfectly level; any dips or rises will make it harder to apply stain evenly. If necessary, refer to this comprehensive guide on floor leveling to prepare your subfloor properly. I remember vividly the time I skipped this step and ended up with uneven patches that took hours of sanding to fix. Take your time here—it’s crucial for a smooth finish.
Choosing and Preparing Your Stain Properly
Select a high-quality stain suitable for hardwood and your desired color. Always stir the stain thoroughly—never shake or shake vigorously—to prevent bubbles that can cause application inconsistencies. When mixing, use a slow-speed paddle to keep the product uniform, as highlighted in this tip. My first attempt involved rushing this step, which resulted in uneven coloration—lesson learned: patience is key. Pour the stain into a separate container for blending, avoiding direct application from the can to minimize contamination.
Applying the Stain in Controlled, Even Strokes
Use a high-quality, natural bristle brush or a lint-free cloth for staining. Dip the applicator lightly; overloading causes drips and streaks. Work in manageable sections, roughly 3-4 feet wide, to maintain wet edges and prevent lap marks. Think of it like painting a wall: you want the stroke to flow seamlessly into the next. During my project, I adopted a ‘W’ technique—moving in a zigzag pattern to distribute the stain evenly—and found it greatly reduced streaking. Keep a wet edge at all times; if the stain starts to dry, you’ll see inconsistent color or streaks. Regularly refresh your applicator to avoid uneven application due to dried stain residue.
Blending and Wiping for a Unified Finish
After applying stain to each section, immediately go over the edges with a clean, dry cloth to blend. This process smooths out streaks caused by uneven absorption. Slightly overlapping wet edges prevents visible lines. I recommend working in a circular motion in tight spaces to promote uniformity. For areas prone to uneven absorption—like corners or edges—using a lint-free sponge can help spread the stain evenly. Once you’ve covered the entire surface, step back and assess for any inconsistencies. Applying a damp cloth lightly across the surface can also even out the stain and minimize streaks, provided you do so within the working time of the product.
Patience and Final Touches
Allow the stain to penetrate and dry as per manufacturer instructions—usually 4-6 hours. Resist the temptation to rush, as hurried work often leads to visible streaks or blotchiness. If you notice streaks after drying, lightly sanding the surface with fine-grit paper and reapplying the stain in thin, uniform coats can rectify the problem. Remember, a smooth, streak-free finish is achieved through meticulous preparation, controlled application, and patience—skills honed over many projects. Want to prevent future streaks? Consider finishing with a compatible clear coat, which can also help even out minor inconsistencies. For further insights, explore this expert guide on hardwood refinishing techniques.Many homeowners believe that selecting the perfect hardwood and simply installing it flawlessly guarantees a long-lasting, beautiful floor. However, this oversimplification overlooks critical nuances that can make or break your project. For instance, some assume that floor leveling is a minor step, but improper leveling is one of the leading causes of tile cracking and uneven surfaces—and it requires meticulous attention to detail, not just a quick pour of self-leveling compound. In fact, according to experts at this comprehensive guide, ignoring proper subfloor prep can lead to costly repairs down the line.
A common myth is that floor levelers are foolproof; many DIYers over-rely on them, failing to address underlying issues like subfloor rot or misaligned joists. This oversight traps homeowners into recurring problems, forcing expensive rework later. Instead, mastering *advanced* techniques—such as using a perimeter foam dam or employing precise leveling techniques—is essential for flawless results.
For those venturing into tile installation over uneven surfaces, understanding the importance of proper substrate preparation is vital. Skipping this step increases the risk of grout cracking or tiles shifting over time, which is why I always emphasize reading authoritative sources like this detailed tutorial.
Here’s a question for the serious DIY enthusiast: How can you tell if your subfloor has hidden dips that could sabotage your next project? The answer lies in using a steel trowel test, which reveals uneven spots before tile or hardwood installation. Incorporate such advanced inspection methods to prevent costly corrections later.
The key takeaway? Don’t fall into the trap of oversimplification. Combining a thorough understanding of subfloor conditions, selecting the right leveling technique, and employing precise tools elevate your project from average to professional-grade. For more tips, check out this article on installation pitfalls. Have you ever fallen into this trap? Let me know in the comments.
Keep Your Flooring in Top Shape with the Right Tools
Maintaining hardwood and tile floors is an ongoing process that requires precision and the right equipment. One of my favorite tools is the 360-degree multi-angle sander. I personally use this to smooth out minor imperfections during refinishing, ensuring a seamless, professional finish. Its adjustable angles allow me to reach tight corners and intricate patterns, which standard sanders often struggle with. Pair this with a high-quality vacuum like the compact HEPA vacuum to keep dust levels minimal, maintaining cleanliness and protecting your workspace.
For tile installation, I rely heavily on a digital level with laser projection. This device helps me verify substrate flatness with millimeter accuracy, preventing future cracking or uneven grout lines. It’s a game-changer that saves time and reduces rework, especially over large areas. I recommend choosing models with Bluetooth compatibility to record measurements and share data with your team. These tools are engineering marvels that drastically improve long-term results and peace of mind.
Predicting Future Trends in Floor Maintenance
The future of flooring care seems headed toward integrating smart technology. Imagine sensors embedded in your floors that alert you to issues like moisture buildup or structural shifts before visible damage occurs. As IoT devices become more affordable, adopting such innovations could become standard practice, further extending the lifespan of hardwood and tile surfaces. For now, maintaining your floors with reliable tools remains your best defense against premature wear.
How do I keep my floors looking pristine over time?
Regular maintenance is vital. Scheduled deep cleans with pH-neutral solutions prevent grime buildup that can cause scratches and dull finishes. Applying a quality polish, such as these specialized floor polishes, restores shine and protects against staining. Remember, less is more: avoid over-wetting, as excess moisture can warp wood or loosen tiles. Investing in microfiber mops and soft brushes ensures gentle handling during routine care, minimizing wear and tear.
Another proactive tip involves monitoring humidity levels, especially in climates with high fluctuations. Maintaining a relative humidity between 35-55% helps prevent wood expansion or contraction, which could lead to cracks or gaps. Using a smart hygrometer simplifies this task, alerting you when conditions drift out of optimal ranges. Consistency in maintenance not only preserves beauty but also prolongs your investment.
Consider trying the perimeter sealing technique for grout lines, which blocks dirt ingress and minimizes staining over time. This method involves applying a penetrating sealant around the edges, especially in areas exposed to moisture. For detailed procedures, I suggest reviewing the innovative sealing tips. It’s an easy, cost-effective way to ward off common issues and keep your floors looking new for years.
What’s next for flooring enthusiasts?
As technology advances, expect smart maintenance systems to become more accessible. Until then, sticking with proven, high-quality tools and routine checks is your best strategy for long-lasting results. Don’t hesitate to experiment with techniques like perimeter sealing or advanced polishing to elevate your flooring game. For a detailed approach to achieving flawless floors, visit this comprehensive guide. Start integrating these tools and tips today, and enjoy the satisfaction of durable, beautiful floors that stand the test of time.
Lessons That Changed My Approach to Flooring Projects
One of the most valuable lessons I learned was the importance of patience during surface prep. Rushing through surface cleaning or leveling only leads to streaks and uneven finishes, which are costly and time-consuming to fix later. Another insight was realizing that high-quality tools aren’t optional—they’re essential for a professional result. Investing in a good laser level or a multi-angle sander transformed my workflow. Additionally, I discovered that understanding the underlying subfloor issues can save me from frustrating surprises after installation. By taking the time to inspect and correct these issues beforehand, I ensured a smooth, durable finish. Lastly, I learned that blending stain or finish immediately after application creates a seamless look, preventing ugly streaks and blotches that might otherwise ruin a project.