
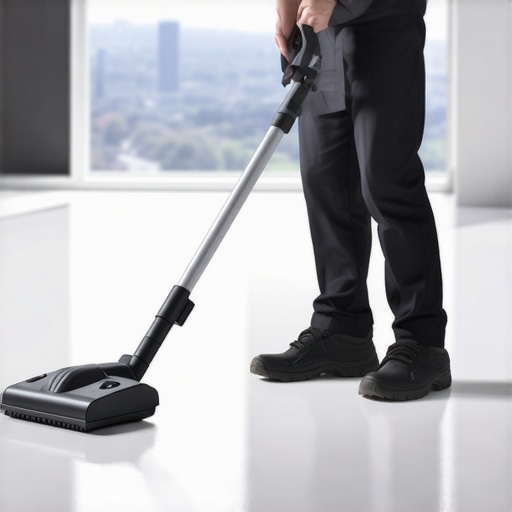
It was a moment of quiet despair in my living room—my new hardwood floor sat uneven, creaking, and uneven underfoot, despite my best efforts to prepare the subfloor. That realization hit me hard: I had overlooked one crucial step in the installation process, which later proved costly. We’ve all been there—thinking we did everything right, only to discover the inevitable: the floors are not as stable or level as they should be. But here’s the secret I wish I knew from the start: a simple vacuum test can save you from ending up with an uneven, squeaky mess.
Why The Vacuum Test Matters More Than You Think
Before you get knee-deep into picking out your tiles or hardwood planks, you need to be confident that your subfloor is solid and flat. It’s the foundation for everything that comes afterward. If it’s compromised—think loose, uneven, or soft—you’ll face problems like tiles cracking or hardwood creaking long after the installation. I learned this lesson the hard way, making a mistake I now see many homeowners and DIY enthusiasts repeat: skipping the subfloor inspection.
The vacuum test is a straightforward, cost-effective method to check the stability of your subfloor. It’s an underrated step, but believe me, neglecting it can lead to big headaches and expensive repairs down the line. When I first attempted my flooring project, I bypassed this crucial check and paid the price. It wasn’t until I did a simple vacuum test that I realized my subfloor was riddled with loose spots, which I then had to address—saving myself from more significant trouble later.
If you’re wondering why this test is so vital, consider this: according to industry experts, a solid subfloor is essential for durable, long-lasting flooring. The National Wood Flooring Association emphasizes that a well-prepared subfloor prevents issues such as warping, squeaking, and cracking, saving both time and money. The good news? It’s an easy step you can do yourself, and it pays off tremendously.
Are you familiar with the feeling of walking on a floor that just doesn’t feel quite right? Or worse, discovering squeaks and uneven patches months after installation? If so, you know how important it is to catch problems early. The vacuum test is your first line of defense against these issues, and it’s simple enough to do before laying a single tile or plank.
Up next, I’ll walk you through exactly how to perform this test correctly, what signs to look for, and how to interpret the results. Trust me—giving your subfloor a quick check with this method can make or break your entire flooring project. Curious to see how this works in real life? Check out our detailed guide on [floor leveling and preparation](https://tiletrendshop.com/the-ultimate-guide-to-floor-leveling-for-a-perfect-finish) and start transforming your space with confidence.
Clear the Area and Prepare Your Tools
Start by removing all furniture and debris from the room to get a clear workspace. You will need only a vacuum cleaner, preferably with a hose attachment, and a flashlight to examine the area afterward. Ensure your vacuum is clean and functioning properly to effectively assess the surface.
Identify Key Inspection Spots
Focus on areas prone to settling or known problem spots, such as near load-bearing walls, corners, or where previous repairs were made. Mark these spots with painter’s tape or chalk for easy reference. This targeted approach is similar to how professionals like those in floor leveling guides advise addressing high-risk zones first.
Perform the Vacuum Test
Place the vacuum hose directly onto the subfloor at your marked spots. Press firmly enough to create a seal around the hose opening, then turn on the vacuum. If the vacuum pulls or if you notice the hose lifting slightly off the surface, it indicates the presence of loose or soft spots beneath. This is akin to how I discovered loose sections in my own subfloor, which caused creaking and unevenness later on.
Interpreting the Results
Strong suction or movement suggests areas with insufficient support or unevenness. These spots can be fixed by adding shims, reinforcing with subfloor patches, or leveling compounds. Remember, ignoring these signs often leads to problems like cracking or squeaking down the line, as highlighted in common installation mistakes here.
Address Detected Issues Immediately
If you find any weak or loose spots, take action before proceeding with the main flooring installation. Stabilize the subfloor by screwing down loose sections, applying patches, or using self-leveling compounds if necessary. For detailed techniques, consider consulting resources such as precise leveling methods. This proactive step helps prevent future issues and ensures a solid foundation.
Document Your Findings
Make notes of all problematic areas and the corrections applied. This record can be valuable for future reference or if you encounter warranty claims or professional inspections later. A thorough inspection like this is small effort for significant long-term benefits, preventing costly repairs as emphasized in flooring installation warnings.
Many underestimated the intricacies of professional flooring installation, falling for myths that can sabotage even meticulous DIY projects. One widespread misconception is that leveling is a one-time step, but in reality, subtle nuances like understanding the moisture content of subfloors or the material’s expansion properties are crucial. For instance, ignoring the importance of proper acclimation of hardwood or tile can lead to warping or cracking later, as highlighted in expert resources on floor leveling.
Another trap is rushing the curing or setting periods, which many believe are flexible, yet premature walking or placement can cause uneven surfaces or bonding failures. Advanced installers often emphasize inspecting subfloor conditions thoroughly, not just visually but with tools like moisture meters, to mitigate unseen issues that cause problems down the line.
A common myth is that a perfectly leveled subfloor guarantees a flawless finish—this isn’t entirely true. Small deviations, often unnoticed, can become glaring once the final layer is applied. Mastering the nuances of floor prep, such as substrate smoothing with specialized compounds, can be the difference between a stunning, durable floor and one plagued with squeaks or dips.
Some believe that the visual pattern of tiles or hardwoods can mask underlying flaws; however, seasoned professionals warn that patterns can highlight subfloor imperfections if not addressed beforehand. This underscores the importance of comprehensive prep work, which is detailed extensively in our comprehensive step-by-step guide to flooring installation.
Think about the common mistakes like neglecting expansion gaps or inadequate adhesive application, mistakes that seem minor but can cause significant issues like buckling or delamination. Experts advocate for meticulous attention to detail at every phase, from initial measurements to finishing touches.
From an advanced perspective, understanding how environmental factors like humidity fluctuations can subtly influence materials is vital. Studies in material science reveal that even minor moisture variations can generate stresses within flooring materials, leading to long-term damage—this is why controlling indoor climate and using proper underlayments are often overlooked but essential steps.
Have you ever fallen into this trap? Let me know in the comments.
For more expert insights, explore our article on common installation mistakes to avoid and elevate your project from amateur to professional quality.Maintaining your flooring over time is crucial to preserve its beauty and durability. Investing in the right tools can make all the difference in keeping your hardwood and tile floors in top condition. I personally recommend a high-quality orbital sander for refinishing hardwood. Its variable speeds and ergonomic design allow for controlled sanding, minimizing scratches and ensuring a smooth finish, especially when applying expert refinishing techniques from Hardwood Floor Refinishing Tips for 2025. For tile maintenance, a grout cleaning machine equipped with oscillating brushes effectively removes embedded dirt without damaging the grout lines, saving you from costly repairs or regrouting down the line.
Adopting routine cleaning with microfiber mops paired with pH-balanced cleaners prevents dirt buildup that can cause scratches and wear. I also use a moisture meter regularly to monitor humidity levels, especially in areas with engineered wood, as fluctuations can lead to warping or cupping. Maintaining a stable environment, ideally between 35-55% relative humidity, is essential for preserving your floors over the long term. As noted in Floor Leveling Guides, controlling moisture is often overlooked but vital for preventing costly issues.
Tools should be cleaned and stored properly after each use. For example, wiping down the orbital sander with a tack cloth removes residual dust, extending its lifespan and maintaining performance. Similarly, sealing grout lines with a high-quality sealant annually helps prevent stains and deterioration, especially in high-moisture zones like bathrooms and kitchens.
In the trend toward sustainable flooring, I advocate for using eco-friendly maintenance products that avoid harsh chemicals. This approach not only prolongs your floor’s lifespan but also promotes a healthier home. As the market evolves, new innovations such as self-healing polyurea coatings are emerging, promising even longer-lasting protection, a development highlighted in advanced coating research. These advancements reflect a future where flooring maintenance becomes more efficient and durable.
To truly master the art of flooring upkeep, consider implementing adjustable roller brushes for your vacuum and investing in moisture-absorbing silica gels in storage areas. Regularly inspecting for signs of moisture or wear allows for early intervention, saving money and effort. For more detailed strategies, I recommend reviewing professional tips on floor combinations and maintenance practices.
Start integrating these tools and routines today. A simple step like testing humidity with a reliable moisture meter can dramatically extend your floors’ lifespan. Don’t wait until visible damage appears—being proactive is the key to keeping your floors beautiful for decades.
The Hardest Lesson I Learned About Flooring: Pay Attention to the Small Details
One of the biggest realizations I had was that overlooking the importance of thorough subfloor inspection can undermine your entire flooring project. Even if everything else seems perfect, a tiny, loose patch underfoot can cause squeaks and unevenness that ruin the aesthetic and durability. The vacuum test is a prime example of a small step that offers enormous peace of mind, saving time and money down the line.
Why I Trust the Simple Vacuum Test Over Expensive Equipment
Initially, I was tempted to rent specialized tools to assess my subfloor. However, I found that a standard vacuum cleaner, coupled with a keen eye and a flashlight, sufficed to spot weak spots. This method is cost-effective, quick, and accessible—making it ideal for DIYers eager to avoid expensive repairs later. It taught me that sometimes, the simplest tools are the most effective in uncovering hidden issues.
The Power of Seedling Mindset When Tackling Flooring Challenges
Approaching my project with curiosity rather than frustration transformed my experience. Recognizing that small imperfections could snowball into larger problems prompted me to double-check everything, including the subfloor. Embracing a mindset focused on learning and adaptation allowed me to catch issues early, ultimately leading to a flawless finish. This lesson reminds us that patience and keen observation are vital in flooring installation.
Curated Tools That Made My Floor Shine
For my refinishing projects, I rely on an orbital sander that offers controlled, even sanding, as detailed in expert refinishing tips. To maintain my grout lines, I use a grout cleaning machine with oscillating brushes, which ensures longevity and appearance. Moreover, a high-quality moisture meter helps me monitor humidity levels—crucial for preventing warping—especially in engineered wood floors. These tools are worth investing in, as they keep my floors looking pristine.
Embrace the Little Wins for Long-Term Success
Every small step, like performing that vacuum test or applying proper sealants, accumulates into a durable, beautiful floor. Celebrating these victories encourages continuous learning and meticulous care. Remember, the elimination of guesswork makes the difference between a temporary fix and a lasting masterpiece. For comprehensive advice on preserving your floors, explore resources like expert flooring techniques.