
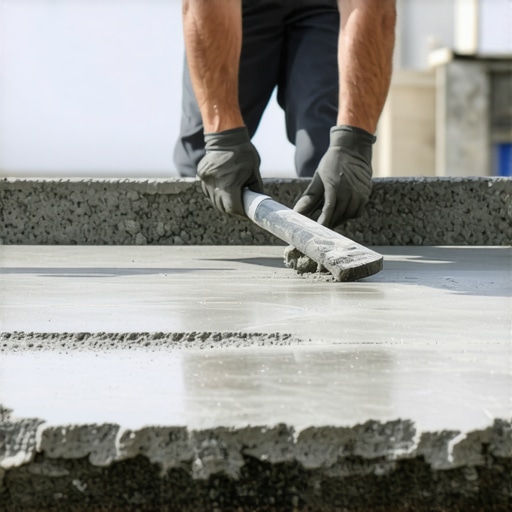
I vividly remember the day I struggled for hours trying to set a hefty porcelain slab onto an uneven subfloor. No matter how carefully I spread the thinset, the heavy tile refused to stay level, leaving me frustrated and questioning my skills. It was only after I stumbled upon a simple but powerful trick—adjusting the consistency of my thinset—that everything changed. Suddenly, installing those large, weighty tiles became manageable, and my results looked professional.
Mastering the Thinset Consistency for Heavy Porcelain Tiles
Ever faced the nightmare of lippage or uneven tiles after a long day of work? If you’re like me, you probably tried all the standard techniques—priming the subfloor, using spacers, and even double-checking your levels—yet somehow the tiles just wouldn’t sit perfectly. The culprit often lies in the thinset mortar’s consistency. Getting this right can make all the difference, especially with heavy porcelain slabs that demand more stability during installation.
Is a Trick Like This Really Worth the Hype?
Trust me, I’ve been there. What initially seemed like a trivial detail—adjusting the thickness of the mortar—turned out to be a game-changer. I recall early on, making the classic mistake of mixing too wet or too dry, thinking that thicker mortar would hold better. Instead, I ended up with slumping tiles and wasted time. It wasn’t until I read a bit about proper mixing ratios that I learned the importance of a *medium, peanut butter-like consistency*—not too runny, not too stiff—and actually tested it out on my next project.
According to industry experts, the right thinset consistency ensures proper adhesion, reduces voids beneath the tile, and prevents issues like lippage later on. [Tile Council of North America](https://tiletrendshop.com/why-your-self-leveling-primer-is-peeling-off-the-slab) emphasizes how critical mortar quality is for durable, flawless tile work. Since then, I’ve consistently applied this simple trick—adjusting my mix to a workable but firm consistency—and the results speak for themselves.
Now, I’m excited to guide you through the practical steps of mastering this technique so you can avoid the headaches I faced. Ready to elevate your tile game? Let’s dive into the details that will make your tile installation smoother, faster, and much more reliable.
Achieve the Perfect Mix: A Step-by-Step Guide
Start by measuring the thinset powder accurately, using a standard bucket or scoop. Mix the powder gradually with clean, cold water, pouring in small amounts while stirring continuously with a margin trowel. Aim for a creamy, peanut butter-like consistency—firm enough to hold a shape when lifted but still workable. During my first attempt, I accidentally added too much water, resulting in a runny mix that caused heavy tiles to slide after placement. To correct this, I added more powder and mixed thoroughly, transforming the consistency into a manageable, stable paste.
Test and Adjust the Mixture
Before applying to the entire area, test a small amount of thinset by spreading it on a surface and letting it sit for a minute. If it slumps or separates, it’s too wet; if it’s stiff and gritty, it’s too dry. Adjust accordingly: add a splash of water for looseness or more powder for stiffness. I learned this the hard way when I skipped the test and faced uneven tile depths. Consistent adjustment ensures reliable adhesion and leveling.
Use Proper Tools and Techniques
Employ a notched trowel appropriate for large porcelain tiles—usually a 1/4″ or 3/8″ V-notched trowel. Apply the mixed thinset onto the substrate in small sections, spreading it evenly with the notch side to create ridges. Then, use the flat side of the trowel to back-backer—pressing the thinset into the subfloor to remove air pockets and ensure a strong bond. Remember, working in manageable sections prevents the mortar from drying out before tile placement.
Maintain the Correct Working Time
Be aware that thinset varies in setting time depending on temperature and humidity—usually about 24 hours. I once attempted to re-position a heavy porcelain slab an hour after setting, only to find it had begun to ‘skin over.’ To avoid this, work swiftly but carefully, and don’t reapply thinset over dried patches. Use a [floor leveling primer](https://tiletrendshop.com/how-to-achieve-flawless-floor-leveling-before-tile-laying) if your substrate is uneven, to improve bonding and smoothness.
Monitor Consistency During the Job
Regularly check your mix as you work. If the thinset starts to stiffen due to prolonged exposure or environmental factors, remix by adding a small amount of water and re-mix thoroughly. This maintains a uniform adhesive strength that prevents lippage and hollow spots, especially with large format tiles which are more sensitive to uneven application. For detailed techniques, refer to [Professional Floor Leveling Secrets](https://tiletrendshop.com/mastering-floor-leveling-pro-secrets-for-perfect-installations).
Many DIY enthusiasts and even seasoned homeowners tend to oversimplify flooring installation, often believing that proper leveling or perfect tile alignment is just about following basic guidelines. However, this approach overlooks the nuanced details that determine long-term success and flawless results. One common misconception is the belief that achieving a perfectly level subfloor or a flush tile surface is solely about the initial application. In reality, subtle issues like moisture variations, substrate composition, and even environmental factors can compromise the final outcome if not properly addressed. For example, many assume that a smooth surface equals a stable foundation, but according to experts at the [floor leveling challenges](https://tiletrendshop.com/floor-leveling-challenges-common-mistakes-and-how-to-avoid-them), small undetected dips or high spots can lead to severe lippage or cracks over time.
A significant trap that many fall into involves underestimating the importance of substrate preparation and moisture mitigation. Applying a premium tile or hardwood flooring without ensuring optimal substrate conditions can cause uneven settling, warping, or adhesion failures. For advanced installers, understanding the impact of environmental conditions—like humidity and temperature—is critical. As highlighted in industry studies, fluctuations in these parameters can subtly alter material dimensions, leading to misalignments or buckling months after installation. That’s why higher-echelon professionals never rely solely on visual inspections—they employ precise measurements and climate controls.
Another often overlooked aspect is the choice of materials and their compatibility with existing substrates. For instance, using a thinset mortar that’s not suited for certain substrates or environmental conditions can result in bond failure, especially with large format tiles and heavy porcelain slabs. To avoid these pitfalls, it’s crucial to familiarize yourself with advanced [flooring installation fundamentals](https://tiletrendshop.com/flooring-installation-fundamentals-leveling-for-a-seamless-look), emphasizing the importance of substrate analysis and the selection of suitable adhesives.
Furthermore, many assume that once the floor is leveled and tiles are set, the process is over—when in fact, post-installation care and minor adjustments are often necessary to maintain perfection. Small imperfections that seem insignificant initially can become noticeable over time if neglected. Regular monitoring of the installation, especially during seasonal changes, is essential. For example, wood floors are susceptible to expansion and contraction; understanding these nuances can prevent cupping or gaps, as discussed in [mastering hardwood floor refinishing](https://tiletrendshop.com/mastering-hardwood-floor-refinishing-expert-tips-for-2025).
In essence, true mastery over flooring hinges on attention to those hidden details—moisture levels, substrate preparation, environmental control, and material compatibility. Overlooking these nuances might save time initially, but it can cost dearly later in repairs or replacements. I encourage every installer to go beyond the basics and embrace a meticulous, detail-oriented approach. Before concluding your next project, ask yourself: have you accounted for the subtle, yet critical, factors that determine longevity and finish quality?
Think you know every trick? This little-known nuance might surprise you—testing moisture levels with specialized devices can make or break your work. Don’t underestimate the power of precision in every step. Want to learn more about how to avoid common floor leveling pitfalls? Check out [this comprehensive guide](https://tiletrendshop.com/transform-your-floor-with-expert-leveling-techniques) and elevate your craftsmanship. Have you ever fallen into this trap? Let me know in the comments.
Keeping Your Floors in Top Shape: Essential Maintenance Strategies
Once your flooring installation is complete, the real work of maintaining its flawless appearance and functionality begins. Regular upkeep not only prolongs the lifespan of your floors but also preserves their aesthetic appeal. A strategic maintenance routine involves choosing the right tools and understanding the methods that work best for your specific flooring type, whether it’s tile, hardwood, or engineered wood.
Invest in Quality Cleaning Equipment
Using the appropriate tools is crucial. For hardwood floors, a microfiber mop paired with a soft-bristle broom minimizes scratching and debris accumulation. For tile and grout, a handheld steam cleaner can be an excellent choice for deep cleaning without harsh chemicals. I personally recommend a high-quality, adjustable damp mop, such as the Microfiber Magic Mop, because it effectively picks up dust and dirt while being gentle on surfaces. Additionally, an oscillating buffer with soft pads is invaluable for maintaining polished finishes on hardwood and laminate flooring. Regularly replacing or cleaning your vacuum’s beater bar prevents dirt from scratching delicate surfaces, a tip I learned after a damaged section of my engineered wood fell under high foot traffic.
Maintain for Longevity and Appearance
Consistent maintenance extends your floors’ beauty. For hardwoods, applying a nourishing oil finish every few years helps uphold shine and prevents drying. Meanwhile, sealing grout lines every 12-18 months reduces staining and moisture ingress, especially in high-humidity environments. Keep an eye on environmental conditions—maintaining stable humidity and temperature levels is essential; sudden fluctuations can cause expansion, contraction, or cracking. A quality humidity monitor like the “HumiMaster” can provide real-time data to help you adjust your HVAC accordingly and prevent issues.
Using Proper Tools for Floor Leveling and Repairs
When it comes to long-term results, a well-maintained subfloor is fundamental. I recommend a laser level to verify flatness periodically, especially if your floor is subjected to seasonal changes. For minor repairs or leveling uneven spots, a high-grade self-leveling compound, like Quicklevel Pro, ensures a seamless surface. For detailed troubleshooting, consult this guide on floor leveling. Regular inspections and reapplication of leveling material as needed will keep your surface even, preventing lippage and ensuring a safe walking surface.
Future Trends in Floor Maintenance
Advancements in flooring materials and finishes suggest a move towards self-healing surfaces or coatings with built-in UV protection, reducing routine upkeep. Smart sensors embedded in flooring could alert homeowners about moisture levels or structural shifts before visible damage occurs, making maintenance more proactive than reactive. Staying abreast of these innovations can help you invest in tools and products that offer long-term savings, both financially and in effort.
How do I maintain my flooring over time?
Consistent cleaning with suitable tools, environmental control, and periodic inspections form the cornerstone of long-term maintenance. For example, adopting an automated schedule for sealing grout lines or oils can drastically improve durability and appearance. Remember, investing in quality tools like a microfiber mop, oscillating buffer, and laser level pays off dividends over the years. Don’t hesitate to reach out to professionals through this contact page for expert advice tailored to your specific flooring. Try integrating a moisture monitor into your routine; early detection of humidity issues can prevent costly repairs down the road. Staying proactive is key to keeping your floors beautiful and functional for decades to come.
Reflecting on my journey through flooring mastery, I realize that one of the most profound lessons was recognizing the power of meticulous preparation and attention to detail. The realization that adjusting mortar consistency was the hidden key to success transformed my approach from trial-and-error to precision-based, elevating every project I undertook.
The Hardest Lesson I Learned About flooring installation,floor leveling,tile,hardwood floors
Early in my career, I underestimated the impact of substrate conditions and mortar consistency. I believed that following standard procedures was enough, but I often faced lippage and uneven surfaces. It was only after I experienced a failed installation due to improper thinset mixing that I understood the significance of level, consistency, and testing small batches before full application. This lesson cemented my commitment to thorough prep work and testing, which are now cornerstones of my methodology.
3 Myths About flooring installation,floor leveling,tile,hardwood floors That Held Me Back
- Myth: Perfect straight lines mean perfect leveling.
Truth: Even with perfectly aligned tiles, underlying substrate imperfections can cause lippage. Proper leveling and substrate prep are essential. - Myth: More mortar means better adhesion.
Truth: Excess mortar creates voids and uneven surfaces. The right consistency and technique matter more than quantity. - Myth: Once set, the floor is final.
Truth: Continuous monitoring and maintenance ensure longevity and prevent long-term issues.
What Experts Won’t Tell You About flooring installation,floor leveling,tile,hardwood floors
Many professionals keep quiet about the nuances that separate good from exceptional work. For instance, subtle environmental factors like humidity can drastically affect mortar setting times and bond strength. Using advanced tools such as moisture meters and laser levels, professionals preempt problems that amateurs might overlook, resulting in flawless finishes that stand the test of time. Additionally, understanding the compatibility of materials and substrate conditions often remains an unspoken secret but is crucial for durable, high-quality results.
Secrets to Masterful Floor Leveling That I Wish I Knew Sooner
Implementing a comprehensive substrate analysis and incorporating strategic moisture mitigation methods early on can save countless issues later. Embracing a testing routine for thinset mix and environmental conditions enabled me to avoid costly rework. From using precise tools like self-leveling compounds and laser levels to performing regular inspections, these practices create the foundation for success. To delve deeper into advanced leveling techniques, I recommend exploring this guide on common challenges and solutions.
My Essential Toolkit for flooring installation,floor leveling,tile,hardwood floors
- Moisture Meter: Ensures substrate stability before tiling.
- Laser Level: Guarantees perfectly straight rows and consistent floor flatness.
- Self-Leveling Compound: Corrects minor unevenness efficiently.
- High-Quality Trowel and Notched Edges: Achieve even mortar application and reduce voids.
Trustworthy tools like these are the unsung heroes of successful flooring projects. They provide precision and confidence, saving time and materials while ensuring professional results. For curated product recommendations, visit this contact page to find your perfect tools.
Your Next Step in Flooring Confidence
Embarking on a tile or hardwood installation can be daunting, but with the right knowledge and tools, you can achieve stunning, long-lasting results. Remember, the key lies in attention to detail—test, adjust, and monitor throughout the process. Your dedication to these nuanced steps not only elevates your craftsmanship but also creates spaces that inspire and endure. Now is the time to take that leap—your flawless floor awaits.
Have you ever struggled with achieving a perfect level surface in your flooring projects? Share your experiences below—I’d love to hear your stories and tips!
**