
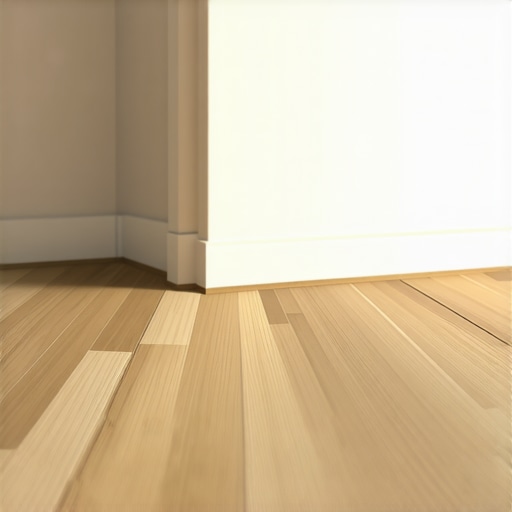
I’ll never forget the moment I stepped onto my freshly installed hardwood floor and heard that unsettling creak—only to find a section buckling underfoot. It was a lightbulb moment for me, realizing that despite following all the installation guidelines, my flooring was reacting badly to the conditions. The cause? The often-overlooked Perimeter Gap Rule, which is crucial in floating floor installations. If you’ve ever experienced your beautiful new floors warping, buckling, or lifting at the edges, then you probably understand my frustration.
The Hidden Pitfall That Causes Buckling
Many DIYers and even seasoned pros underestimate how important perimeter gaps are. They think leaving a small gap around the edges isn’t a big deal—until they realize that’s exactly what allows the floor to expand and contract naturally. Without enough space, the floorboards get squeezed and end up buckling or lifting, especially when humidity or temperature swings occur. My early mistake was ignoring the manufacturer’s recommended expansion gap; I thought I was saving time, but I was only inviting disaster. That mistake cost me repairs down the line and a lot of unnecessary stress.
Does the Perimeter Gap Really Make That Much Difference?
Absolutely. The expert advice from professionals like those at flooring installation specialists confirms that proper expansion gaps are essential for a durable, wrinkle-free finish. Ignoring this key detail is one of the most common reasons floors buckle over time. If you’re about to start your project or have already faced issues, understanding and applying the Perimeter Gap Rule can save you a lot of trouble. Whether you’re installing laminate, engineered hardwood, or tile over a floating floor, this rule applies.
Have You Encountered This Problem?
If you’re nodding along or feeling anxious about your flooring project, don’t worry—you’re not alone. Buckling floors are a widespread issue that many homeowners face, often because of overlooked installation details. The good news is that with correct planning and a keen eye on those expansion allowances, you can avoid these pitfalls entirely.
Are you curious about how to identify if your floor is buckling or how to fix it? Stay tuned—I’ll walk you through straightforward steps to keep your floors flat, stable, and beautiful for years to come. Ready to prevent or fix buckling right now? Let’s dive into the practical solutions that can make this problem a thing of the past.
}#}#}}}#}#}#}#}#}#}#}#}#}#}#}#}#}#}#}#}#}#}#}#}#}#}#}#}#}#}#}#}#}#}#}#}#}#}#}#}#}#}#}#}#}#}#}#}#}#}#}#}#}#}#}#}#}#}#}#}#}#}#}#}#}#}#}#}#}#}#}#}#}#}#}#}#}#}#}#}#}#}#}#}#}#}#}#}#}#}#}#}#}#}#}#}#}#}#}#}#}#}#}#}#}#}#}#}#}#}#}#}#}#}#}#}#}#}#}#}#}#}#}#}#}#}#}#}#}#}#}#}#}#}#}#}#}#}#}#}#}#}#}#}#}#}#}#}#}#}#}#}#}#}#}#}#}#}#}#}#}#}#}#}#}#}#}#}#}#}#}#}#}#}#}#}#}#}#}#}#}#}#}#}#}#}#}#}#}#}#}#}#}#}#}#}#}#}#}#}#}#}#}#}#}#}#}#}#}#}#}#}#}#}#}#}#}#}#}#}#}#}#}#}#}#}#}#}#}#}#}#}#}#}#}#}#}#}#}#}#}#}#}#}#}#}#}#}#}#}#}#}#}#}#}#}#}#}#}#}#}#}#}#}#}#}#}#}#}#}#}#}#}#}#}#}#}#}#}#}#}#}#}#}#}#}#}#}#}#}#}#}#}#}#}#}#}#}#}#}#}#}#}#}#}#}#}#}#}#}#}#}#}#}#}#}#}#}#}#}#}#}#}#}#}#}#}#}#}#}#}#}#}#}#}#}#}#}#}#}#}#}#}#}#}#}#}#}#}#}#}#}#}#}#}#}#}#}#}#}#}#}#}#}#}#}#}#}#}#}#}#}#}#}#}#}#}#}#}#}#}#}#}#}#}#}#}#}#}#}#}#}#}#}#}#}#}#}#}#}#}#}#}#}#}#}#}#}#}#}#}#}#}#}#}#}#}#}#}#}#}#}#}#}#}#}#}#}#}#}#}#}#}#}#}#}#}#}#}#}#}#}#}#}#}#}#}#}#}#}#}#}#}#}#}#}#}#}#}#}#}#}#}#}#}#}#}#}#}#}#}#}#}#}#}#}#}#}#}#}#}#}#}#}#}#}#}#}#}#}#}#}#}#}#}#}#}#}#}#}#}#}#}#}#}#}#}#}#}#}#}#}#}#}#}#}#}#}#}#}#}#}#}#}#}#}#}#}#}#}#}#}#}#}#}#}#}#}#}#}#}#}#}#}#}#}#}#}#}#}#}#}#}#}#}#}#}#}#}#}#}#}#}#}#}#}#}#}#}#}#}#}#}#}#}#}#}#}#}#}#}#}#}#}#}#}#}#}#}#}#}#}#}#}#}#}#}#}#}#}#}#}#}#}#}#}#}#}#}#}#}#}#}#}#}#}#}#}#}#}#}#}#}#}#}#}#}#}#}#}#}#}#}#}#}#}#}#}#}#}#}#}#}#}#}#}#}#}#}#}#}#}#}#}#}#}#}#}#}#}#}#}#}#}#}#}#}#}#}#}#}#}#}#}#}#}#}#}#}#}#}#}#}#}#}#}#}#}#}#}#}#}#}#}#}#}#}#}#}#}#}#}#}#}#}#}#}#}#}#}#}#}#}#}#}#}#}#}#}#}#}#}#}#}#}#}#}#}#}#}#}#}#}#}#}#}#}#}#}#}#}#}#}#}#}#}#}#}#}#}#}#}#}#}#}#}#}#}#}#}#}#}#}#}#}#}#}#}#}#}#}#}#}#}#}#}#}#}#}#}#}#}#}#}#}#}#}#}#}#}#}#}#}#}#}#}#}#}#}#}#}#}#}#}#}#}#}#}#}#}#}#}#}#}#}#}#}#}#}#}#}#}#}#}#}#}#}#}#}#}#}#}#}#}#}#}#}#}#}#}#}#}#}#}#}#}#}#}#}#}#}#}#}#}#}#}#}#}#}#}#}#}#}#}#}#}#}#}#}#}#}#}#}#}#}#}#}#}#}#}#}#}#}#}#}#}#}#}#}#}#}#}#}#}#}#}#}#}#}#}#}#}#}#}#}#}#}#}#}#}#}#}#}#}#}#}#}#}#}#}#}#}#}#}#}#}#}#}#}#}#}#}#}#}#}#}#}#}#}#}#}#}#}#}#}#}#}#}#}#}#}#}#}#}#}#}#}#}#}#}#}
Assessing Your Subfloor Before Starting
Start by inspecting your subfloor for uneven spots or soft areas. Use a long level or a laser level to identify high and low points. For example, I once noticed a slight dip in my concrete slab that caused tiles to crack once installed. Addressing these imperfections beforehand is crucial for a flawless finish. If you discover significant dips or unevenness, it’s best to level the surface using a self-leveling compound. For detailed techniques, refer to this guide.
Choosing the Right Tools and Materials for Leveling
Invest in quality tools like a self-leveling primer, an appropriate trowel, and a generous supply of the leveling compound. When I prepared my first project, I used a gauge rake to spread the compound evenly and a notched trowel to ensure proper thickness. For best results, follow the manufacturer’s instructions precisely. Remember: improper mixing or application can lead to failures, especially in large areas or complex layouts. Check out this resource for advanced tips.
Executing a Flawless Leveling Process
Begin by pouring the self-leveling mixture into the lowest spot and let gravity do its work. Use a smoothing tool or a gauge rake to spread the material across the surface. Working in sections, I found that working quickly but carefully yields better results; the compound sets rapidly, often within 15-20 minutes. During my first attempt, I made the mistake of overworking the compound, which caused uneven spots. Keep a wet rag handy to clean the edges and avoid dry patches. Remember, the goal is to achieve a flat, seamless surface that prepares your space for tile or hardwood. If you encounter unexpected issues like bubbling or cracking, consult this tutorial.
Tackling Common Challenges and Fixes
Uneven floors can be unpredictable, especially in humid or climate-sensitive environments. If you miss spots or notice the level isn’t uniform after curing, don’t panic. Small low spots can often be corrected with additional compound once the first layer fully cures. For more complex problems like bridging cracks or surface roughness, professional-grade patching materials and techniques are necessary. My experience with delayed curing due to improper substrate moisture levels taught me the importance of checking for moisture before beginning. A concrete moisture test from this page can save headaches later.
Despite the abundance of DIY tutorials and professional advice, many installers still fall prey to common misconceptions and subtle pitfalls that compromise the quality of hardwood or tile floors. One crucial nuance that often flies under the radar is the importance of understanding environmental variations and how they interact with your chosen flooring materials. For example, many believe that simply following the manufacturer’s instructions suffices, but overlooking the influence of humidity and temperature fluctuations can lead to long-term issues like buckling or cracking. Advanced practitioners recognize that proactive site assessment, including moisture testing and climate control strategies, is essential for a flawless finish. Expert sources, such as the comprehensive guidelines at this resource, emphasize that neglecting environmental assessment is among the top reasons for installation failures. Additionally, a common myth is that tile and hardwood must be installed immediately after surface preparation, but in reality, allowing subfloors to acclimate to ambient conditions is vital to prevent expansion or contraction post-installation. This approach might seem like extra effort but can significantly extend the lifespan of your floors. Moreover, many overlook the critical role of proper subfloor preparation techniques, such as ensuring a dust-free, level, and stable surface, which can be the ‘make or break’ factor in achieving a seamless, durable surface. According to recent studies on material behavior, even minor undetected imperfections can translate into visible seams or premature failure over time. As you plan your next flooring project, remember that advanced knowledge and attention to these subtle details can save you headaches and costly repairs later. For a deeper dive on how to expertly level floors with precision, check out this guide. Have you ever fallen into this trap? Let me know in the comments and share your experiences with overlooked nuances in flooring installation.
Ensuring your floor remains pristine and functional over time hinges on using the right tools and adopting effective maintenance routines. My personal approach involves investing in high-quality equipment that guarantees precision and durability. For example, I rely heavily on a laser level like Bosch Cross Line Laser GLL 55 for ongoing checks; its accuracy ensures that any shifts or dips in the floor level are immediately identifiable, allowing me to address issues proactively before they become costly repairs. Additionally, I swear by a moisture meter like the Protimeter Surveymaster to monitor environmental stability in areas prone to humidity fluctuations, thereby preventing problems such as warping or buckling that can compromise even the best flooring installations.
When it comes to cleaning and routine upkeep, I prefer using pH-neutral cleaners specific to the flooring type—be it hardwood or tile—and avoid abrasive scrubbing tools that can scratch surfaces. Regularly inspecting grout lines, checking for signs of moisture intrusion, and promptly addressing any damage with patching compounds or refinishing kits can extend the lifespan of your floors dramatically. For example, in hardwood care, applying a quality polish like this maintenance secret not only preserves the finish but also enhances resistance to daily wear.
How do I maintain my flooring over time?
Consistent monitoring and preventative care are essential. I plan routine checks using my laser level and moisture meter every six months, especially in high-traffic or moisture-prone zones. Additionally, establishing a controlled environment—maintaining steady humidity levels, for example—limits expansion and contraction that could lead to cracks or gaps. Embracing technology like smart humidity sensors connected to a home automation system provides real-time alerts, allowing for swift intervention. Furthermore, scheduling professional inspections every few years ensures that subtle issues are caught early. As the industry advances, I predict that integrated environmental monitoring systems combined with AI-based diagnostics will become standard, making routine maintenance more straightforward and efficient. To stay ahead, consider consulting expert guides such as this resource for innovative maintenance strategies.
Remember, regularly updating your tools and methods doesn’t just preserve your floors—it enhances their appearance and functionality for decades. Try implementing a monthly check with a laser level and moisture meter, and see how early detection of potential issues can save you significant repairs. An ounce of prevention truly beats a pound of cure when it comes to flooring care!
Three Lessons That Changed My Flooring Approach
Firstly, never underestimate the importance of environmental assessments; understanding humidity and temperature fluctuations beforehand can prevent costly buckling. I once ignored this, leading to warping that could have been avoided with prior testing — a lesson in proactive planning. Secondly, investing in quality tools such as laser levels and moisture meters has saved me countless headaches; these reliable instruments allow for precision and early issue detection. Lastly, patience in surface preparation makes all the difference; rushing through leveling or subfloor repairs often results in uneven floors and future repairs. Embracing these lessons has transformed my projects into lasting, beautiful installations.
Tools and Resources That Elevate My Flooring Craft
My go-to laser level, the Bosch Cross Line Laser GLL 55, offers unmatched accuracy that keeps my floors perfectly aligned. The Protimeter Surveymaster moisture meter provides essential insights into moisture levels, helping prevent hidden issues. For leveling challenges, I rely on comprehensive guides like this expert resource, which demystifies complex techniques. When selecting flooring materials, this site offers valuable advice on matching tile and hardwood for a seamless look. These tools and guides have consistently proven their worth in my projects, ensuring quality results every time.
Step Into Your Flooring Journey Today
Embarking on or refining your flooring installation journey can be deeply rewarding, especially when you incorporate these insider tips and trusted resources. Remember, mastery comes from attention to detail and continuous learning. Whether you’re tackling a small repair or a full-scale renovation, adopting a proactive mindset and utilizing the right tools will set you up for success. Don’t hesitate to start your project today — your future flawless floors await, and I believe in your ability to accomplish them with confidence. What’s the biggest challenge you’ve faced in flooring installation? Share your experiences below and let’s learn together!