
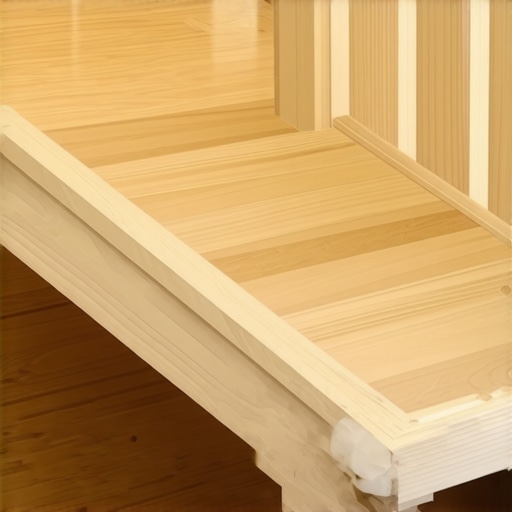
Picture this: you’re finally done with your staircase renovation, proud of the fresh look. But then, every step sounds like a mini thunderclap—squeak! It’s enough to make you want to tear out the entire staircase and start over. I remember my frustration all too well. I had spent hours laying down new treads, only to be kept awake at night by the unsettling creaks and groans. That’s when I had my lightbulb moment: the best-kept secret to squeak-free stairs isn’t some complicated gadget—it’s construction adhesive.
Why Your Stairs Squeak and How to Fix It Naturally
Squeaky stairs are more than just an annoying rattle—they can signal loose treads and potential safety hazards. Early on, I made the mistake of ignoring those creeping squeaks, thinking they’d go away or that pushing the stairs back into place would do the trick. Spoiler alert: it didn’t. That oversight taught me that a simple, effective solution exists—using construction adhesive to secure the treads firmly to the subfloor and stringers. This method not only eliminates noise but also enhances stability.
Building codes and expert flooring installers emphasize proper attachment techniques for longevity and safety. According to a study by the industry leader in flooring installation, employing the right adhesive and securing methods can increase the lifespan of your staircase significantly. So, if you’re tired of the constant squeaking, it’s time to consider this game-changing approach.
Will This Really Work for My Old, Creaky Staircase?
I know what you’re thinking—”Does this trick work on old stairs? Or is it only for new installs?” Trust me, I’ve been there. When I first learned about using construction adhesive, I was skeptical. I’d seen too many DIY fixes that promised the moon but delivered mediocrity. My mistake was not doing enough research and applying the method unevenly. The reality is, this technique can work wonders for stairs of all ages when executed correctly. I’ll walk you through the proven process below, so stay tuned to transform your creaky steps into silent, steady ones.
Thinking about how to get started? If you’re interested in a comprehensive overview of flooring installation fundamentals, I recommend checking out this detailed guide. Now, let’s dive into the step-by-step process to banish those squeaks once and for all.
Prepare Your Tools and Workspace
Before diving into fixing your squeaky stairs, gather essential tools: a corded or cordless drill, a putty knife, a pry bar, construction adhesive like Liquid Nails, a foam brush for precise application, and safety gear such as goggles and gloves. Clear the area around the staircase, remove any loose debris, and ensure you have enough lighting. I remember one time I started working without a proper workspace, which made the process messy and frustrating. Setting up a clean, organized area speeds up the repair and improves results.
Identify Loose Treads and Louder Spots
Step onto each step and gently nudge in different directions to detect where the squeaks originate. Use a pencil to mark noisy spots. In my case, I found that the third step was loose along its front edge, causing the squeak whenever I stepped on it. For a more thorough check, lift each tread slightly with a putty knife to see if there’s movement. Remember: identifying the exact areas that move is key to a lasting fix.
Disassemble and Prepare Treads for Adhesion
Carefully remove any existing finish or paint from the underside of the treads with a wire brush or sandpaper to ensure the adhesive bonds well. Use a pry bar gently to lift the edges if necessary, but be cautious not to damage the wood. Once lifted, clean the contact surfaces thoroughly with a damp cloth. During my project, I encountered some old glue residues that hindered adhesion—scraping these away made a significant difference in securing the treads firmly.
Apply Construction Adhesive Effectively
Spread a liberal bead of construction adhesive along the top of the stringers and those contact points of the tread that connect to the subfloor and risers. Think of it like putting glue on the edge of a puzzle piece; coverage is crucial. Use a foam brush to spread the adhesive evenly, especially in hard-to-reach areas. In my DIY attempt, I made the mistake of applying too little adhesive, which resulted in an ineffective fix. Adequate application ensures tight bonding and noise reduction.
Secure and Reinforce the Treads
Fit the treads back into place, pressing firmly to ensure maximum contact with the adhesive. Use shims or scrap wood blocks if needed to hold the parts tightly while the adhesive cures—typically 24 hours. For added reinforcement, drive a few finishing nails through the tread into the stringers just below, then countersink and fill with wood putty. This step transformed my squeaky staircase into a tranquil set of stairs, all thanks to proper pressure during curing.
Final Checks and Additional Tips
Once the adhesive has set, walk carefully across each step to test for squeaks. If some creaks persist, reapply the adhesive in those spots and clamp overnight. Be patient—sometimes multiple applications are necessary for a perfect silence. Also, consider sealing the treads and risers with a quality finish to prevent dust accumulation, which can compromise the adhesive over time. Regular maintenance extends the life of your fix, and for hardwood stairs, a periodic polish can keep your steps looking pristine. Want more insights on preserving wooden floors? Check out these hardwood care tips.When it comes to flooring, many assume that following standard procedures guarantees a flawless result. However, the real challenge lies in understanding the nuanced intricacies that differentiate a professional finish from a DIY misstep. One common misconception is that leveling a subfloor is a straightforward task, but in reality, subtle imperfections can lead to long-term problems if not addressed with precision. For instance, many installers overlook the importance of proper moisture testing before laying tile or hardwood, which can cause significant buckling or cracking down the line. According to industry experts, failing to account for moisture content variations can undermine the entire project, making early testing a step you can’t afford to skip. Additionally, a frequent myth is that all adhesives and leveling compounds are interchangeable. In truth, selecting the wrong type can result in inadequate adhesion or uneven surfaces, which becomes glaring once the flooring is installed. It’s vital to choose products specifically designed for your substrate and final flooring material, as detailed in the comprehensive guide on flooring installation fundamentals. Advanced DIYers often neglect the subtle departure from manufacturer instructions, such as surface preparation or cure times, which can compromise the entire installation. Remember, small oversights today can lead to major fixes tomorrow. Now, you might wonder, what are some technical errors even seasoned pros stumble over when installing intricate patterns or premium materials? These pitfalls include improper subfloor preparation, inconsistent adhesive application, or misaligned tile joints—issues that only become apparent after the project’s completion. To avoid these, meticulous planning, thorough surface preparation, and attention to detail are non-negotiable. Seeking expert advice or detailed tutorials on issues like common leveling challenges can save you time and costly mistakes. Remember, precision in each step ensures a seamless, durable, and beautiful finish that stands the test of time. Have you ever fallen into this trap? Let me know in the comments.
Tools I Recommend for Lasting Flooring Maintenance
Keeping your floors in pristine condition over the years requires the right tools and a bit of know-how. I swear by a high-quality microfiber mop like the O-Cedar Microfiber Flip Mop because it gently lifts dust without scratching delicate surfaces, especially on hardwood and tile. For deep cleaning, a handheld steam cleaner such as the Dupray Twig Steam Cleaner is invaluable; it sanitizes without harsh chemicals, extending the lifespan of your floors. When it comes to repairs, I rely heavily on a flexible putty knife and a cordless detail sander. The putty knife helps with re-caulking or filling gaps, while the sander ensures even finishes when refinishing worn patches. For ongoing protection, a good hardwood floor polish like this polish maintains shine and prevents minor scratches from turning into major damage.
How do I maintain my flooring over time?
Routine maintenance is about more than just cleaning; it’s about understanding your specific flooring material and applying tailored techniques. For hardwood floors, regular buffing with a damp microfiber cloth and periodic reapplication of a protective finish keeps the surface resilient. Tile floors benefit from sealing grout lines every 1-2 years, ensuring moisture doesn’t seep in and cause deterioration. A critical part of maintenance involves inspecting for issues early—loose tiles, scratches, or gaps—so you can address them before they escalate. I recommend setting a schedule to check your floors seasonally. Additionally, consider investing in high-grade cleaning products designed for your flooring type, as using the wrong chemicals can cause long-term damage. For detailed guidance, read more about essential tile design maintenance tips and similar topics.
Looking ahead: How trend-aware flooring maintenance is evolving
The future of maintaining flooring involves smart technology integration. IoT-enabled sensors could monitor humidity levels or detect damage early, notifying you via smartphone app. Advanced cleaning robots are also becoming more sophisticated, adapting to different floors and debris types without supervision. Staying ahead involves not just understanding current tools but also embracing innovations that make upkeep easier and more effective.
Scaling Up Your Flooring Efforts with Confidence
If you’re planning a large renovation, proper maintenance tools and routines are essential to scale your project successfully. Investing in quality prep equipment, like a powerful floor buffer or a professional-grade leveling system, reduces material waste and speeds up the process. Moreover, establishing consistent inspection and cleaning routines ensures your investment lasts decades, saving money in repairs down the line. For comprehensive strategies, consult our flooring installation and maintenance guide. Don’t forget—long-term success hinges on attention to detail and proactive care, so start implementing these practices today. Ready to elevate your flooring maintenance routine? Try incorporating a biannual deep clean with your chosen steam cleaner to keep your floors looking and performing their best for years to come.
When I first tackled my creaky staircase, I didn’t realize that behind every squeak lay a lesson about patience and attention to detail. The biggest breakthrough came when I understood that simple solutions, like proper adhesion, could prevent years of frustration. Now, armed with personal insights and tried-and-true methods, I want to share some of the most valuable lessons I’ve learned—ones that go beyond the basics and delve into the nuances of flooring success.
The Hidden Truths That Elevate Your Flooring Journey
- Don’t underestimate the power of surface prep: I once skipped thorough cleaning and sanding before applying adhesive, which led to lingering squeaks. Proper preparation creates a bond that truly lasts.
- Beware of quick fixes: Applying a dab of glue might seem tempting, but without securing the tread firmly during curing, noise can return. Patience during curing is essential for a lasting fix.
- Sample before committing: Testing your adhesive or sealing finish on a small area prevented surprises on the main surface. A little trial-and-error saves time and materials in the long run.
- Understand your materials: Different woods and subfloor types react uniquely. Educating myself on these specifics made my repairs more effective and durable.
- Maintain a curious mindset: Every problematic squeak was a puzzle waiting to be solved, which transformed my process from frustration to discovery. Embrace learning as part of the journey.
Tools and Resources That Made a Difference
- Quality adhesives like Liquid Nails—I trust them because they provide a strong, flexible bond that withstands wear over time.
- A good putty knife—it allowed me to apply adhesive precisely and cleanly, minimizing mess and improving adhesion.
- Learning from industry leaders—the comprehensive guide on flooring basics gave me foundational knowledge needed to troubleshoot effectively.
- Moisture testing tools—these helped me prevent issues caused by hidden moisture, saving time and money before project starts.
- Patience and persistence—the most underrated tools, but they turned my DIY efforts into professional results, making me confident in my repair skills.
Your Next Step in Flooring Confidence
Every floor and staircase tell a story—one of meticulous craftsmanship and rightful pride. Remember, the key to transforming squeaky nuisances into silent sanctuaries is not just about fixing what’s broken but understanding the subtle dance between materials, tools, and technique. With the right knowledge and mindset, you’ll be empowered to elevate any space you touch. Don’t hesitate to experiment, learn, and perfect your craft; this is the path to truly stunning and lasting flooring results.
What’s the most stubborn squeak you’ve struggled to fix? Share your experience and tips below—let’s elevate each other’s flooring skills!