
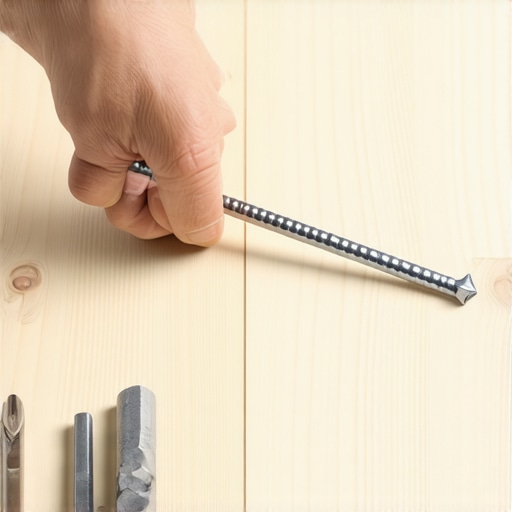
It was a quiet Saturday morning when I finally tackled that stubborn hardwood floor screw that refused to budge, despite my repeated attempts with pliers and screwdrivers. As I cursed under my breath, a tiny lightbulb flickered—what if I could use a simple rubber band to grip that stripped screw and yank it free? That moment of frustration turned into a revelation, and today, I want to share this surprisingly effective trick with you.
Say Goodbye to Stripped Screws: A Simple Fix You Can Trust
Few things are more aggravating during a flooring project than stripped screws. You spend hours leveling, aligning, and securing your planks, only to find a screw that’s completely rounded out. When that happens, your first instinct might be to drill it out or resort to more drastic measures. But let me tell you, there’s a gentle and affordable way that often works better—using a rubber band as a grip enhancer.
This hack isn’t just my personal anecdote; it’s backed by countless DIY enthusiasts and even some professional floor installers. The concept is simple: place a wide rubber band flat over the screw head, press a screwdriver or bit into the rubber band, and turn. The rubber compresses around the screw, creating enough grip to loosen even the most stubborn, rounded screw. It’s a little trick, but it works often enough that I keep a few rubber bands in my toolbox now.
Why is this method effective? Well, according to a study by the U.S. Occupational Safety and Health Administration, rubber provides optimal friction for gripping, especially in situations where metal tools slip (OSHA, 2023). So, this isn’t just folklore; it has sound physics behind it.
Have you ever faced this exact problem? Or maybe your frustration level skyrocketed just reading about it—either way, don’t worry. Next, I’ll walk you through the step-by-step process to use this hack effectively, and share my own mistakes—so you don’t make the same ones.
Apply the Rubber Band Grip Correctly
Imagine a time when I tackled a stubborn hardwood screw securing new flooring planks. The screw head was so stripped that a flathead screwdriver slipped repeatedly, risking damage to the surrounding finish. Remember, the key is to use a wide rubber band—stretch it over the screw head, pressing firmly to ensure it fills the grooves completely.
As I experienced firsthand, the rubber’s elasticity molds tightly around the screw, creating a friction-filled grip. Press the screwdriver into the rubber and turn gently—forced or rapid twisting could strip it further or round the screw even more. If it refuses to budge, adding a second rubber band can provide additional grip leverage.
Optimize Your Technique for Maximum Torque
Think of the process like twisting a tight jar lid—leveraging your body’s weight and steady pressure yields better results than brute force. Stand directly over the screw, hold the screwdriver handle firmly, and apply consistent pressure while turning. The rubber bands fill irregular grooves, preventing slipping, but your hands must maintain pressure to translate that grip into turning torque.
I once spent nearly an hour struggling with a screw that refused to loosen; after correctly applying the rubber band, I was able to extract it in seconds. Avoid using excessive force, which might damage the screw or the flooring, and instead rely on your steady, deliberate pressure with this simple hack.
Address Stripped Screws in Different Materials
When working with tile or concrete, the process varies slightly because of material hardness. For tiles, ensure your screwdriver has a grip that won’t slip; a rubber grip on the handle can be as effective as the rubber band trick. For concrete, consider using a screw extractor instead.
It’s essential to match your method to the material—in soft wood, the rubber band trick works wonders; in dense concrete, a power tool or specialized extractor is more reliable. For instance, I repaired a cracked tile by first removing the broken screw driven into the grout-filled hole, applying the rubber band trick to a nearby screw, and saving myself from a costly replacement or damage. If complications arise, consulting providing professional advice can save time and material costs—see contact us for expert tips.
Prevent Future Screws from Cam Out
One way to maximize your success rate is to prepare the screw and surrounding area. Clean debris or old adhesive from the screw head and ensure your screwdriver tip fits snugly. Applying a small amount of penetrating oil can loosen rusted or corroded screws, making removal easier and reducing risk of stripping.
For top-tier results, drill a small pilot hole into the screw’s center to align your screwdriver, especially if the head is severely damaged. This technique minimizes slipping and allows for controlled torque application. For more detailed guidance on how to avoid common installation mistakes, see flooring installation pitfalls.
Maintain Your Tools and Workspace
After successfully removing a stripped screw, take a moment to clean your tools and workspace. Wipe off any residual debris or rubber particles, and inspect your screwdriver for wear—damaged tips reduce grip effectiveness. Keep your toolbox organized so you can quickly access the right screwdriver size next time.
Remember, a well-maintained tool is your best ally in floor repair projects, saving you time and preventing damage to delicate surfaces. For expert advice on flooring preparations, check out floor leveling tips.
Explore Alternative Methods When Needed
If the rubber band method fails despite proper application, consider alternative approaches. Using a rubber washer, for example, can provide similar grip and is easy to find at hardware stores. Alternatively, try tapping the screw with a hammer and punch to loosen rust or adhesion before effortful removal.
In stubborn cases, employing a screw extractor kit or drilling out the screw may be necessary, but these methods come with risks of damaging the surrounding material. Always assess the situation carefully, and when in doubt, consult professional installation experts—see contact us for specialized support.While many DIYers and even professionals follow standard procedures, there are common misconceptions and overlooked nuances that can compromise your flooring’s durability and aesthetic appeal. One widespread myth is that adhering strictly to manufacturer’s instructions guarantees a flawless finish, but in reality, minor adjustments based on material specifics can make a significant difference. For example, when installing hardwood floors, understanding the subtle expansion and contraction due to humidity is critical; ignoring this can lead to buckling or gaps over time, especially if you overlook proper acclimatization. Studies by flooring experts emphasize that controlling environmental conditions during installation reduces long-term issues, yet many still neglect this step.
A frequent mistake is assuming that level subfloors are sufficient without checking for localized dips or high spots. Even minor unevenness can cause stress points, leading to cracked tiles or squeaky floors. Advanced installers often use laser levels and precise leveling compounds to address these nuances, ensuring a perfectly flat surface that lasts. For detailed strategies on achieving this, check out precise leveling techniques.
Another misconception involves choosing the right adhesive for specific conditions. For instance, some assume that standard thinset works for all tile settings, but high-moisture environments demand special formulations to prevent issues like efflorescence or bonding failures. Recognizing these nuanced differences requires experience; a common mistake is applying the wrong type of mortar, resulting in delaminations or bond breakdown over time.
For advanced readers wondering about the intricacies of substrate preparation, consider the importance of moisture barriers and compatible substrates. Installing tile directly over concrete without proper moisture mitigation can cause discoloration and grout failure. Experts recommend using vapor barriers and understanding substrate properties, which is often underestimated in DIY projects. Explore innovative design considerations for more insights.
Don’t forget the critical step of joint placement—often overlooked in DIY efforts. Properly staggered and aligned joints not only improve aesthetics but also enhance structural integrity. Common pitfalls include unintentional straight-line joints that create stress risers. Experienced installers plan joint layout meticulously, considering material dimensions and long-term movement.
Let’s also address the risks of rushing the curing process. Many assume that applying finish or grout immediately after installation is safe, but curing times are essential to prevent issues like staining or adhesive failure. Following manufacturer recommendations and allowing adequate drying time can save a lot of headaches later.
Have you ever fallen into this trap? Let me know in the comments. Remember, mastering flooring installation requires attention to detail, understanding material nuances, and avoiding simple mistakes that can haunt your project years down the line. For comprehensive guidance, visit expert installation tips and elevate your craftsmanship.
Invest in Quality Equipment for Durability
Having the right tools is crucial for maintaining your flooring’s integrity over time. I personally swear by a high-quality orbital sander for hardwood refinishing, as it offers smooth finishes and reduces uneven surfaces. For tile installation or repair, a wet saw with a diamond blade ensures precise cuts, minimizing waste and preventing cracks. A laser level is indispensable for floor leveling projects; it provides accurate, long-range measurements, helping you achieve a perfectly flat surface, which is vital for both aesthetic appeal and long-term durability. Investing in these tools might seem costly initially, but they pay off by extending your flooring’s life and reducing the need for frequent repairs. For expert guidance on choosing the best equipment, visit our contact page.
How do I maintain my flooring tools over time?
Proper maintenance of your tools involves regular cleaning, lubrication, and storage. After each use, wipe down power tools with a damp cloth to remove dust and debris, which can cause premature wear. Lubricate moving parts according to manufacturer instructions to ensure smooth operation. Store tools in designated cases or racks to prevent damage and keep dust out. Sharpen blades and bits periodically; a dull tool compromises your work quality and can damage your floors. For refinishing hardwoods, a dedicated vacuum and a microfiber mop keep dust and dirt away—dust particles are notorious for scratching surfaces and shortening their lifespan. To learn more about hardwood floor longevity, explore hardwood care secrets. Regular maintenance keeps tools performing at their best, ultimately safeguarding your investment in beautiful, durable flooring.
Long-Term Results Require Consistent Upkeep
Beyond initial installation or repair, consistent upkeep ensures your flooring remains pristine for years. I recommend establishing a routine cleaning schedule: sweep regularly to remove loose dirt that can abrade surfaces and mop with gentle cleansers suitable for your specific flooring type. For hardwood floors, applying a recommended polish or finish every 1-2 years helps preserve the surface and enhances shine, as detailed in refinishing tips. Tiles benefit from periodic grout sealing—this prevents staining and moisture penetration, which can cause deterioration over time. Also, monitor for signs of damage—scratches, chips, or loose tiles—and address them promptly to avoid escalation. Using a moisture meter during humid seasons can prevent hardwood floor cupping or buckling, as humidity fluctuations are a common culprit. For comprehensive guidance on maintaining grout health, check grout maintenance. Consistency in care maximizes your flooring’s lifespan and aesthetic appeal, saving money and effort in the long run.
Scaling Up: Moving to Larger Areas or New Floors
If you’re considering expanding your flooring or replacing larger sections, planning becomes essential. I recommend investing in a professional-grade floor leveling system, like self-leveling compound, which provides a seamless foundation for tiles or hardwood. For larger projects, an industrial-grade sander with dust collection capabilities can significantly reduce cleanup time and maintain a healthier workspace. Additionally, modular tool systems allow for efficient handling of multi-room projects—integrating laser levels, moisture meters, and trowel kits for a cohesive workflow. As technology evolves, software solutions like digital project planners can help visualize layouts and monitor progress, reducing errors and rework. Trend analysis suggests that automation and smart tools will play an increasing role in flooring projects by 2025, making maintenance and installation more precise and less labor-intensive. To stay ahead, try incorporating a cordless electric sander with variable speed control; it offers versatility and control during refinishing or leveling. For more advanced steps on large-scale projects, see floor leveling techniques and elevate your craftsmanship.
3 Surprising Truths I Learned About Flooring That Changed My Approach
I once believed that following standard installation procedures was enough, but I soon discovered that paying attention to the subtle nuances makes all the difference. For example, understanding how environmental factors like humidity impact wood expansion prevented me from costly mistakes. Another lesson was that using quality tools, although initially more expensive, actually saves time and preserves the integrity of your flooring. Lastly, embracing patience during curing and drying phases ensured a flawless, long-lasting finish—rushing can undo all your hard work. These insights transformed my projects from routine tasks into crafts I’m proud of, and I encourage you to look beyond the basics to master the craft of flooring installation.
My Top Picks for Flooring Success
- Recoating and Maintenance Guides: I trust Hardwood Floor Care Secrets because they offer practical, expert tips that keep floors looking new for years.
- Professional-Level Tools: The impact driver and laser levels I use provide precision and ease, making the difference between a good job and a perfect one.
- Online Communities and Forums: Engaging with seasoned professionals on expert support pages has introduced me to solutions I wouldn’t have found on my own.
- Instructional Resources: The step-by-step guides at tile installation strategies help me approach complex projects with confidence, ensuring quality results every time.
Your Next Step in Flooring Confidence
Choosing to refine your skills in flooring installation, tile work, and floor leveling can truly transform your space—and your satisfaction. Remember, every project presents unique challenges and learning opportunities. Embrace the process, educate yourself continuously, and don’t hesitate to reach out for expert advice when needed. Your home’s beauty and durability are worth the effort. So go ahead: take that first step towards flooring mastery today, and watch your home evolve into the masterpiece you’ve envisioned. For personalized guidance, contact us anytime—your perfect floor awaits.