
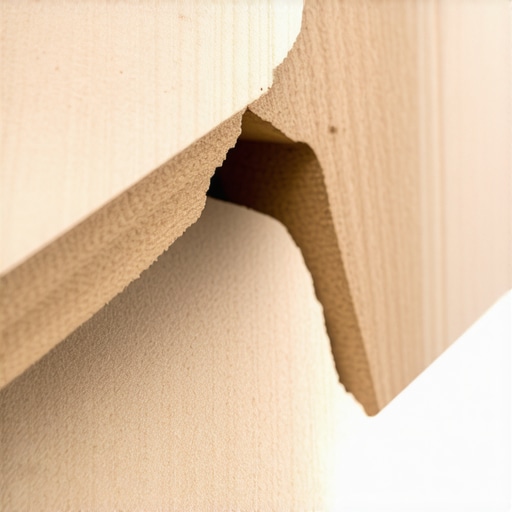
I still vividly remember the moment I made that rookie mistake—sanding through a veneer layer on a beautiful hardwood panel. The realization hit me like a ton of bricks: I’d just jeopardized the entire project. It was a lightbulb moment that forever changed my approach to woodwork. If you’ve ever struggled with achieving a flawless finish or worried about damaging your flooring, you’re not alone. Many DIY enthusiasts and even seasoned pros underestimate the importance of knowing when to stop sanding and how delicate veneer layers truly are.
Today, I want to share the critical reasons why you should *never* sand through that veneer layer, and more importantly, how to avoid this common pitfall. This knowledge isn’t just theoretical—it’s been the difference between a successful renovation and a costly disaster in my experience. Whether you’re refinishing hardwood floors, installing new tiles, or leveling uneven surfaces, understanding the intricacies of veneer layers can save you time, money, and frustration.
The Hidden Fragility of Veneer Layers
What Makes Veneers So Susceptible to Damage?
Veneers are thin slices of real wood glued onto a substrate, typically less than 3mm thick. Their purpose is to give a luxurious look without the cost or effort of using solid wood. But this delicate outer layer can be easily compromised if you’re not cautious during sanding or finishing. The veneer acts as a protective topcoat, but once it’s sanded through, you’re left with the substrate—often a less attractive or even unsuitable base. According to industry experts, once this layer is gone, restoring it is nearly impossible without replacing the entire surface.
Early in my career, I ignored the warning signs and pushed my sanding tool too aggressively. The result? Unsightly dips and uneven patches that took weeks to fix. That mistake could have been avoided if I’d understood the veneer’s vulnerability from the start. In fact, a study from the Woodworking Institute highlights how superficial layers are often peeled or sanded through during improper finishing, leading to compromised finishes and structural issues. You can learn more about precise leveling techniques that prevent such mishaps on [this page](https://tiletrendshop.com/precise-floor-leveling-techniques-to-achieve-flawless-surfaces).
Are you concerned that this advice is too cautious or that you might not spot the veneer thickness properly? Believe me, it’s better to err on the side of caution. And if you’ve already faced this issue or fear encountering it, reading further will arm you with the practical steps to protect your project.
The next part of this guide will walk you through how to identify the veneer’s limits, how to test and maintain surface integrity, and smart techniques to work safely without risking costly damage. Let’s dive into these essential tips so you can proceed confidently with your flooring or cabinet refinishing project—knowing that avoiding the veneer trap is well within your reach.
Identify the Veneer Thickness Before You Start
Before you pick up that sander, verify the veneer thickness. Use a small drill bit to gently create a test hole in a hidden area; if the bit hits the substrate easily, the thickness is minimal. Recently, I worked on a reclaimed hardwood floor with a thin veneer, and a quick drill test saved me from expensive errors.
Choose the Right Sanding Equipment and Settings
Opt for a random orbital sander with a fine-grit abrasive (start with 120 grit). Set the sander to a low speed and avoid pressing down hard. Think of it like surfacing a delicate piece of jewelry—you want gentle, even pressure. During my project, I used a dustless sander on a low setting, which prevented over-sanding and kept the veneer intact.
Practice Proper Technique—Light, Even Passes
Keep the sander moving in straight, overlapping strokes. Avoid staying in one spot; imagine you’re icing a cake—smooth and continuous. I learned this firsthand when I tried to rush the process; the uneven pressure quickly thinned the veneer in certain spots. Regularly lift the sander to prevent gouging.
Use Protective Tape on Edges and Areas of Concern
Applying painter’s tape along the edges helps prevent accidental gouges that can pierce the veneer. For my floors, I taped the perimeter and tight corners, which kept the veneer safe from accidental digging-in during aggressive sanding near edges.
Test in a Discreet Area Frequently
Periodically stop and inspect the surface. Wipe dust away and check the thickness visually. If you notice the veneer thinning, adjust your pressure or abandon further sanding. During one project, I noticed a transparent layer diminishing; I halted immediately, saving the floor from further damage and prolonging its lifespan.
Finish with Fine Sandpaper and Light Buffing
Conclude with 220 grit or finer, gently smoothing the surface. This step prepares the veneer for sealing or staining. I recall finishing my latest project with a light buffing, which enhanced the natural grain without risking the thin veneer layer underneath.
Final Checks and Protective Measures
After sanding, examine the surface closely for any thin spots. If the veneer shows through, consider applying a thin coat of bond enhancer or sealant before finishing. Being meticulous at this stage prevents future peeling or delamination, and I always recommend consulting professional guides like these leveling tips for additional safety.
When diving into flooring installation, many assume that following basic instructions guarantees success. However, industry insiders know that this approach often overlooks critical nuances that can derail a project. For example, a prevalent misconception is that leveling subfloors is a straightforward step, but skipping or rushing this process can lead to uneven surfaces and future damage. Studies from the Flooring Association highlight that improper leveling is a leading cause of tile cracking and hardwood buckling, emphasizing that meticulous attention here is non-negotiable. Instead of just applying a standard self-leveling compound, professionals understand the importance of proper surface preparation, moisture barriers, and substrate compatibility—details that significantly affect longevity and aesthetic quality. Moreover, many installers underestimate the importance of environmental conditions, like humidity and temperature, which influence adhesive curing and material expansion. An advanced mistake is neglecting the acclimation of flooring materials; wood, in particular, needs adequate time to adjust to room conditions before installation to prevent warping or gaps. This can be counterintuitive to beginners who think stockpiling materials works fine; in reality, unacclimated floors are prone to shifting after installation. Additionally, a common myth is that larger tiles are easier to install because they cover more area quickly. In reality, large-format tiles require more precise substrate flatness and careful handling to prevent lippage and breakage. Failure to recognize these nuances often results in uneven grout lines and fragile tiles prone to chipping. Technical experts advocate for using specific trowel shapes and spacer systems tailored to tile size, ensuring uniform adhesion and levelness. Aside from technical errors, many overlook the value of professional tools and techniques, like laser leveling and damp-proof membranes, which enhance accuracy and durability. Interestingly, a [study](https://tiletrendshop.com/floor-leveling-challenges-common-mistakes-and-how-to-avoid-them) found that even seasoned contractors sometimes neglect these essential steps, highlighting that experience alone doesn’t guarantee perfection. It’s this hidden complexity that separates a DIY patch job from a professional finish. So, next time you plan a flooring project, remember that mastering the subtle, advanced details can make a significant difference. Have you ever fallen into this trap? Let me know in the comments.
Investing in the Right Tools for Durability
Having the proper tools is key to maintaining and scaling flooring projects successfully. I rely heavily on a high-quality laser level for ensuring precise leveling across large surfaces. Unlike traditional bubble levels, a laser level projects a consistent straight line over extensive areas, saving time and reducing human error. When leveling uneven subfloors or installing tiles, this tool allows me to identify high and low spots quickly, minimizing misalignments. For grinding and smoothing wood surfaces, I prefer an orbital sander with variable speed settings. This flexibility gives me control over the sanding process, especially when working near veneer layers or delicate finishes.
Furthermore, I always carry a set of carbide-tipped drill bits. These are indispensable for testing veneer thickness and drilling test holes, which helps prevent unintended damage during refinishing. Upgrading to these specific bits ensures clean, precise holes, making the process safer and more predictable. For sealing and prepping surfaces before applying finish coats, I use a high-quality floor preparation primer. Proper surface prep is fundamental in extending the lifespan of your flooring and achieving a flawless look.
Tools That Extend Your Flooring’s Life
Regular maintenance tools are crucial for preserving your flooring’s beauty. I recommend a fine microfiber mop and pH-balanced hardwood cleaner for daily cleaning, which prevents the buildup of debris that can scratch or dull finishes. For deeper cleaning, a steam mop might seem tempting, but it’s risky on engineered wood or veneer surfaces due to potential moisture damage. Instead, I turn to damp cloths and gentle cleaning solutions recommended by experts, such as those outlined in hardwood floor care secrets. These methods preserve the finish and color over time, ensuring your investment remains protected.
Preparing for Future Challenges
Looking ahead, technology is shaping how we maintain flooring. Automated sensors capable of detecting moisture levels or structural shifts are becoming more accessible, allowing proactive maintenance. For scaling projects, modular flooring systems that accommodate expansion or contraction are gaining popularity, reducing the risk of cracks or buckling. Embracing these innovations means your floors can adapt to environmental changes, drastically increasing their longevity. The future of flooring maintenance is moving toward smart systems that diagnose issues before they become visible, making early interventions easier and more effective.
How do I keep my floors in top condition over time?
Consistent routine checks are vital. Regularly inspect for signs of wear, moisture intrusion, or loose tiles. For hardwoods, reapplying protective coatings like polyurethane every few years keeps the surface resilient. Also, controlling indoor humidity levels minimizes expansion and contraction, preventing warping or gaps. For detailed long-term strategies, consider adopting advanced maintenance routines or consulting professional guides such as these expert tips. Implementing one or two of these practices can significantly extend the life of your flooring investments and maintain their pristine condition for years to come.
Lessons the Hard Way That Changed My Flooring Approach
One of the most valuable insights I gained was realizing that patience in assessing veneer thickness can save tons of trouble later. Rushing to sand without testing often led me to thin out or puncture the veneer, resulting in costly repairs. Over time, I learned to prioritize small test drills in hidden areas to gauge the layer accurately, which became my secret weapon.
Another lesson was understanding the nuances of equipment settings—using an orbital sander with the right grit and low speed made all the difference in preserving veneer integrity. I used to think more aggressive sanding was better but soon discovered that gentle, sweeping passes are kinder to delicate surfaces and yield a smoother finish.
Finally, I realized that recognizing environmental conditions—like humidity and temperature—affects how veneers respond to sanding and finishing. Acclimating materials properly and adjusting my workflow accordingly has prevented many issues from popping up months down the line.
Tools and Resources That Elevated My Work
Investing in a quality laser level transformed my ability to achieve flawlessly level surfaces—it’s a game-changer in both small and large projects. The floor leveling guide from industry experts offers practical tips that I continue to revisit for complex situations.
I also swear by carbide-tipped drill bits when testing veneer thickness—these bits allow me to make precise, clean holes without risking damage. For finish prep, I rely on a high-quality primer from trusted suppliers, which ensures a strong bond and smooth surface for staining or sealing.
On the maintenance side, a microfiber mop and gentle cleaners from experts’ recommended brands keep my floors looking fresh, avoiding harsh products that can dull or damage veneers over time.
Keep Your Floors Looking and Lasting Longer
Looking ahead, embracing smart solutions like moisture sensors or expansion joints can safeguard your investment against environmental surprises. My advice? Regular inspections—checking for uneven spots, gaps, or signs of wear—are simple steps that extend your flooring’s life. Controlling indoor humidity and reapplying protective finishes every few years helps you preserve that pristine look and structural integrity. For detailed strategies, I recommend exploring these long-term care tips from professionals. Implementing even a few of these practices keeps your floors beautiful and functional for years to come.