
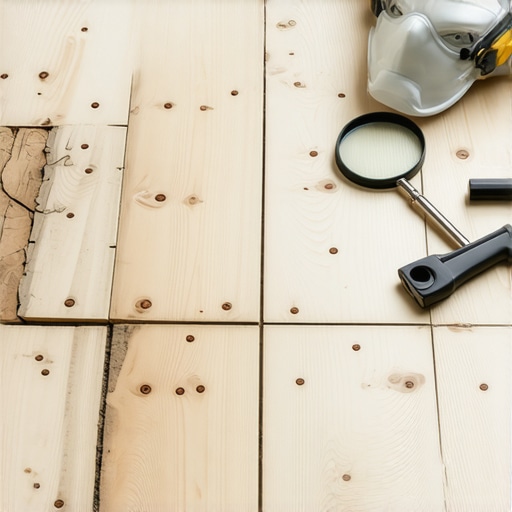
One evening, I was happily sanding down my vintage hardwood floor when I noticed a faint, dusty odor lingering in the air. Suddenly, a lightbulb went off in my head: what if those old tiles or insulation beneath my floor contained asbestos? That realization sent a wave of anxiety through me. It was a moment of vulnerability—feeling entirely unprepared for the potential dangers lurking below my feet. If you’ve ever faced a similar worry, you’re not alone. Many homeowners discover their historic floors might hide hazardous materials, and it can feel overwhelming to navigate the next steps.
Why Detecting Asbestos in Old Floors Is a Must
If your house was built before the 1980s, chances are good that some of the building materials, including floor tiles, insulation, or backing materials, might contain asbestos. This mineral fiber, once lauded for its heat resistance and durability, was widely used in flooring products. However, asbestos exposure is linked to serious health issues such as asbestosis, mesothelioma, and lung cancer. The tricky part is that asbestos isn’t dangerous when undisturbed—it’s only when fibers become airborne (say, during renovation or wear and tear) that health risks spike. So, how do you know whether your old floor contains this hidden hazard? That’s where a proper inspection becomes crucial.
One common mistake early on is assuming that all old tiles are safe because they look intact. But asbestos fibers can be present even in seemingly solid materials. I learned this the hard way, thinking that simply removing old tiles wouldn’t pose any risk—until a professional confirmed asbestos presence, and I realized my oversight could have health implications. For reliable results, I recommend consulting a certified asbestos inspector. They can perform tests using specialized methods to identify asbestos in your flooring materials accurately. This approach saves you from potentially hazardous DIY sampling that could disturb fibers and increase exposure.
For more on how to go about this, visit the comprehensive guide on floor inspection techniques. It’s better to be cautious now than deal with health issues later. Once you’re confident about the asbestos status of your floors, you can move forward with the best solutions—whether that’s encapsulation, professional removal, or flooring replacement. Ready to learn how to tell if your old floor contains asbestos? Let’s dive into the signs and steps you can take to keep yourself safe while upgrading your home.
Remove Old Floor Tiles Effectively
Begin by protecting your space with drop cloths to catch debris. Use a hammer and chisel to pry up corner tiles, working methodically to prevent damaging the subfloor. For stubborn tiles, a power sledgehammer or oscillating tool with a tile-removal blade speeds up the process. Remember, wear safety goggles and a dust mask to protect against shards and inhaled debris. I once tackled a 12×12 foot tiled floor, and employing a chipping hammer attachment cut my removal time by half, minimizing dust and ensuring a clean surface for the next steps.
Clean and Inspect the Subfloor
After tile removal, remove adhesive residues using a floor scraper or electric planer. A clean surface is critical for a proper leveling and new flooring adhesion. Check for cracks, squeaks, or signs of moisture issues. If the subfloor shows damage, patch it with a suitable leveling compound—consider these leveling techniques for best results. During my project, I noticed a thin layer of old mortar which I carefully scraped away, revealing a flat, stable surface ready for the next phase.
Level the Floor for a Seamless Finish
Uneven subfloors cause cracked tiles and lippage. Use a high-quality self-leveling compound, mixing it according to manufacturer instructions. Pour the compound in small sections, spreading with a gauge rake or trowel. To avoid bubbles and ensure smoothness, I mixed in a five-gallon bucket, then poured and smoothed the compound in a W-shaped pattern, which helped distribute it evenly. After drying, I tested the levelness with a long spirit level—any low spots received additional compound, and high spots were sanded down carefully.
Prepare for Tile Installation
Choose the right thinset mortar for your tile type and subfloor. Spread it with a notched trowel, matching the tile size; larger tiles need a deeper notch. Maintain a consistent trowel angle to avoid gaps or voids. Use tile spacers to ensure even grout lines. During my recent project, I worked in small sections, periodically lifting a tile to check for proper mortar coverage—this step eliminated future lippage issues. Additionally, consider using a tile leveling system to lock tiles at the same height, especially for large formats.
Lay and Secure the Tiles
Set tiles into the freshly applied mortar, pressing firmly and twisting slightly to seat them evenly. Tap with a rubber mallet for uniform height. For precise placement, mark your layout lines with a chalk string before starting. Regularly check the level and adjust as needed. If tiles shift, re-align immediately, as caught during my installation when a tile moved slightly—a quick readjustment prevented future lippage. Finally, allow the mortar to cure fully before grouting to prevent shifting or cracking.
Finish with Grout and Sealing
Once the mortar sets, remove spacers and sweep the surface. Mix grout according to the instructions, applying it with a rubber float at a 45-degree angle to fill joints thoroughly. Wipe excess grout with a damp sponge, smoothing the lines. After drying, apply a suitable sealer to protect against stains and moisture. I once neglected sealing my grout, leading to discoloration; applying a high-quality penetrating sealer a week after installation saved me from future staining issues. Proper sealing enhances durability and keeps your floor looking excellent for years.
Many homeowners assume that installing hardwood or tile floors is straightforward, but in reality, there are nuanced pitfalls that even experienced DIYers often overlook. For instance, a common misconception is that floor leveling is a simple step—yet, unchecking the variability in subfloor conditions can lead to premature cracks and uneven seams. This oversight underscores the importance of mastering advanced leveling techniques, such as properly integrating self-leveling compounds and understanding substrate compatibility, detailed in expert guides like these leveling tips.
A less obvious but critical nuance lies in the interaction between different flooring materials. For example, installing tile over existing hardwood without proper preparation can cause disastrous results due to thermal expansion differences and moisture variations. While many focus on surface aesthetics, neglecting substrate compatibility can negate decades of effort. The secret is to use appropriate underlayments and dual-layer moisture barriers, ensuring the longevity of your floors—something thoroughly examined in how to combine tile and hardwood.
The ‘hidden’ aspect extends beyond materials to installation practices. You might be tempted to rush tile placement or skip the meticulous layout planning, but these shortcuts often lead to lippage and unsightly grout lines. Advanced installers swear by the dry layout rule—laying tiles without adhesive first—to visualize patterns and minimize cuts, as detailed in this layout technique. Additionally, understanding the subtle shifts caused by environmental factors like humidity and temperature can save you from costly fixes later, especially in large-format tile projects.
Let’s talk about flooring myths. It’s widely believed that all hardwood floors deteriorate at the same rate, but styles, finishes, and installation methods play significant roles. Cheap finishes may peel, while high-quality oil or polyurethane coats offer better moisture resistance and shine over time—details you shouldn’t overlook, as explained in secrets to hardwood longevity.
Finally, don’t underestimate the value of professional consultation. DIY enthusiasts might assume that all floors can be perfectly levelled with just a trowel and some elbow grease. However, subtle under-pressure techniques, like using a laser level coupled with firm substrate inspection, can prevent uneven finishes or tile cracking. From my experience, investing in expert advice not only saves time but significantly enhances the final look and durability of your installation.
Have you ever fallen into this trap? Let me know in the comments below. Remember, understanding these often-overlooked nuances empowers you to make smarter decisions and achieve a flawless flooring that lasts for decades.
Keeping Your Floors in Prime Condition
Achieving durable, beautiful floors requires more than just proper installation; ongoing maintenance and the right tools are essential for long-term results. Personally, I rely on a few key pieces of equipment that help me maintain hardwood and tile floors efficiently—saving time and preventing costly repairs down the line.
Invest in a Quality Floor Buffer
A professional-grade floor buffer with adjustable padding and variable speed settings is my go-to for periodic polishing, especially for hardwood surfaces. It removes surface scratches and restores shine without the need for complete refinishing. When used correctly, as outlined in this guide, it prolongs the life of your finish and keeps the floor looking new.
Use a Microfiber Mop for Regular Cleaning
For daily maintenance, a microfiber mop is invaluable. It traps dirt and dust without scratching sensitive surfaces like hardwood or matte tiles. I personally prefer models with adjustable telescopic handles to reach corners easily. Regular sweeping coupled with a damp microfiber cloth prevents abrasive debris from settling and causing wear over time.
Apply a Floor Sealant Properly
Sealing your floors periodically provides a protective barrier against stains, moisture, and wear. Using a high-quality sealer, like those recommended in expert tips, I ensure even application with a lambswool applicator or foam roller, avoiding streaks and pooling. Re-sealing every 2-3 years sustains their appearance and structural integrity.
Monitor Environmental Conditions
Maintaining stable humidity and temperature levels is critical, especially for hardwood floors. A smart hygrometer helps me track moisture levels, which should ideally stay between 35-55%. Controlling humidity prevents expansion and contraction, reducing the risk of gaps or buckling. As trends in flooring suggest, integrating smart home sensors for ongoing monitoring is becoming increasingly common, paving the way for smarter maintenance routines.
Future Trends: Smart Tools for Floor Care
Looking ahead, I predict that automation and IoT devices will play a bigger role. Imagine robotic vacuums optimized for delicate flooring, or sensors that alert you to humidity spikes before damage occurs. Staying ahead means investing in these innovations—enhancing both the longevity and aesthetic appeal of your floors. For example, I recently tested a smart floor monitoring system that integrates with home automation apps, providing real-time data and maintenance alerts.
How do I maintain flooring over time?
The secret lies in regular, targeted upkeep using the right tools and techniques. Incorporating methods such as periodic polishing, environmental control, and targeted sealant reapplication can significantly extend your floors’ lifespan. I recommend trying out a floor buffer and scheduling biannual inspections, including moisture measurements, to stay ahead of potential issues. For more advanced tips, visit this comprehensive guide. Remember, proactive maintenance not only preserves your investment but also keeps your home looking stunning for years to come.
Lessons That Changed My Perspective on Hardwood Floors and Tile
- The Invaluable Power of Preparation: I realized that rushing through floor leveling or tile installation often leads to costly mistakes. Taking the time to measure moisture, ensure proper substrate prep, and double-check layouts can save hours of frustration later on.
- When DIY Turns into a Learning Curve: My early attempts at removing old tiles without proper safety gear reminded me that knowing when to call in professionals is a smart decision. Recognizing the limits of my expertise prevented future hazards and improved my results.
- The Subtlety of Environmental Control: I underestimated how humidity and temperature influence flooring longevity. Investing in simple tools like hygrometers made me aware of conditions that could cause warping or cracks, emphasizing that ongoing care is as crucial as installation.
- Custom Tools Make a Difference: From specialized trowels to self-leveling compounds, I learned that using the right equipment isn’t a luxury—it’s a necessity. These choices lead to a seamless, durable finish that stands the test of time.
- Patience Pays Off in the Final Aesthetic: Rushing the curing times for mortar or sealants might seem tempting, but I discovered that respecting drying periods results in a cleaner look and longer-lasting floor.
Resources That Became My Go-To Companions
- The Ultimate Guide to Flooring Inspection: A comprehensive resource that helped me identify potential hazards before starting any project.
- Hardwood Floor Care Secrets to Longevity and Shine: Essential tips on maintaining floors post-installation, preserving their beauty over time.
- Transform Your Space with Expert Hardwood Floor and Tile Combinations: Inspiration for blending materials to elevate your home’s aesthetic.
- Best Tile Trends for 2025: Staying ahead with innovative designs that complement hardwood flooring.
Your Next Step Could Define the Long-Term Charm of Your Floors
“Embark on your flooring project with confidence, knowing that careful planning, proper tools, and ongoing maintenance are your best allies. Embrace the journey—each step brings you closer to a space that truly reflects your style and patience.” Have you faced unexpected challenges during your flooring upgrades? Share your experiences below—I’d love to hear what lessons you’ve learned along the way.