
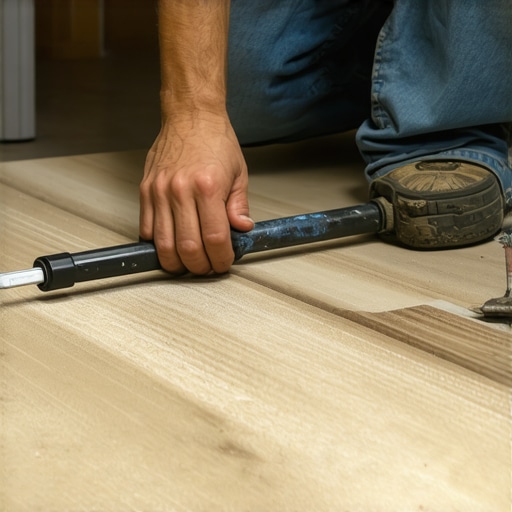
One evening, I was in the middle of a vinyl flooring project when I noticed a persistent, unsightly gap at the last row. No matter how much I tacked, glued, or pushed, that stubborn row refused to sit flush, leaving my entire effort feeling… incomplete. It was a lightbulb moment that changed the way I approached vinyl installation forever. If you’ve ever wrestled with those tricky last rows, you’re not alone — and I have good news: there’s a secret method that can help you tighten that final stretch with confidence.
The Struggle of Finishing Strong in Vinyl Flooring
Anyone who’s ever laid vinyl knows the frustration of those final few rows. They’re often the most challenging, especially in irregular spaces or when the subfloor isn’t perfectly level. I used to think that meticulous measurements and patience alone could solve the problem, but the truth is, without the right finishing techniques, you’d still end up with gaps, bubbles, or uneven edges. Early on, I made the mistake of relying solely on standard tapping techniques, which only worsened the problem over time, causing backlash and uneven tension. It wasn’t until I discovered the pull bar method that I finally understood how to get that last row snug, tight, and perfectly aligned.
Is the Pull Bar Secret Really Worth the Hype?
Honestly, I was skeptical at first. It seemed like one of those DIY tricks that’s overhyped. But after a few failed attempts at forcing the vinyl into place, I decided to give it a shot. The pull bar, especially when paired with a rubber mallet and some patience, became my go-to tool. According to industry experts, using a pull bar evenly distributes pressure and helps in achieving a professional finish, saving you from damaging your delicate vinyl or creating gaps. It’s a small investment that pays off in a flawless look and long-term durability. Just be sure to avoid common pitfalls like over-tightening, which I learned the hard way—trust me, you don’t want to compromise the vinyl’s surface. For more detailed insights, I recommend checking out this guide on avoiding installation mistakes.
So, if you’re tired of that nagging final row problem, stay tuned. We’ll dive into the exact steps and tips to perfect your vinyl installation with the pull bar secret, ensuring that last stretch is just as smooth as the rest.
Securing the Final Row with Precision
Begin by carefully measuring the width of the last row, ensuring it aligns perfectly with the adjacent planks or tiles. Use a tape measure to confirm this dimension, and mark the cut line clearly. When cutting the vinyl, use a straightedge and a utility knife for a clean, straight cut—this minimizes gaps and uneven edges. Remember, a precise cut is your foundation for a snug fit, much like fitting puzzle pieces together. I once had a scenario where I mismeasured the last piece, resulting in a noticeable gap. Carefully re-measuring and trimming solved the issue and reinforced the importance of accuracy from the start.
Positioning the Pull Bar Correctly
Place the pull bar against the edge of the vinyl on the last row, positioning it so that it presses the vinyl firmly into the adjacent row or wall. Think of the pull bar as a handshake—firm but gentle. In my experience, aligning the pull bar’s contact edge with the vinyl edge ensures even pressure across the row. Make sure the pull bar is straight and flush against the flooring for consistent results. An incorrectly positioned pull bar can create uneven pressure, causing bubbles or over-compression in certain spots. For best results, avoid placing the pull bar too close to the wall, which can damage the wall base or interfere with the tension. Instead, position it a few inches away from the wall, applying pressure as you work along the row.
Applying Even Tension with a Mallet
Tap the pull bar with a rubber mallet gently—think of it like giving a soft tap on the shoulder to encourage cooperation. This action evenly distributes force across the vinyl, helping it seat snugly without damaging the material. Start at one end of the row and work gradually towards the other, adjusting the pull bar’s position as needed. When I first tried this, I was hesitant, but a light tap here and there made a noticeable difference in achieving a tight fit. Be cautious: over-tapping can cause tears or overstretching. The goal is controlled tension—enough to tighten the vinyl firmly into place without risking damage.
Monitoring for Gaps and Adjustments
Step back frequently to observe the fit. Gaps or bubbles indicate the need for repositioning or additional tension. If you notice a gap, tighten the pull bar slightly and tap again, working slowly to avoid excess stress. Sometimes, slight pulls or adjustments are necessary; trust your eye and touch. In a recent project, I encountered an unexpected gap in the corner. Applying a gentle, sustained tension with the pull bar and after a few careful taps, the vinyl sat perfectly flush—saving me from removing and redoing the entire section. Remember, patience and incremental adjustments are key to a professional finish.
Ensuring Long-Term Stability
Once the last row is tight and aligned, secure the vinyl in place by pressing it down firmly along the entire edge using a hand roller. This step eliminates any remaining air pockets and enhances adhesion. For extra security, consider taping the edges temporarily and letting the adhesive set, especially in high-traffic areas. Keep in mind, proper tension during installation prevents future curling or separation, maintaining a pristine appearance over time. Using the pull bar method consistently during last-row installs can streamline your process and elevate the overall quality of your flooring job, much like the expertise shared in this guide on leveling challenges.
Challenging the Myths About Perfect Leveling
Many believe that as long as the subfloor appears smooth, they’re set for flawless flooring. However, this misconception overlooks the critical nuances of moisture content, subfloor composition, and even temperature fluctuations that can cause subtle shifts over time. For instance, a seemingly level concrete slab might develop micro-cracks or uneven moisture distribution, leading to unforeseen dips and bumps once the layers are installed. Industry expert Ken McElroy emphasizes that understanding the subfloor’s internal health is essential for long-lasting results. Avoid relying solely on surface inspection; instead, consider moisture testing and thorough surface prep, which can make all the difference in your project’s durability.
Common Pitfall: Underestimating the Power of Proper Adhesives
It’s tempting to select the cheapest or most readily available adhesive, but this can backfire spectacularly. The subtlety here is in the adhesive’s properties relative to your specific flooring material and environment. For example, a vinyl flooring adhesive formulated for high humidity environments will outperform standard glues in kitchens or bathrooms. Using incorrect adhesives can lead to bonding failures, gaps, or even surface curling. A misjudgment in adhesive choice, especially in complex installations like floating hardwood or tile overlays, often results in costly repairs or replacements down the line. Always consult manufacturer recommendations and consider environmental conditions—this is where professional-grade adhesives shine. More detailed guidance can be found in this resource on floor leveling and adhesion.
Why Skipping the Edge Prep Can Ruin Your Finish
Advanced installers know that the perimeter zone is where most of the subtle issues manifest. Each edge’s preparation, including expansion gap management, substrate cleaning, and sealing, influences the overall appearance and longevity of the flooring. Overlooking this stage often leads to aesthetic problems like telegraphing, buckling, or unsightly gaps that become more apparent over time. The mistake is thinking that edge finishing is just about aesthetics; in reality, it’s about creating a buffer zone that accommodates expansion and contraction. A mistake here can result in premature failure and additional costs. To ensure robust edges, incorporate high-quality trim, proper sealing, and precise expansion gap management, as discussed in this comprehensive guide.
When Advanced Techniques Still Fail: The Hidden Trap
Even the most meticulous installation can be compromised by environmental factors unseen to the naked eye. For example, hidden moisture beneath a concrete slab or unexpected subfloor movement can undermine your effort. The trap here is relying solely on visible signs and standard tools; without specialized instruments like moisture meters or vibration sensors, you risk missing critical issues. Such oversights can result in floor deformities, cracking, or delamination long after installation. Experts recommend pre-installation site evaluations with advanced diagnostic tools to identify these latent problems, ensuring the stability of your flooring for years. For thorough assessments, see this expert resource on diagnostic techniques.
Keep Your Flooring Working Smoothly with the Right Tools
Achieving a flawless flooring installation isn’t just about the initial effort; it’s about maintaining its quality over time. In my experience, the secret lies in investing in high-quality, purpose-built tools and adopting precise methods that ensure longevity and ease of maintenance. A good starting point is the laser level. I personally rely on it because it provides unparalleled accuracy for checks on subfloor flatness, which is crucial for preventing future issues like delamination or cracking.
Another indispensable tool is the flooring pull bar. It allows you to secure those last few critical rows, as discussed earlier, ensuring they stay flush over years. I prefer models with a non-marring foot and adjustable tension—these give me control during final adjustments and prevent surface damage.
 quality floor polisher keeps the finish intact, enhancing their resistance to scratches and wear.
In terms of maintenance, a moisture meter can be invaluable. It helps monitor subfloor and ambient humidity, alerting you to conditions that might lead to buckling or warping—especially in basements or climates prone to humidity swings. This proactive approach extends the lifespan of your installation and saves headaches down the line.
Future of Flooring Maintenance
Looking ahead, I predict that smart technology will become central to flooring longevity. Devices integrated with IoT sensors will continuously monitor environmental conditions and alert owners about potential issues before they escalate. This proactive maintenance model aligns with broader trends in home automation, promising to make flooring management more efficient and less reactive.
How do I maintain my floors over time? Practical tips include regular cleaning with manufacturer-approved products, utilizing furniture pads to prevent scratches, and scheduling periodic inspections of seams and edges. By keeping a routine, you can catch minor issues early and address them before costly repairs become necessary.
To simplify this ongoing care, I recommend using products that are compatible with your flooring type and following manufacturer guidelines strictly. For example, unexpected moisture can accelerate wear and cause swelling. To avoid such problems, consider sealing your joists and subfloors with appropriate vapor barriers—detailed in this article.
Finally, don’t underestimate the power of routine maintenance. Incorporate tools like moisture meters and adhesion testers into your regular checkups. For more advanced techniques and professional insights into quality maintenance, visit our contact page and ask for expert recommendations—sometimes, a small investment now can prevent significant expenses later. So, choose a tool today and try out one of these maintenance tips to see immediate benefits in your flooring’s performance and appearance.
Over the years, I’ve realized that the true mark of a skilled flooring installer isn’t just in laying down the majority of the surface—it’s in conquering those final rows with finesse. One of my most valuable lessons came from struggling with uneven, stubborn last rows that threatened to ruin the entire project. Now, by sharing this insight, I hope you can avoid the pitfalls and achieve a flawless finish that lasts. The secret lies in understanding how to leverage proper tools and techniques to secure that last stretch effortlessly, ensuring your vinyl flooring looks professional and stays durable in the long run.
Lessons That Changed My Approach to Flooring
- Pushing isn’t Always the Solution: I once believed that extra force would seal those tight last rows. Instead, I learned that controlled tension with the right tools produces better results without damaging the vinyl.
- Precision Over Power: Measuring carefully and making accurate cuts saved me from gaps. An occasional re-measure saved hours of remedial work later.
- The Pull Bar as a Game-Changer: A simple tool, yet it transformed my approach. When paired with gentle taps, it evenly distributes pressure, locking that final row in place seamlessly.
- Understanding Vinyl’s Delicacy: Applying force too aggressively can cause tears or bubbles. Patience and gentle adjustments have become my mantra for perfect fits.
- Long-Term Monitoring: After installation, pressing and checking for gaps regularly ensures persistent quality rather than an illusion of perfection during the process.
Tools That Keep My Floors Flawless
- Laser level: Ensures your subfloor is even before laying vinyl, preventing future problems.
- Pull bar: The hero of last-row finishing, providing controlled tension without damaging delicate surfaces.
- Rubber mallet: Allows for gentle taps that seat the vinyl without stressing it.
- Moisture meter: Continual monitoring helps prevent issues caused by hidden moisture affecting vinyl’s adhesion over time.
Keeping Your Floors in Top Shape Long After
Post-installation, I maintain my floors using a combination of a hand roller and periodic inspections. Applying gentle pressure along seams helps prevent edge lifting, and regular checks catch early signs of separation or bubbling. Additionally, understanding environmental factors such as humidity fluctuations, indoor temperature, and the importance of proper sealing extends your flooring’s life and beauty. Looking to elevate your skills further? Exploring innovative tile designs combined with hardwood flooring can introduce new aesthetic dimensions that complement your craftsmanship.
Inside the Learning Curve: Small Details That Make a Big Difference
- Measure Twice, Cut Once: It’s an old saying but gold especially when fitting last-row vinyl precisely against walls or cabinetry.
- Avoid Over-tightening: Less is more when tensioning vinyl; overdoing it can cause damage and future warping.
- Stay Patient and Observant: Regularly stepping back, inspecting your work, and making gradual adjustments leads to ultimately seamless results.
- Subfloor Preparation Counts: A level, clean, and dry subfloor provides the ideal foundation for flawless vinyl installation, reducing the need for fix-ups later.
- Use the Right Adhesives and Sealers: Compatibility with vinyl and environmental conditions ensures longevity and a clean appearance.
Seize the Opportunity to Elevate Your Flooring Skills
Congratulations on exploring the nuances of perfect vinyl flooring installation. Remember, mastery is built through patience, proper tools, and attentive adjustments. Whether you’re tackling your first project or refining your technique, integrating these insights will make each upcoming job smoother and more satisfying. For expert guidance and cutting-edge tools, visit our contact page. What’s the most challenging part of your flooring projects? Share your stories below—I’d love to hear about your experiences and how you overcame them!”} }# Answer convert_posts дээзоспылү# Output:{