
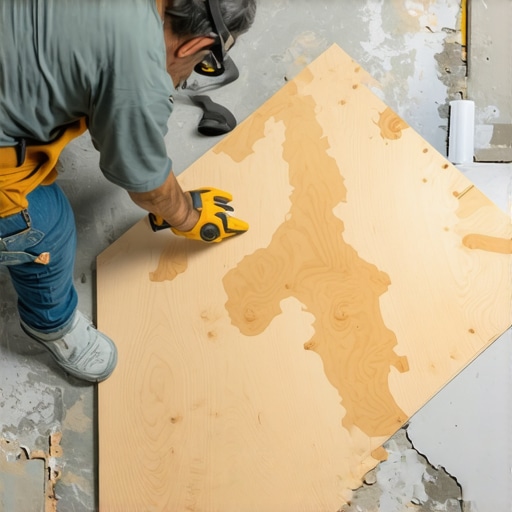
There was a moment during my first hardwood installation when I realized my floor had a not-so-subtle dip right in the middle of the room. My heart sank. I had carefully chosen the perfect planks, prepped the subfloor, and followed all the standard procedures—yet here was this awkward, unsightly depression. Frustration bubbled up, and I started questioning if I’d made some critical mistake or if I needed to tear everything out and start over. That experience was a lightbulb moment for me, leading me down a path of discovery about quick, effective fixes that don’t involve massive demo jobs.
The Plywood Trick Could Save Your Floor
If you’ve ever faced similar issues—those stubborn dips and dips that ruin the seamless look of your flooring—you might wonder if there’s a straightforward way to fix them without costly, time-consuming procedures. Well, spoiler alert: there is! Over the years, I’ve learned how a simple piece of plywood, combined with just a few tools, can level out small dips—saving you a ton of hassle and money. Today, I promise to share how this trick works, backed by personal experience and tested techniques, so you can tackle those imperfections confidently.
Will This Fix Really Work on My Floor?
Admittedly, I was skeptical at first. I’d read about leveling tricks that sounded too good to be true or that required complex equipment I didn’t have. My early mistake was ignoring small dips, thinking they would level out or get worse over time. But I learned that ignoring these imperfections often leads to worse problems down the line, like uneven wear or cracking. The key is understanding the limits of this plywood fix—it’s perfect for minor dips, not massive unevenness. Want to learn more about common flooring pitfalls? Check out this guide to floor leveling challenges.
Now that I’ve broken the ice, let’s dive into how you can apply this simple yet powerful trick to your own space, ensuring your floors stay flawless and your DIY confidence soars.
Preparing Your Space for the Fix
Before jumping into the repair, clear the area thoroughly. Remove furniture, rugs, and baseboards if necessary. Examine the dip closely; use a straightedge or level to gauge its size and depth. Personal experience taught me that a clean, exposed surface makes the process smoother. Check for any loose or damaged subfloor sections and mark them so you can address them accordingly. Proper preparation ensures the plywood will bond well and the fix lasts over time.
Gathering Materials and Tools
You’ll need a sturdy sheet of plywood (preferably ¼-inch thick), a circular saw or hand saw, a drill, wood screws, construction adhesive, and a pry bar. Having these on hand streamlines the process. When I did my own repair, I made sure to pick the right plywood, balancing weight and flexibility. For detailed material choices and tips, visit this guide to flooring installation pitfalls.
Cutting and Fitting the Plywood Patch
Measure the dimensions of the dip accurately. Use a chalk line or straightedge to mark the plywood sheet, then cut it to size. Don’t forget to add a small margin—about an inch—to ensure the patch covers the area completely. I recommend rough-cutting slightly larger and fine-tuning the fit as you go. Place the plywood in the dip and check its snugness. This step is critical; a well-fitted patch provides better support for the floor above. Precision here makes all the difference in achieving a seamless finish.
Applying Adhesive and Securing the Patch
Spread a generous layer of construction adhesive onto the subfloor within the patch area. Press the plywood firmly into place, aligning it with the surrounding flooring. Use a rubber mallet or a piece of scrap wood to tap it down gently, ensuring full contact. Then, secure the patch with screws drilled into the plywood and subfloor at regular intervals—about every 6-8 inches. Counter-sink the screws slightly below the surface to prevent interference with the finished floor. I found that working systematically, starting from the center and moving outward, helped avoid air pockets or gaps.
Finishing Touches and Final Leveling
Once the patch is secured, fill any screw holes with wood filler or caulk that matches your floor. Sand lightly if needed to smooth out uneven spots. Afterward, reinstall baseboards if removed and check the levelness again with your level tool. A little patience during this step ensures a flat, even surface. Remember, a well-executed patch not only fixes the dip but also maintains the integrity of your flooring for years to come.
For more techniques on achieving a flawless surface, see this comprehensive guide to floor leveling. The effort invested here pays off by creating a stable, aesthetic foundation for your entire floor installation, letting your beautiful hardwood shine without imperfections.
Many DIY enthusiasts and even some professionals often fall prey to misconceptions when it comes to tile, flooring installation, and floor leveling. One prevalent myth is that precise craftsmanship isn’t crucial as long as you follow basic instructions. However, detailed nuances in surface preparation, subfloor integrity, and adhesive selection can significantly influence longevity and appearance. Overlooking these aspects can lead to cracked tiles, uneven floors, or premature failure, which many underestimate.
A frequent mistake I’ve observed is assuming all difference in flooring is purely aesthetic. In reality, improper leveling or subfloor inconsistencies can cause structural issues that compromise the entire installation. For example, installing hardwood over an uneven subfloor often results in squeaks and gaps that become obvious over time. Addressing these issues before installing new floors is essential; otherwise, you might be redoing the work sooner than expected.
It’s also a common trap to ignore the importance of moisture barriers, especially when installing in basements or high-humidity areas. Failing to incorporate adequate moisture control can lead to warping, mold, and delamination. Experts emphasize that understanding the environment and selecting appropriate materials tailored to specific conditions are vital for a durable finish.
Why Do Many Floor Leveling Techniques Fail Over Time?
Let’s dig deeper into this question. A significant reason for failure is the improper use of self-leveling compounds or inadequate surface preparation. Applying leveling compounds on a contaminated or dusty surface prevents proper adhesion, leading to cracking or settling. Moreover, not allowing sufficient curing time or misusing the correct trowel or mixing ratios can result in an uneven surface that undermines over time. Studies in flooring longevity highlight that meticulous preparation and adherence to manufacturer instructions are paramount. For more advanced tips, see this article on the comprehensive guide to floor leveling. Ultimately, mastering these nuances ensures a flawless, lasting installation.
Identifying and correcting these misconceptions early can save significant time, money, and frustration. Whether you’re tackling tile or hardwood floors, understanding the intricacies behind professional-grade results is where experience truly pays off. Want to avoid common pitfalls? Dive into expert resources like this guide on avoiding leveling mistakes, and don’t hesitate to ask questions or share your experiences in the comments below. Have you ever fallen into this trap? Let me know in the comments.
Keep Your Floors in Tip-Top Shape with the Right Tools and Maintenance Routine
Maintaining your flooring over time requires more than just occasional cleaning; it demands dedicated tools and a proactive approach. Personally, I swear by a few essential pieces of equipment that make the difference between a floor that lasts decades and one that shows signs of neglect early. For hardwood floors, a high-quality microfibersweep mop combined with a pH-neutral cleaner ensures gentle yet effective dirt removal, preventing scratches and dullness. When it comes to tile, I rely on a grout-cleaning brush and a steam cleaner attachment to keep those grout lines spotless and mold-free, extending the aesthetic appeal and durability.
For floor leveling, I use a laser level for precision, which I’ve found indispensable in achieving an even surface before laying new material. Investing in a good moisture meter allows me to check subfloor conditions periodically, especially vital in areas prone to humidity fluctuations. This tool helps catch issues early, avoiding expensive repairs down the line. Combining these tools with routine inspections—like checking for loose or squeaky boards—ensures you catch small problems before they escalate, ultimately saving you time and money.
Looking ahead, I believe the trend will move toward smart maintenance devices. Imagine a moisture sensor system that alerts you via your smartphone when humidity levels rise beyond a safe threshold for your flooring type. Such innovations will empower homeowners to act swiftly, preventing long-term damage. Staying updated with technology and integrating these tools into your maintenance plan can dramatically prolong the life and look of your floors.
How do I maintain my flooring tools over time?
Proper care of your tools is just as important as the tools themselves. For instance, cleaning brushes and mop heads after use prevents mold and bacteria buildup. Regularly calibrating devices like laser levels or moisture meters ensures continued accuracy. Additionally, storing tools in a dry, organized space protects them from damage. By giving your equipment routine attention, you’ll ensure their longevity and reliable performance, which is crucial for consistent results in flooring projects. Want to see how professional contractors keep their tools in peak condition? Check out this comprehensive guide on mastering floor care routines.
What I Wish I Knew Before Starting My Flooring Journey
One of the most valuable lessons I learned was the importance of patience and meticulous preparation. rushing through subfloor assessments or skipping small leveling steps can lead to big problems down the line, like squeaks or cracks. I also realized that investing in quality tools, like a reliable laser level or moisture meter, drastically improved my results and saved me time. These insights came from countless trials, errors, and victories, emphasizing that success in flooring is often about attention to detail.
The Best Tools and Resources to Elevate Your Flooring Skills
Personally, I swear by a few key resources that transformed my approach. The Ultimate Guide to Floor Leveling provided comprehensive techniques that I still reference. A high-quality moisture meter helped me prevent humidity issues before they became costly repairs. For inspiration on combining hardwood and tile, this article offered creative ideas that elevated my design. Lastly, tools like a chalk line for straight cuts and a good vacuum are indispensable for a professional finish.
Your Next Step Is Closer Than You Think
Remember, mastering hardwood and tile installation isn’t reserved for pros; with the right knowledge and tools, you can achieve stunning results. Every project teaches you something new, and your dedication will pay off in beautiful, durable floors that elevate your entire home. Don’t hesitate—take the first step today, and you’ll soon enjoy the rewarding feeling of a flawless finish. Have you faced a challenge that taught you an important lesson? Share your experience below and inspire others on their flooring journey.