
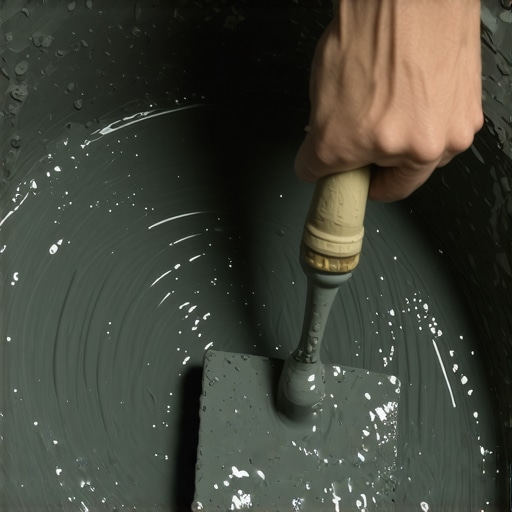
I remember the moment vividly—kneeling on a freshly tiled floor, beads of sweat on my brow, when I realized my grout looked more like a lukewarm pudding than the smooth, workable mix I needed. It was a lightbulb moment that changed everything. Too runny, and I’d risk uneven joints; too thick, and it would be impossible to work into the tiny crevices. That frustration drove me to discover the secret to mixing grout to the ideal consistency—like peanut butter that’s just right, not too stiff, not too runny.
Why the Right Grout Consistency Can Make or Break Your Flooring Project
Getting your grout mix just right isn’t just about aesthetics—it’s about durability, ease of application, and what ultimately determines the longevity of your floor. An improperly mixed grout can lead to cracking, crumbling, and even mold growth if moisture gets trapped. Knowing how to achieve that perfect peanut butter texture helps ensure your joints are solid and your finished surface holds up over time. Trust me, a little extra effort upfront avoids major headaches down the line.
Is the Peanut Butter Test Really Worth the Hype?
Early in my DIY journey, I made the mistake of mixing grout too thin, thinking it would spread easier. Spoiler alert: it dried unevenly, and I had to redo the entire section. Always remember, the goal is a consistency that holds onto your trowel without slumping off. According to flooring expert advice, this texture carries the ideal balance of workability and stability—crucial for flawless results (Learn more about common installation pitfalls). If you’ve faced the frustration of smeared or uneven grout, stay tuned—I’ll share my tried-and-true method to get that perfect mix every time.
Achieving the Ideal Grout Consistency with Precise Steps
During my last tile project, I vividly recall mixing grout and struggling to reach that perfect peanut butter texture. Here’s the step-by-step process I followed to ensure my grout was just right. First, gather your materials: dry grout powder, fresh water, and a clean mixing bucket. Start by adding approximately 75% of the recommended water into the bucket, then gradually mix in the dry grout. Use a margin trowel or a drill with a paddle attachment to combine thoroughly, ensuring no dry pockets remain. The goal is a homogenous, lump-free mixture that mimics the smooth, creamy consistency of peanut butter—firm enough to hold onto your trowel without dripping off.
Test, Adjust, Repeat
Once mixed, perform the ‘peanut butter test’ by lifting some grout with your trowel and observing its behavior. It should cling without slumping. If it’s too runny, add a small amount of dry grout and mix again in small increments. If too stiff, add a splash of water and remix. This controlled adjustment prevents waste and guarantees optimal workability. I remember a moment when I added too much water, resulting in a skimpy mix that smeared unevenly. After removing excess moisture by adding dry portions, I achieved that perfect, workable texture, leading to clean, durable joints.
Use the Right Tools and Techniques for Consistency
Employing the right tools makes all the difference. Use a drill with a paddle bit to ensure thorough mixing, especially when working with large batches. Mix slowly at first to incorporate dry ingredients, then increase to a medium speed until smooth. Stop periodically to scrape the sides of the bucket, avoiding unmixed pockets that can compromise the consistency. Remember, consistent mixing in small batches yields the best results, especially when working on large areas. During my project, I learned to extend my mixing time slightly to prevent lumps—this attention to detail paid off with perfectly uniform grout that set evenly and hardened properly.
Avoiding Common Mistakes that Ruin Your Grout
One mistake I often see is adding all the water at once, leading to uneven consistency. Always add water gradually as you mix. Also, don’t overmix; prolonged mixing can introduce air bubbles, weakening the grout. Keep your workspace clean, and always measure water precisely. For more in-depth tips on tile installation, check out this step-by-step guide. Mastering this simple yet crucial step ensures your grout is durable, easy to work with, and resistant to cracking or crumbling over time—saving you headaches on future repairs.Many DIY enthusiasts and even seasoned pros can be misled by common misconceptions about flooring installation, often due to oversimplified advice or outdated practices. A prevalent myth is that laying tiles or hardwood floors is solely about leveling the subfloor. But in reality, overlooking nuanced aspects like proper moisture barriers or substrate preparation can lead to future problems such as warping or cracking. For instance, installing hardwood over insufficiently prepared concrete can trap moisture, causing expansion and eventual damage—something that many underestimate (avoid these mistakes).
Why Should Advanced Floor Leveling Be More Than Just a Flat Surface?
Achieving a perfectly level floor requires understanding the subtle imperfections of your subfloor—like high and low spots that are invisible to the naked eye but can cause lippage or uneven grout lines. Relying solely on a spirit level won’t reveal these flaws; advanced techniques, such as using a laser level or employing a self-leveling compound in stages, can make a substantial difference (master the art of floor leveling). Skipping these steps results in lippage that detracts from aesthetics and can compromise the integrity of the installation over time.
Common Mistakes That Trap the Unsuspecting Installer
One trap is not considering acclimation of flooring materials. Hardwood and some tile variants expand or contract based on ambient humidity. Failing to acclimate materials adequately can lead to buckling or gaps once the temperature and humidity fluctuate—errors many overlook until it’s too late. Furthermore, improper preparation of the substrate, such as neglecting to remove old adhesive residues or cracking the concrete, can introduce unforeseen issues. According to experts, thorough substrate analysis and adherence to manufacturer guidelines are essential (learn about proper leveling).
Let me share a crucial insight: the importance of controlling moisture levels during installation. Research shows that improper moisture testing is a leading cause of flooring failure, especially in basements or below-grade installations (prevent moisture problems). Always perform both moisture and pH tests on the subfloor before proceeding—simple steps that save thousands of dollars and countless headaches.
Have you ever fallen into this trap? Let me know in the comments. The devil is in the details, and understanding these hidden nuances ensures your flooring lasts a lifetime.When it comes to maintaining beautiful hardwood floors, tiles, or any other type of flooring, having the right tools and techniques is crucial for long-term durability. I personally rely on a few specific pieces of equipment to ensure each project stands the test of time. One indispensable tool is a high-quality laser level; unlike traditional spirit levels, laser levels provide a 360-degree horizon, making it much easier to spot subtle unevenness in large areas, especially when dealing with complex floor layouts. For leveling substrates, I recommend using a rapid-setting self-leveling compound like Deck-O-Flex; it’s fast, reliable, and produces a flat surface that prevents future lippage or cracks, as outlined in detailed guidelines here floor leveling fundamentals. To achieve smooth grout joints, I use a small, professional-grade grout float with a fine foam pad—this gives me the control to press grout into tight spaces without excess smear. I also swear by a vibrating hammer drill with a paddle attachment for mixing large batches of thinset or grout thoroughly, reducing lumps and ensuring optimal adhesion. A good-quality moisture meter, such as the Tramex CME5, helps me verify subfloor conditions before starting, preventing moisture-related issues down the line. As flooring technology evolves, I predict the rise of automated leveling systems powered by AI, which will streamline troubleshooting in complex installations, ensuring consistent results regardless of the project size. How do I maintain long-term results? The key is regular cleaning with neutral pH solutions and inspecting high-traffic areas periodically for cracks or movement. Applying protective pads on furniture and area rugs helps prevent unnecessary wear. Lastly, always revisit your initial substrate preparation—neglecting this step can undo many of your careful efforts, leading to costly repairs down the road. For more details on the tools I trust and techniques I use, check out expert flooring tips. If you want to boost your flooring longevity today, try integrating a laser level into your next project—precision will Astound you. Don’t forget, mastering these tools and methods builds the foundation for flooring that looks great and lasts for decades.
What the Deep Dive Taught Me About Floor Perfection
One of the most surprising lessons was realizing how small details, like precisely mixing grout, can dramatically impact the longevity of a floor. It’s not just about aesthetic appeal but about creating a foundation that withstands years of wear. That eye-opening moment made me double down on meticulous prep work and embracing a mindset that values patience over shortcuts.
Learning to control moisture levels during installation was another game-changer. Overlooking this step can lead to unseen issues that manifest long after the project looks perfect. It taught me to be more attentive to environmental factors and to trust in thorough testing rather than assumptions.
Discovering the importance of substrate preparation reshaped how I approach any flooring project. I now see it as the unglamorous but essential foundation that underpins everything else. Skipping it might save time initially, but it risks costly repairs later—and that’s a gamble I no longer take.
Tools and Resources That Make a Difference
The [floor leveling fundamentals](https://tiletrendshop.com/flooring-installation-fundamentals-leveling-for-a-seamless-look) guide became my go-to resource, providing step-by-step insights that demystify complex processes. I trust a high-quality laser level for its precision, especially in large or intricate layouts, ensuring consistent results across the board. My favorite mixing paddle makes a tedious task of blending grout or thinset almost enjoyable, and a moisture meter regularly prevents issues before they start.
Additionally, the [expert flooring tips](https://tiletrendshop.com/revamp-your-home-with-expert-flooring-installation-tips) articles provide fresh ideas and troubleshooting advice that keeps my skills sharp. Over time, integrating these tools and knowledge has transformed each project from guesswork into a confident craft.
Push Beyond Comfort for Floors That Last
Remember, every high-quality floor begins with a commitment to detail and a willingness to learn. Jump into your next flooring project equipped with curiosity and patience, and you’ll be amazed at what you can achieve. Hardworking floors not only elevate your home’s style but also become a testament to your craftsmanship. So, are you ready to take those extra steps toward flooring mastery and create something truly lasting?
Have you ever struggled with achieving the perfect grout consistency or subfloor preparation? Share your experiences below, and let’s learn together!