
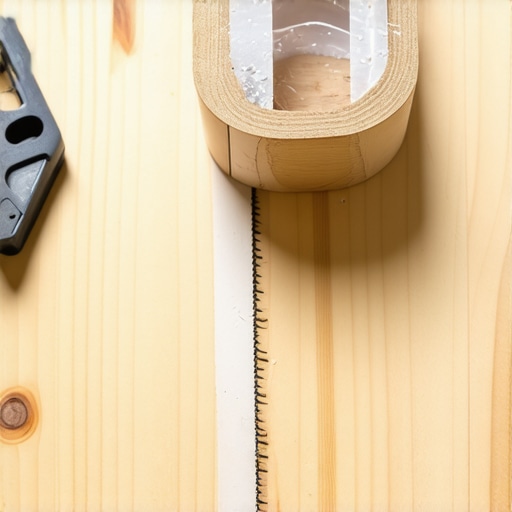
I remember the moment vividly—my hands trembling slightly as I lifted that freshly cut hardwood plank, only to be greeted by jagged splinters digging into my fingertips, and tiny shards scattering across the floor. It was a gut punch of frustration, especially after hours of preparation and careful measuring. That lightbulb moment hit me: there’s got to be a better way to make clean cuts without the mess of splinters.
Say Goodbye to Splintered Edges with a Simple Painter’s Tape Trick
Hardwood flooring installation can be a rewarding project, but let’s face it—those splinters are a constant headache. They not only pose a safety risk but also ruin the sleek look you’re aiming for. Over the years, I’ve experimented with various methods, but one approach stands out as a game-changer. It’s straightforward, affordable, and surprisingly effective, and that’s using painter’s tape to shield your cut edges.
This trick isn’t just amateurish advice tossed around in online forums; it’s backed by real-world experience and has saved me countless cleanup hours. Plus, it makes the difference between a professional-looking finish and a sloppy, splintered mess. If you’re tired of chiseling away at sharp edges or fear damaging your hardwood, keep reading—you’re about to learn exactly how I do it.
Is the Painter’s Tape Hack Really Worth the Hype?
Initial skepticism is natural; after all, it sounds too simple to be effective. I used to think that fancy blades or specialized tools were the only solutions. However, I made a mistake early on by rushing through cuts without proper protection—causing splinters and uneven edges. That oversight led me to research and test different techniques, eventually discovering that a strip of painter’s tape applied along the cut line can prevent fibers from splintering and chipping.
Learning from that mistake has helped me understand that sometimes, small details make all the difference. It’s not about expensive tools but about smart, deliberate steps to improve quality and safety. If you’ve ever struggled with splintered edges or worried about damaging your flooring, this simple hack could be exactly what you need. For more insights into efficient flooring installation, check out [tile and flooring pointers that save time and money](https://tiletrendshop.com/tile-installation-pointers-that-save-time-and-money). Now, let’s dive into how to master this technique and make your hardwood projects stand out.
Secure Your Surface with Painter’s Tape Before Cutting
Start by measuring the length of your cut line accurately with a tape measure, then mark it clearly with a pencil. Apply a strip of painter’s tape along the entire cut line, pressing it down firmly to adhere smoothly. I recall the time I was about to cut a lengthy plank for a corridor; I marked it meticulously, then laid down the painter’s tape, ensuring it was flat and without bubbles. This prevents fibers from fraying during the cut, resulting in a cleaner edge and fewer splinters.
Use the Right Saw and Blade for a Clean Cut
Choose a fine-tooth saw or a circular saw equipped with a blade designed for wood, such as a high-tooth-count blade. Before making the cut, set the saw to a slow, steady pace—rushing causes jerky movements, increasing the risk of splintering. I once used a dull blade on a similar job, leading to ragged edges despite taping. Replacing it with a sharp, fine-tooth blade transformed the results, emphasizing the importance of proper equipment.
Make the Cut with a Steady Hand for Precision
Align your saw’s blade precisely along the marked edge of the tape. Keep a firm grip and proceed slowly, maintaining consistent pressure. When I cut a plank for a client’s living room, I focused on maintaining a smooth, straight motion, watching for the tape to guide the blade. The result was a near-perfect edge that required minimal sanding—saving time and yielding a professional look.
Remove Tape and Smooth Edges After Cutting
Immediately peel away the painter’s tape from the cut edge to reveal the fibers underneath. If needed, lightly sand the edge with fine-grit sandpaper to remove any tiny splinters or roughness. I remember carefully sanding a cut edge that showed minor splinters despite the tape; a quick, gentle pass smoothed it out perfectly. This step delivers a neat, splinter-free finish that looks seamless and professional.
Verify the Cut and Prepare for Installation
Place the cut plank in position to check fitment and alignment. Use a level or straightedge if necessary to ensure the surface remains even. Adjust as needed by trimming small amounts—it’s better to cut slightly oversized and refine rather than risk an uneven or cracked piece. My experience with this method consistently results in tight joints and a flawless floor surface.
By following these precise steps—applying painter’s tape, choosing the right tools, executing steady cuts, and finishing edges carefully—you significantly reduce splintering and achieve professional-grade results. Incorporate these tips into your workflow and see how much easier and cleaner hardwood installation becomes.
While mastering basic techniques in tile, floor leveling, and hardwood flooring is essential, many installers and DIY enthusiasts often overlook nuanced details that can make or break a project. A prevalent myth is that achieving a level subfloor guarantees perfect results; however, experts emphasize that proper preparation goes beyond just leveling—incorporating moisture testing, substrate compatibility, and understanding material properties is crucial. For instance, failing to account for moisture variance can lead to future buckling, as highlighted in studies by flooring industry authorities, which warn against relying solely on visual assessments of the subfloor.
Another advanced mistake revolves around the misconception that all self-leveling compounds perform equally well in every scenario. The reality is that some products peel or crack if applied improperly—especially over non-porous surfaces or in high-humidity environments. Using the wrong primer or misjudging the thickness of the pour often results in compromised floor flatness and durability. To avoid this, consult detailed guides like this comprehensive resource, which shares expert strategies on achieving flawless surfaces.
What most people overlook is the importance of understanding material interactions at the microscopic level. For example, hardwood floors require acclimation not just of temperature, but also of humidity and wood species compatibility to prevent warping or gaps over time. Many installers assume that simply installing wood at room temperature suffices, but expert opinion suggests that acclimation should occur over several days, considering the specific climate conditions of the environment. This nuance is often missing from beginner guides, leading to avoidable issues down the line.
In the realm of tile installation, an advanced trap is neglecting the significance of proper expansion joints and builders’ gaps. Commonly, the focus is on perfect cuts and adhesive choices, yet ignoring the importance of expansion space can cause tiles to crack or pop loose as they expand or contract. As documented in industry studies, incorporating strategic movement joints and understanding substrate movement is essential for long-term stability.
Lastly, common myths persist about the universality of tools—many believe that a one-size-fits-all saw blade or trowel can handle all materials flawlessly. In reality, selecting the appropriate blade for porcelain versus natural stone, or using the right notch size in thinset, makes a tangible difference. A mistaken choice here can lead to incomplete bonding or chipping, which undermines the entire installation.
Navigating these nuanced aspects requires deeper knowledge and a strategic mindset. For those eager to elevate their craft, I recommend exploring advanced tips that save time and money and consulting experts about material-specific techniques. Remember, paying attention to these hidden details is what differentiates a professional finish from a costly mistake. And you, have you ever fallen into this trap? Share your experiences in the comments!Maintaining your flooring investments isn’t just about initial installation; it requires the right tools, consistent methods, and strategic planning to ensure longevity. Over the years, I’ve honed a toolkit that simplifies upkeep and helps my floors look pristine even years down the line. One essential item is a high-quality microfiber mop paired with an omega-shaped soft-bristle broom. These allow gentle cleaning without scratching surfaces or pushing debris into grout lines. For hardwood floors, I swear by a dual-action floor buffer equipped with a soft pad. It effectively removes scuff marks and brings back shine without chemicals, which I prefer for health and environmental reasons. This buffer handles light sanding and polishing, especially after deep cleans, extending the life of the finish and helping to prevent scratches that could become costly. When it comes to long-term durability—particularly over uneven subfloors—I use a laser level to identify persistent high or low spots, guiding my repairs with precise self-leveling compounds approved for the task. This approach is recommended by experts in [floor leveling techniques](https://tiletrendshop.com/precise-floor-leveling-techniques-to-achieve-flawless-surfaces). For scaling projects or future updates, I rely on a modular multi-tool system, such as the Oscillating Tool with various attachments. It allows me to undercut baseboards, clean grout lines, and make minor adjustments without needing a separate set of specialized tools, saving time and space. Looking ahead, I believe the trend will shift toward smart maintenance systems—integrating sensors that monitor humidity and subfloor conditions, alerting homeowners to issues before damage occurs. Now, to keep your floors working perfectly, periodically inspect expansion joints and apply a commercial-grade floor protector on high-traffic areas—it’s a simple step that can prevent costly repairs later. How do I maintain hardwood floors over time? Regularly cleaning with pH-neutral products, applying a fresh coat of polyurethane every few years, and maintaining consistent humidity levels are key. Investing in quality tools like a microfiber mop and a dual-action buffer not only makes cleaning easier but also preserves the surface integrity. For detailed guidance on professional-level maintenance routines, check out our comprehensive tips at [Revamp Your Home with Expert Flooring Installation](https://tiletrendshop.com/revamp-your-home-with-expert-flooring-installation-tips). Don’t forget—you can also schedule regular inspections to catch potential issues early; a proactive approach ensures your floors stay beautiful and functional for decades. Want to take your maintenance game further? Trying out a dual-action buffer for your next deep clean can make a noticeable difference—give it a shot and see your floors shine like new.
The Hardest Lesson I Learned About Tile, Floor Leveling, Hardwood Floors, and Flooring Installation
One of my most profound realizations was that no single tool or technique guarantees perfect results—it’s the consistent attention to detail that truly makes a difference. Early in my career, I believed that high-end equipment would solve all issues, but I soon discovered that understanding material behavior and preparing thoroughly often trumps fancy gadgets. Patience and planning balanced with practical experience became my greatest assets.
3 Myths About Floor Installation That Held Me Back
- Myth: All Hardwood Floors Need Excessive Acclimation Time. I learned that different wood species and climates demand tailored acclimation periods. Skipping this step leads to warping or gaps down the line.
- Myth: Self-Leveling Compounds Are a One-Size-Fits-All Solution. In reality, choosing the right product for your substrate and conditions makes all the difference for a flat, durable floor.
- Myth: Professional Finish Happens Only with Expensive Tools. Good technique and attention to detail often outshine costly equipment. A steady hand and knowledge elevate any project.
What Experts Won’t Tell You About Tile, Floor Leveling, and Hardwood Floors
Many seasoned installers know that the smallest oversight—like neglecting expansion joints or misjudging substrate moisture—can cause large issues later. Experts often emphasize precise floor leveling techniques and environmental checks as the secret to lasting results. Their insights show that investing time in preparation is more valuable than rushing to finish.
Materials Matter More Than You Think
I used to assume that all adhesive or grout was interchangeable, but I found that material compatibility and quality heavily influence durability. For example, selecting a grout sealer tested in high-moisture environments can prevent staining and degradation over years of use. Deepening my knowledge on this helped me avoid costly repairs and rework.
Attention to Hidden Details Elevates Your Craft
Sometimes, the difference between amateur and professional work lies in overlooked steps—like properly undercutting door casings or double-checking levelness with a laser level. These detailed checks are what truly ensure smooth, flawless floors that stand the test of time.
My Essential Toolkit for Flooring Success
- High-quality laser levels: They provide rapid, accurate checks of flatness and alignment. I trust this resource for guidance on choosing and using laser tools effectively.
- Moisture meters: Critical for assessing subfloor conditions before installation, saving from future buckling or mold issues.
- Proper saw blades: I swear by diamond-tipped or fine-tooth blades designed for specific materials—this prevents chipping and splintering.
- Quality fasteners and sealants: Long-lasting results depend on materials that suit your environment and flooring type.
Embrace Your Flooring Journey Today
Remember, every successful project starts with a curious mindset and a willingness to learn from your experiences—both successes and missteps. Whether you’re installing hardwood, tile, or leveling your subfloor, the key is to stay attentive to detail and never underestimate the power of proper preparation. You’re capable of creating beautiful, durable floors that transform your space and boost your confidence in your skills.
What step in flooring installation has challenged you the most? Share your story below and let’s help each other grow!
,