
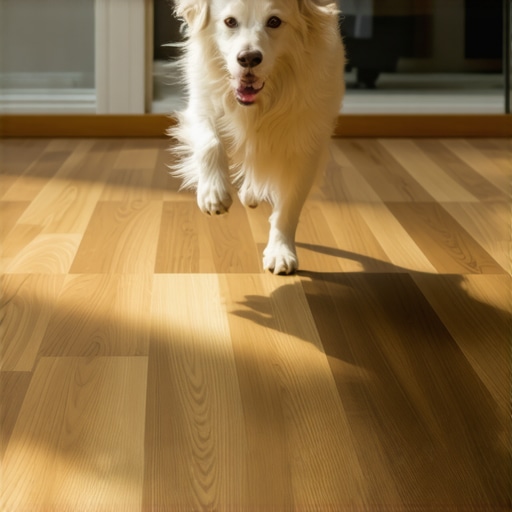
It was a morning like any other, but as my big Labrador dashed across the living room, I heard that terrible creak. My heart sank. No matter how carefully I selected my flooring, my misunderstanding of hardwood durability was about to cost me dearly. That lightbulb moment struck—did I really need to settle for fragile floors that could crack under even a tiny foot, let alone a large dog bouncing around? If you’ve ever felt that gut-wrenching worry about your hardwood floors and your energetic, hefty pup, you’re not alone. Many pet owners face this dilemma: how do you enjoy the warm, elegant look of hardwood without the constant fear of scratches and cracks?
Why Finding Dog-Resistant Hardwood Matters More Than Ever
Our furry friends are family. Yet, their presence can turn a beautiful new floor into a scratched-up mess faster than you can say “paw print.” The good news is, recent advancements in hardwood species and flooring technology have opened up options that combine style with resilience. I’ve tried my fair share of floorings, and early on, I made a costly mistake—I believed all hardwoods were equally vulnerable. It wasn’t until I explored specific species that I truly understood the value of choosing the right type for heavy-footed, fur-covered family members.
Are you tired of replacing or repairing scratches regularly? Do you dread the idea of pet-related wear ruining your home’s aesthetic? If so, you’re in the right place. Today, I’ll share the inside scoop on seven hardwood species that are surprisingly pet-friendly, backed by both personal experience and expert insights. This way, you won’t have to sacrifice your home’s beauty just because you have a large dog.
Is Hardwood Actually Worth the Hype?
When I first started searching for durable floors, I was skeptical. I questioned whether hardwood could truly stand up to my dog’s enthusiasm. To be honest, I had fallen into the trap of believing all hardwoods were delicate. I remember choosing a popular oak finish, only to find unsightly scratches after a few months. The mistake? I overlooked the species’ natural hardness and didn’t consider proper finish treatments. It taught me a vital lesson: not all hardwoods are created equal.
If you’re wondering whether investing in pet-resistant hardwoods is genuinely worthwhile, I can tell you from personal experience—and many others agree—that selecting the right species makes all the difference. For a detailed comparison of various flooring options, check out this guide on choosing the right hardwood floors. In the upcoming sections, I’ll walk you through which seven hardwood species can handle large dogs and how to ensure your floors stay beautiful for years to come.
Prep Your Space Like a Pro
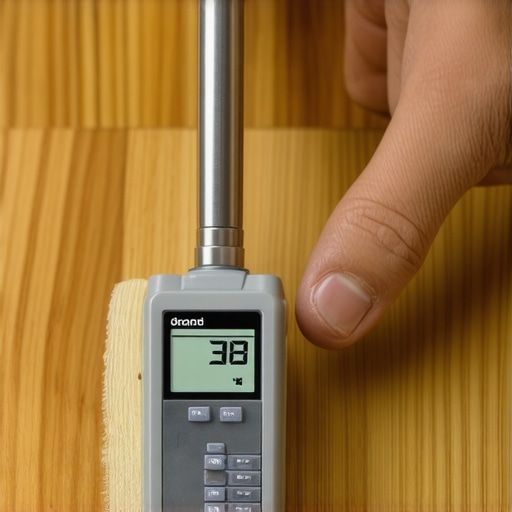
Begin by clearing the room entirely, removing furniture and debris to ensure an unobstructed work area. Use a moisture meter to evaluate the subfloor’s humidity levels; a reading above 12% may require drying or sealing before proceeding. Install a vapor barrier if necessary to prevent moisture damage, especially in basements or humid climates. This step is crucial toprevent future warping or buckling under your energetic dog.
Level the Subfloor Perfectly
A smooth, level surface is essential for a flawless hardwood installation. Use a self-leveling compound, spreading it with a trowel according to the manufacturer’s instructions. Pay special attention to corners and doorways where unevenness often lurks. After applying, wait for the recommended 24 hours before walking on it, ensuring a perfectly flat foundation. I once rushed this step and ended up with a creaky floor—lessons learned the hard way. For detailed techniques, visit this comprehensive guide.
Stagger Planks for Strength and Style
Lay out your hardwood planks in a staggered pattern, offsetting each row by at least 6 inches. This not only enhances visual appeal but also adds structural stability, reducing the risk of gaps and cracks over time. Use spacers to maintain uniform expansion gaps around the room’s perimeter—typically 1/4 inch—to accommodate wood expansion during humidity changes. I learned this trick after a stubborn gap appeared post-installation, and now I always back-butter large format planks for better adhesion and fewer voids.
Secure and Finish with Precision
Fasten the planks using nails or staples, striking just below the surface to avoid visible marks. For floating floors, clip together the tongue and groove systems firmly, ensuring a tight fit that resists separation from pet activity. Apply a high-quality, pet-resistant finish—such as water-based polyurethane—that resists scratches and is easy to touch up. Remember, multiple thin coats provide better durability than a single thick layer. Don’t rush this step; patience results in a resilient, long-lasting surface. For tips on achieving a flawless finish, see these hardwood maintenance secrets.
Protect Your Investment
Once installed, develop a regular cleaning routine: sweep daily with a soft-bristle broom to prevent abrasive grit from scratching your floors. Use a damp microfiber mop avoiding excessive water, which can seep into seams and cause swelling—especially in high-traffic areas. To boost resistance, periodically reapply a protective finish or use furniture pads to minimize denting from heavy paws. Remember, consistent care extends the life of your flooring beyond initial installation, keeping it beautiful despite energetic pets.
Many DIY enthusiasts and even experienced homeowners fall for misconceptions when tackling flooring projects, which can lead to costly mistakes. One prevalent myth is that as long as the subfloor appears level to the naked eye, it’s suitable for installation. However, subtle unevenness often goes unnoticed but can cause squeaks, cracking, or uneven wear over time. Professional-level floor leveling involves more precise techniques like using a self-leveling compound properly, which is often overlooked by amateurs. For a detailed look at proper leveling methods, check out this comprehensive guide.**
Another misconception is that thicker underlayment always provides better protection and noise reduction. While thicker underlayments can be beneficial, their effectiveness largely depends on the material’s type and installation quality. Using the wrong underlayment or installing it improperly can lead to issues such as mold growth or subfloor damage, especially under engineered wood or vinyl plank flooring. It’s crucial to choose an underlayment suited to your specific flooring type and environment, as explained in this article.**
A more nuanced misunderstanding involves tile installation, where many presume that substrate preparation is a trivial step. In reality, improper surface preparation, such as neglecting to prime surfaces or not using the appropriate mortar, can lead to cracks and delamination. Advanced tiling requires meticulous attention to substrate diagnostics—checking for moisture levels, using appropriate primers, and choosing the right adhesive. For expert tips, visit this resource.**
The key to avoiding these pitfalls is understanding that flooring installation is an integration of multiple detailed steps—each critical to the final outcome. Skipping or rushing these details often results in disappointment and additional costs. For instance, ensuring your subfloor is perfectly leveled with techniques like those outlined in this article can save you headaches later. Moreover, dedicating time to proper preparation and using the right materials tailored to your project’s needs boosts longevity and appearance.
Have you ever fallen into this trap? Let me know in the comments! Remember, investing in the correct initial steps prevents costly repairs and keeps your floors looking pristine for years.Maintaining your floors long-term requires the right equipment and a bit of know-how. One of my go-to tools is a high-quality moisture meter, like the Protimeter Surveymaster, which I use monthly to ensure subfloor humidity remains below the critical 12% threshold—preventing warping or mold growth. For regular cleaning, I swear by a microfiber mop combined with a pH-neutral cleaner because it lifts dirt without damaging the finish, as recommended in hardwood floor care secrets. When it comes to touch-ups or refinishing, an orbital sander with variable speed settings is invaluable; I prefer the Bosch ROS20VSC for precision and control, especially when sanding smaller areas or edges. Keep a set of quality putty knives and wood filler on hand for minor repairs—using the same brand as your flooring finish ensures better adhesion and blending. Looking ahead, I believe the trend will lean toward smart, connected maintenance tools that alert you to issues before they escalate, like moisture sensors that link directly to your smartphone.
If you want to keep your flooring in top shape, I recommend trying the technique of applying a thin, even layer of finish with a finishing pad wrapped around a rubber block—this ensures smooth application without bubbles. For more advanced tips on maintaining your floors, check out Mastering hardwood refinishing in 2025. Remember, consistent, proactive care now saves you costly repairs later, so equip yourself properly and stay ahead of potential issues!
Unspoken Lessons Behind Every Scratch and Gap
One of my biggest revelations was realizing that patience during installation is more valuable than any quick fix. Rushing through subfloor prep or skimping on leveling often led to uneven surfaces that exacerbated pet wear and tear over time. I also learned that selecting a species with high natural hardness, like Brazilian Cherry, drastically reduces scratches—saving me headaches and repair costs. Another lightbulb moment was understanding that finishing with multiple thin layers, rather than one thick coat, creates a resilient shield against big paws and playful antics, proving that attention to detail trumps shortcuts in longevity.
Tools and Resources That Transformed My Approach
My go-to toolkit includes a reliable moisture meter—a small device with big implications—helping me ensure the subfloor’s humidity is ideal before installation, which is essential for preventing future buckling. I swear by high-quality water-based polyurethane finishes, as they withstand scratches and are more eco-friendly, aligning with my commitment to sustainability. Books like Mastering hardwood refinishing in 2025 opened my eyes to innovative techniques and materials that stand up to pet life. Lastly, consulting professional installation guides provided step-by-step clarity, saving me from costly errors and giving me confidence in every decision.
Your Next Move Starts Now
Transforming your flooring journey from guesswork to mastery is within reach. Choosing the right hardwood species and installation practices tailored for heavy paw traffic doesn’t have to be overwhelming—arming yourself with the right knowledge and tools makes all the difference. I encourage you to take that first step today, knowing that a pet-friendly, beautiful hardwood floor is not only possible but achievable with a deliberate approach. Keep learning, stay curious, and your home will thank you for it.