
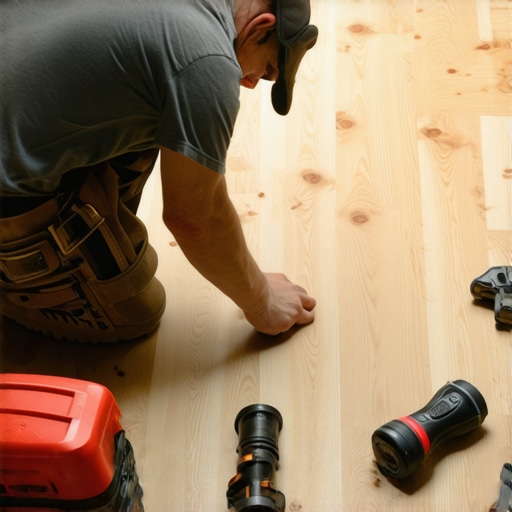
I remember the exact moment I stepped onto my new hardwood floor and felt that unsettling bounce. It was a crisp Saturday morning, sunlight streaming in, and I was eager to enjoy the smooth, shiny surface I had worked so hard to install. But instead of that satisfying click under my feet, there was a noticeable give, a slight wobble that made my heart sink. I had spent weeks honing my skills, following expert guides, only to be left staring at a bouncy, unsteady subfloor that threatened the entire project.
This lightbulb moment made me realize something crucial: pulling up joists isn’t always the only answer. In fact, many homeowners and DIY enthusiasts face this exact problem but feel powerless because they think a total demo is the only fix. But fear not—there are effective methods that don’t involve tearing apart your floors. Today, I want to share proven techniques that helped me stabilize my subfloor and get back to enjoying my home without the chaos of major reconstructions.
Why Fixing a Bouncy Subfloor Matters More Than You Think
A bouncy or uneven subfloor isn’t just an aesthetic concern; it can lead to long-term issues. From creaking sounds to cracked tiles, the consequences affect both the comfort and durability of your flooring. If left untreated, this problem can worsen, causing your beautiful new surface to shift, crack, or even fail prematurely. Additionally, addressing it early means saving money and frustration in the long run. Interestingly, a study by flooring experts indicates that improper subfloor preparation is among the top causes of flooring failure—so solving this problem quickly is essential for lasting results.
Have you ever faced this issue and wondered whether there’s a quick fix that won’t destroy your existing setup? If so, you’re in the right place. I’ll walk you through methods I tested personally—methods that don’t require us to undo everything from scratch but still deliver solid, lasting results.
Is a Fix Without Demolition Really Possible?
Early on, I made the mistake of thinking that every problem with the subfloor meant pulling up the entire floor—an exhausting, costly task. But I learned that there are smarter, less invasive options. Techniques like sistering existing joists, adding shims, or applying premium leveling compounds can effectively tighten up a loose or bouncy surface. These solutions are backed by flooring installation experts and can be implemented with some patience and careful planning.
Now that I’ve set the stage, let’s dive into these methods—step-by-step. If you’ve faced persistent floor bounce, stay tuned, because I’ll share exactly how I tackled the problem and how you can do the same.
Ready to make your floors sturdier and enjoy that flawless feel once again? Let’s get started!
Sistering the Joists for a Firm Base
One of the most reliable methods I used involved sistering the existing joists—essentially, attaching new, solid wood beams alongside the sagging ones to reinforce them. I started by locating the weak joists with a stud finder, then marked where additional support was needed. Using a circular saw, I cut new 2×8 or 2×10 boards to match the length of the joists. I then applied high-strength construction adhesive along the existing joist and positioned the new board snugly against it, securing it with heavy-duty nails or screws every 12 inches. As I tightened everything down, I noted a significant reduction in bounce, much like adding an extra layer of support to a wobbly table. This approach is highly effective and negates the need for complete floor removal, especially when the damage is localized. For detailed techniques, check out https://tiletrendshop.com/precise-floor-leveling-techniques-to-achieve-flawless-surfaces.
Adjusting and Leveling with Shims
Shims are thin wedges made of wood, plastic, or metal that can be inserted between the joists and the subfloor or between the joists and the ledger board. I used shims to lift sagging areas by carefully sliding them into place with a pry bar. To do this precisely, I first identified the areas where the floor dipped or bounced, then inserted shims underneath the joists until the surface became even. Using a level across multiple points, I ensured a flat surface. The process is akin to leveling a wobbly picture frame by adjusting its corners—simple but effective. Be cautious not to over-shim, as this can cause unevenness elsewhere. Once positioned, I secured shims with screws or construction adhesive to prevent movement. This technique is a quick fix that makes a noticeable difference and can be combined with structural support for longevity.When it comes to flooring, many DIY enthusiasts and even seasoned pros often cling to myths that can sabotage a project. One widespread mistake is believing that a perfectly flat subfloor guarantees a flawless finish. In reality, small imperfections can magnify once tiles or hardwood are installed, leading to lippage or uneven gaps. Proper surface preparation involves more than just checking for dips; it requires meticulous testing, like the flashlight trick, to identify subtle high or low spots that can ruin the aesthetic and structural integrity. For advanced techniques on achieving a smooth, level surface, visit https://tiletrendshop.com/precise-floor-leveling-techniques-to-achieve-flawless-surfaces.
Another misconception revolves around underlayment choices. Many assume that cheap materials will suffice, but in truth, underlayments like foam or cork can compress over time, causing tiles to crack or vinyl planks to buckle. Using high-quality, dense underlayment helps distribute loads evenly and prevents unwanted movement, which is crucial for long-term durability. Don’t settle for shortcuts here; your floor’s lifespan depends on it. You can explore the best options for your project at https://tiletrendshop.com/the-ultimate-guide-to-floor-leveling-for-a-perfect-finish.
Common myths about flooring adhesives also persist. Some believe that a universal adhesive exists for all materials, but specific products are formulated for particular substrates. For instance, thinset mortar works well for ceramic tiles but can cause issues with vinyl or engineered wood if misapplied. Correct adhesive selection, along with proper mixing and application — like avoiding over-troweling or rapid drying — is essential for bond strength. An expert study emphasizes that adhesive compatibility and proper installation techniques significantly influence flooring longevity. Learn more about avoiding bonding pitfalls at https://tiletrendshop.com/flooring-installation-mistakes-to-avoid-for-lasting-results.
Now, let’s address a question that even advanced installers ask themselves: How do I handle substrates with unseen moisture or structural weaknesses? This is where many fall into the trap of skipping moisture tests or ignoring persistent cracks, assuming they are superficial. Ignoring these signs can lead to mold, warping, or tile debonding down the line. Investing in proper testing with devices like moisture meters and structural assessments before installation saves money and headaches. For nuanced insights into moisture management, check https://tiletrendshop.com/why-moisture-meters-are-the-most-important-tool-in-a-wood-install.
Have you ever fallen into this trap or overlooked a detail that caused issues later? Share your experience in the comments and let’s learn from each other.
Keeping Your Floor in Top Shape with the Right Tools
Once you’ve invested time and effort into installing beautiful flooring, maintaining it becomes paramount for longevity and appearance. One of the first steps is selecting tools that are both effective and durable. I personally rely on a high-quality cordless oscillating multi-tool, like the Fein MultiMaster, for delicate tasks such as trimming baseboards or removing stubborn grout without damaging the surrounding surfaces. Its versatility allows me to address multiple maintenance needs with a single device, saving time and reducing tool clutter.
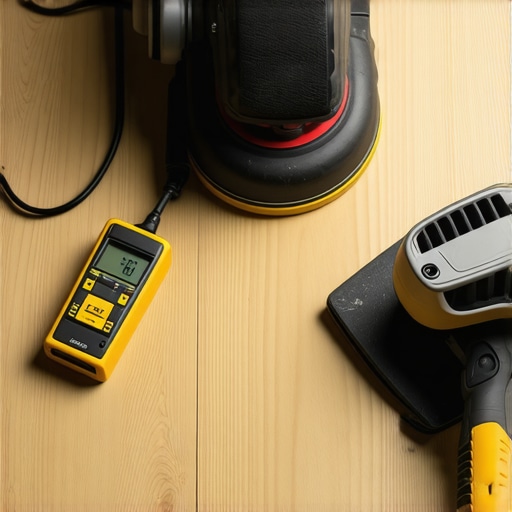
For more extensive repairs, such as sanding uneven areas or refinishing hardwoods, I choose a random orbital sander with variable speed control, like the Bosch ROS20VSC. The adjustable settings help me fine-tune the sanding process, preventing gouges or uneven finishes—crucial for keeping floors pristine over years. Pairing this with good-quality abrasive pads ensures a smooth, even surface that’s ready for sealing or refinishing.
Tools That Protect Your Investment Long Term
Follow-up maintenance includes using specific cleaning solutions that are gentle yet effective. I recommend investing in a pH-neutral floor cleaner, which preserves the wax or urethane finish on hardwoods. For tile or vinyl, a steam mop can be surprisingly effective for deep cleaning without harsh chemicals; just make sure your flooring material can handle moisture—consult trusted sources like this guide for care tips.
Regular inspections with a moisture meter help detect unseen issues, such as subfloor moisture intrusion, which could jeopardize your flooring’s integrity down the line. The Tramex Moisture Encounter MC1 is my go-to device — it’s reliable and easy to use, offering quick readings to catch potential problems early.
Planning for Future Expansion and Upkeep
As your space evolves, ensuring your flooring can handle scaling is critical. When considering new installations or remodels, I recommend planning expansion gaps with quality spacers and sealant to accommodate movement, especially in environments subjected to humidity changes. Advancements in underlayment technology, such as acoustical pads with moisture barriers, are promising trends that help extend your floors’ lifespan and improve comfort.
Looking ahead, I believe that sensor-embedded flooring, capable of monitoring structural health and moisture levels, will become standard. This smart approach will enable homeowners to proactively maintain their floors and avoid costly repairs. In the meantime, start by adopting a routine maintenance schedule that includes the precise tools I’ve shared, and you’ll enjoy flawless floors for years to come.
How do I keep my floors working smoothly over time?
Focus on regular inspections, using tools like moisture meters and proper cleaning methods, to catch issues early. Mechanical maintenance, such as periodically tightening loose fixtures or reapplying sealants, also plays a vital role. Remember, a well-maintained floor isn’t just about appearances—it directly impacts your home’s comfort and longevity. To dive deeper into precise leveling techniques that stabilize your surfaces, check out this comprehensive guide.
Optimize your maintenance routine by investing in a combination of trusted tools and regular inspections. With the right approach, your flooring can stay stunning and durable for decades to come. Don’t hesitate to reach out for expert advice or personalized recommendations through our contact page.
The Hardest Lesson I Learned About Tile, Flooring Installation, Floor Leveling, Hardwood Floors
One of the most impactful lessons I encountered was realizing that minor imperfections in subfloor preparation can lead to major issues down the line, like cracked tiles or squeaky hardwood. Over time, I discovered that investing extra attention during initial leveling saves enormous headaches later. It taught me that patience and precision are the real keys to durability, not rushing through the process in hopes of quick results.
3 Myths About Tile, Flooring Installation, Floor Leveling, Hardwood Floors That Held Me Back
- Myth: A perfectly flat subfloor guarantees a flawless finish.
Reality: Small dips and high spots can become glaring issues once tiles are set, emphasizing the importance of meticulous surface testing. - Myth: Cheap underlayment will suffice.
Reality: High-quality underlayment provides better load distribution and prevents buckling over time, so don’t cut corners there. - Myth: Universal adhesive works for all flooring types.
Reality: Using specific, compatible adhesives prevents bond failure and enhances longevity, which I now always prioritize.
What Experts Won’t Tell You About Tile, Flooring Installation, Floor Leveling, Hardwood Floors
Many professionals know that unseen moisture or subtle substrate flaws can sabotage a project but hesitate to stress testing. Ignoring moisture levels or skipping structural assessments can cause mold, warping, or tile debonding. Detecting these issues early through proper testing —like using reliable moisture meters—has saved me from costly repairs and is something I actively recommend to all DIYers and homeowners alike. Learning this from seasoned installers changed my approach completely.
My Essential Toolkit for Floor Repair and Maintenance
- High-quality cordless oscillating multi-tool: Perfect for delicate trimming and grout removal, it’s a game-changer during repairs and touch-ups.
- Random orbital sander: For refinishing hardwoods and ensuring smooth surfaces before sealing.
- pH-neutral floor cleaner: Preserves finish and keeps floors shining without harsh chemicals.
- Moisture meter like Tramex MC1: Early detection of subfloor moisture helps prevent long-term damage, making it invaluable for routine inspections.
Keep Your Floors Flawless by Staying Ahead
Proper planning—including the right tools and maintenance routines—can dramatically extend the life of your flooring. Regular inspections, using moisture meters to catch hidden issues, and choosing durable, quality materials helps avoid costly fixes. As technology advances, I believe smart sensors embedded in flooring could revolutionize maintenance, alerting homeowners to problems before they escalate. Until then, proactive care and the right knowledge remain your best defenses against unexpected surprises.
Your Next Step Toward Perfect Floors
Armed with lessons learned, myth-busting insights, and essential tools, you’re now better equipped to create and maintain floor surfaces that last. Consistent upkeep, careful installation, and a willingness to learn from experience make all the difference. Whether tackling a small repair or planning a large renovation, remember—attention to detail now prevents regret later. Dive deeper into precise leveling techniques with this detailed guide and keep building your expertise for a more resilient, beautiful home.