
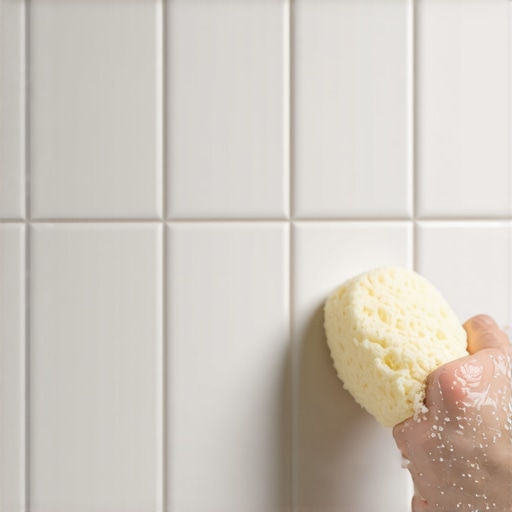
I remember the moment vividly. I had just finished a bathroom renovation that looked stunning—new tiles, fresh grout lines, everything shining. But as I stepped back to admire my work, my heart sank. There was this stubborn, cloudy haze lingering over the grout. No matter how much I scrubbed or bleached, it refused to budge. It was like trying to clean a stubborn stain on a shirt—exhausting and frustrating.
How I Discovered the Simple Dish Soap Hack for Grout Haze
After wasting hours and feeling overwhelmed, I finally found a trick that changed everything. It’s so simple that I wondered why I hadn’t heard about it sooner. Turns out, a gentle dish soap—yes, your everyday kitchen staple—can do wonders for removing grout haze and restoring that crisp, clean look. Today, I’ll walk you through how I did it and share the steps for you to achieve the same gleaming results.
Skeptical About Dish Soap’s Power? Think Again
I get it. When I first heard about using dish soap for grout haze, I was highly skeptical. It seemed too easy, too mundane. But early in my attempts, I made the mistake of using harsh chemicals that only left the grout stained or damaged. The key is choosing the right type of dish soap—mild, degreasing, and free of unnecessary additives. Trust me, this method is a game-changer and worth trying before resorting to costly chemical cleaners. For more in-depth strategies, check out this guide on achieving flawless flooring.
If you’ve encountered the same stubborn haze after your tile work, I want to know—have you tried this trick yet?
Level the Surface Like a Pro
Start by thoroughly inspecting your subfloor; unevenness here is the root of many issues. Use a long spirit level or a laser level to identify high and low spots. For deep dips, apply self-leveling compound, pouring it in the lowest areas and spreading it with a trowel to prevent air pockets. I once faced a bathroom renovation where a slight ridge caused tiles to crack; leveling it out with a floor leveler saved the entire project. Remember, a flat, even surface is the foundation for perfect tiling, much like laying a solid bed for a mattress.
Prep and Prime Properly
Clean the surface meticulously, removing dust, grease, and debris. Use a vacuum and a damp cloth; any leftover dirt can compromise adhesion. Applying a primer compatible with your leveling compound enhances bonding. During my first attempt, skipping primer led to swelling and bonding issues—lesson learned. Think of primer as a handshake between the bond layer and surface; it sets the stage for lasting results. For detailed guidance, check out this comprehensive primer guide.
Mix and Pour with Precision
Follow manufacturer instructions precisely when mixing self-leveler or mortar. Use clean, cold water, and add powder gradually while stirring with a drill attachment to avoid lumps. Pour the mixture in small sections, starting from the furthest corner, then spread evenly with a serrated trowel. A common mistake is rushing the pour, resulting in uneven surface; take your time, and work methodically. My experience taught me to prepare all tools beforehand to prevent mid-process interruptions, ensuring a smooth, self-leveling pour that fills every nook and cranny like a liquid blanket.
Trowel and Finish for Smoothness
Once poured, use a gauge rake or tile float to screed the surface, ensuring uniform thickness. Let it cure undisturbed—cover with plastic if needed to prevent quick drying or dust contamination. After setting, lightly skim the surface with a trowel to smooth out minor imperfections. I once had a patch that cured unevenly, creating a bump; sanding it down damaged the surface. Patience here pays off. For best results, consult this detailed leveler application technique.
Verify Flatness Before Tiling
Use a straightedge or long level to check for deviations. Fix any high spots with a grinder, and add more compound if low areas are detected. Achieving a flat surface is critical to avoid lippage, which can ruin the visual harmony of your tile layout. I always double-check after curing, as even small misalignments can be glaring once tiles are laid. This step ensures your foundation is solid, enabling a flawless tile finish that withstands daily wear and tear.
Many DIY enthusiasts and even professionals often overlook critical nuances that influence the longevity and aesthetic of tile and flooring projects. One widespread myth is that leveling the subfloor is solely about achieving a surface that’s flat to the eye; however, subtle imperfections — even ones invisible to the naked eye — can cause tiles to crack or loosen over time. Experts emphasize that understanding the importance of proper substrate preparation is essential for a flawless finish, as highlighted in this comprehensive guide.
An advanced mistake many make is underestimating moisture issues beneath concrete slabs. Rising damp or moisture vapor emissions can sabotage your flooring even months after installation. While many believe applying a standard primer suffices, studies have shown that using proper vapor barriers and moisture mitigation techniques significantly reduces failure rates, as per expert insights. Failing to address this can lead to bubbling, peeling, or mold growth.
Another subtle point often misunderstood revolves around the adhesion of tiles on different surfaces. While a primer is commonly recommended, the type of primer and compatibility with your chosen adhesive are crucial. For instance, using a primer designed for concrete on a plywood subfloor may impede bonding, causing lifting or hollow sounds. This underscores the necessity of selecting the right bonding agents and understanding substrate compatibility, as detailed in this resource.
What sophisticated questions should experienced installers ask themselves? How do subtle substrate variations impact long-term repairs?
To ensure a lasting installation, consider that even minor variations—less than a millimeter difference in height across a room—can result in misaligned grout lines or uneven tile surfaces. According to recent research published in the Journal of Flooring Science, these small irregularities can cause stress points, leading to cracking or delamination over years. Therefore, meticulous level checking with laser levels and proper compensating techniques are critical. Avoid shortcuts here, as they may lead to extensive repairs later; learn more about avoiding such pitfalls here.
Finally, don’t underestimate the impact of environmental factors such as temperature fluctuations and humidity during installation. Many assume that doing the job in a controlled environment eliminates any risk, but in real-world scenarios, seasonal changes can cause substrates to expand or contract post-installation. Using flexible sealants and good ventilation can mitigate these issues.
Maintaining your tile, hardwood, or leveled floors over time requires more than just initial setup; it demands the right tools, consistent upkeep, and an understanding of evolving best practices. One essential investment is a high-quality, infrared floor thermometer, which helps monitor temperature fluctuations that can affect adhesives and finishes. Regular inspections with a laser level, such as the Bosch GLL 3-330C, ensure your floors stay perfectly flat and catch any shifts early, preventing costly repairs. Using precision tools like a diamond-calibrated grout remover preserves grout lines and tiles, reducing the chance of damage during maintenance. For cleaning, I prefer a microfiber mop paired with pH-neutral cleaners; this minimizes abrasion and preserves surface luster, especially on hardwoods. When dealing with stubborn stains or haze, a dedicated tile blade can safely pass over surfaces without damaging the sealant or finish.
How do I maintain my flooring systems over time?
Consistent monitoring is key. Keep an eye on environmental conditions—excess humidity or dryness can cause materials to expand or contract, compromising the installation. Applying periodic re-sealing on grout and hardwood surfaces extends their lifespan, and using a moisture meter helps detect hidden issues beneath slabs, preventing long-term issues. In light of future trends, automation and smart tools are becoming more prevalent; integrated sensors will soon monitor humidity, temperature, and even structural shifts in real-time, alerting homeowners or contractors before problems escalate. Embracing these advancements today will place you ahead in floor maintenance. To ensure your subfloor remains stable and compatible with new installations, consult this guide on avoiding leveling mistakes. Take the initiative now—try using a laser level weekly to spot any subtle shifts in your flooring. Preventative care is always more cost-effective than repairs later on, and staying proactive guarantees your floors stay stunning and durable for years to come.
Unforeseen Lessons That Changed My Approach to Flooring
One of the most impactful realizations I had was the importance of subtle substrate variations. I used to believe that a quick visual check was enough, but I learned that even a tiny deviation—less than a millimeter—can lead to cracked tiles or lippage down the line. Precision tools like laser levels are invaluable, and investing in them saved me from costly repairs later. Additionally, I discovered that addressing moisture beneath concrete slabs isn’t a task to overlook; using proper vapor barriers significantly reduces failure risks and prolongs the life of your installation. Lastly, selecting the correct primer for your specific substrate isn’t just a step—it’s the foundation of a successful, durable finish. These insights, learned through hands-on experience, made me realize that professionalism lies in attention to the smallest detail.