
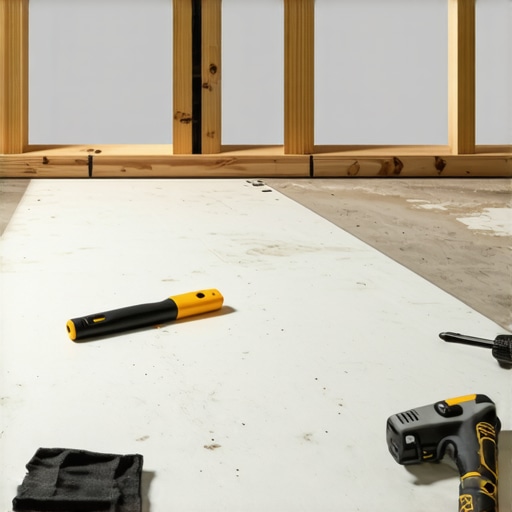
It was a restless night when I first noticed the creaking sound echoing through my freshly installed hardwood floor. Every step felt like I was aggravating an underlying issue that I couldn’t quite see. The frustration of feeling those tiny, almost imperceptible shifts—like the floor was resisting the very foundation beneath—made me realize I was dealing with something more serious than just installation hiccups. That lightbulb moment taught me that subfloor issues, especially when it comes to rubbing against the joists, can cause long-term damage and headaches.
Why Your Subfloor Rubbing Against Joists Can Turn Into a Major Headache
Is Fixing This Really Worth the Effort?
Early on, I made the mistake of ignoring the subtle signs. I thought a little creak here and there was normal. But over time, those minor issues escalated into uneven floors, squeaks, and even cracks. The reason is simple: when the subfloor rubs directly against the joists, it can cause friction that leads to wood expansion, contraction, and eventual warping. These movements compromise the integrity of your flooring and can mean costly repairs down the line.
Addressing this problem early can save you a significant amount of money and hassle. Think of it as giving your floor the right foundation it needs to stay beautiful and sturdy for years. Plus, you’ll feel confident knowing your hard-earned investment isn’t slowly deteriorating because of avoidable mistakes. For in-depth insights, I recommend checking out this guide on common floor leveling mistakes that can lead to issues like these.
Now, let’s get into how to ensure your subfloor stays perfectly in place—because fixing it after the damage is done is no fun at all. If you’ve faced similar problems, keep reading; this can be your step-by-step solution to protect your floors and save your sanity.
Assessing the Damage and Planning Your Fix
Before diving into repairs, take a moment to identify exactly where the subfloor rubs against the joists. Use a putty knife or a pry bar to gently lift the edges of the subfloor in suspect areas. If you notice squeaks or movement, it’s a sign that the subfloor isn’t secured properly. Document these spots, as targeted fixes are more effective than a one-size-fits-all approach. I once found a particularly loose section behind my closet after an inspection, which was causing most of the squeaking. After marking it, I was ready to proceed with securement techniques that ensure a tight fit.
Many homeowners and even experienced DIY enthusiasts fall prey to misconceptions about tile, hardwood floors, and floor leveling that can undermine their efforts and lead to costly mistakes. It’s essential to go beyond the surface and understand the nuanced truths that professionals rely on. One widespread myth is that choosing the most aesthetically appealing tile or hardwood is always the best option. However, without considering the specific environmental conditions and load-bearing requirements, even the most beautiful flooring can deteriorate prematurely. For instance, selecting the right flooring materials involves more than just visual appeal; factors like moisture resistance, thermal expansion, and subfloor compatibility play crucial roles. I recommend exploring tile selection tips to make informed decisions that balance style and durability.
Another common misconception is that leveling compounds and self-levelers are foolproof solutions for uneven floors. Many assume that applying a self-leveling compound will automatically produce a perfectly flat surface, but in reality, improper preparation and application can result in lippage, cracks, or adhesion failures. For expert insight, see floor leveling secrets. An often-overlooked nuance is that temperature and humidity significantly influence how these compounds cure. Failure to account for these factors can lead to uneven drying, compromising the entire floor installation.
Why do so many installations look perfect but develop issues later?
The answer often lies in the subtle, advanced mistakes made during the initial stages. For example, neglecting to prepare the subfloor adequately—such as failing to remove dust, debris, or moisture—can cause weak bonding, resulting in tiles or hardwoods that shift and crack over time. Additionally, misjudging expansion gaps or using incompatible adhesives can trap moisture or constrain materials, leading to warping. According to industry experts, such as those cited in this comprehensive guide, understanding these nuances is critical for long-lasting results.
Beware of the trap where many installers assume that a one-size-fits-all approach will suffice. Every space has unique conditions, requiring tailored solutions—whether that’s using the right primer, selecting the appropriate underlayment, or customizing expansion gaps. Overlooking these details can transform a seemingly successful project into a maintenance nightmare sooner than anticipated.
Finally, the importance of advanced preparation cannot be overstated. It’s tempting to speed through steps like subfloor cleaning or moisture testing, but these can be the Achilles’ heel of your project. For instance, conducting a calcium chloride test before pouring concrete or applying leveling compounds can save you from future issues such as mildew, delamination, or buckling. For professional tips, visit this resource.
In the end, mastering the nuances of flooring installation involves understanding the subtle interplay between materials, environmental conditions, and precise techniques. By dispelling myths and avoiding common pitfalls, you can achieve a flawless finish that endures for decades. Have you ever fallen into this trap? Let me know in the comments and share your experience.
Keeping Your Floors in Top Shape
Once your hardwood or tile floors are installed properly, the journey shifts to maintenance and ensuring longevity. The right tools and routines can dramatically extend the life of your flooring, saving you money and preserving beauty over the years. One device I personally swear by is the impact driver equipped with a long bit, which I use meticulously for tightening subfloor screws—especially in areas prone to squeaks and movement. This tool provides torque control and stability, making it ideal for deep-tightening without damaging the substrate. You can learn more about its advantages at this resource.
Another essential tool is a high-quality moisture meter. Regular moisture checks prevent issues like warping or delamination, especially in humid environments. I prefer a pin-type meter for its accuracy in detecting localized moisture pockets in sublayers and concrete slabs. Routine monitoring helps catch problems early, enabling proactive maintenance. This will soon become crucial as climate patterns shift, and homes are subjected to more extreme conditions—making moisture management more vital than ever.
How do I maintain my flooring over time?
Cleaning routines are foundational. For hardwood floors, I recommend using a microfiber mop and a pH-neutral cleaner, avoiding harsh chemicals that can strip finishes. For tiles, gentle sweeping followed by damp mopping with non-abrasive solutions keeps grout intact and tiles shining. Additionally, applying a quality finishing wax or polish periodically enhances both appearance and protective layers. For hardwoods, a finish like polyurethane offers durability, but it must be inspected and recoated whenever signs of wear appear. You could explore this guide for detailed care strategies.
Investing in meticulous upkeep now can prevent costly repairs later, especially as the industry forecasts smarter, more eco-friendly finishes that resist scratches and moisture better. With advancements in nanotechnology, future coatings might even have self-healing properties—similar to how some modern car paints repair minor scratches automatically. Staying informed about these innovations can give you a head start in preserving your floors for decades to come.
Don’t forget the value of regular inspections—look for signs of lifting, grout cracks, or finish deterioration. Fix issues immediately by consulting experts or following proven repair techniques, like those detailed in this comprehensive guide. Applying minor touch-ups and maintaining a clean environment not only enhances aesthetics but also supercharges durability.
Start by incorporating an impact driver into your maintenance toolkit and scheduling quarterly moisture checks. Taking these proactive steps now will ensure that your investment continues to serve beautifully for years, reducing the need for expensive restoration projects down the line.
Lessons from the Trenches: The Surprising Truths Behind Floor Durability
- One of the most eye-opening lessons I learned was the importance of proper subfloor preparation. Skipping moisture testing or rushing the leveling process can lead to issues that surface months later, like cracked tiles or squeaky hardwoods. It’s these small details that separate a durable floor from a headache-inducing disaster.
- Another insight was understanding the dramatic impact of environmental conditions. Humidity fluctuations can cause wood floors to expand or contract, revealing shortcomings in initial installation. Investing in humidity control tools and knowing when to adjust them saved me from premature floor failure.
- Lastly, I realized that not all leveling compounds are created equal. Achieving a perfectly flat surface often depends on choosing the right product for your specific environment and applying it with precision. Rushing or cutting corners here almost always backfires, leading to unevenness and long-term damage.
Tools and Resources That Elevated My Flooring Game
- Impact Driver with Long Bit: This was a game-changer for tightening subfloor screws precisely without damaging the material. Its torque control gave me confidence during stubborn squeak fixes, making my repair work more professional and lasting.
- High-Quality Moisture Meter: Regular moisture checks prevent issues like warping or delamination. My favorite pin-type meter provided accurate readings in critical spots, allowing me to act before problems worsened. It’s an essential tool for anyone serious about long-lasting floors.
- Professional-Grade Floor Leveling Guide: Following expert advice and step-by-step strategies from trusted sources like the comprehensive floor installation guide saved me from common pitfalls and ensured my floors were flawlessly flat.
- Moisture and Environmental Knowledge: Books and courses on moisture management and material compatibility broadened my understanding. They provided insights into how environmental factors influence installation quality, a lesson that’s worth every homeowner’s attention.
The Future is Bright: Take Action Today
Your flooring journey doesn’t have to be riddled with setbacks. With a mix of insider knowledge, the right tools, and patience, you can achieve stunning, durable floors that stand the test of time. Don’t wait for small issues to become costly repairs—start applying these lessons now and transform your space into a testament of expert craftsmanship. Remember, a well-executed flooring project today means peace of mind tomorrow.