
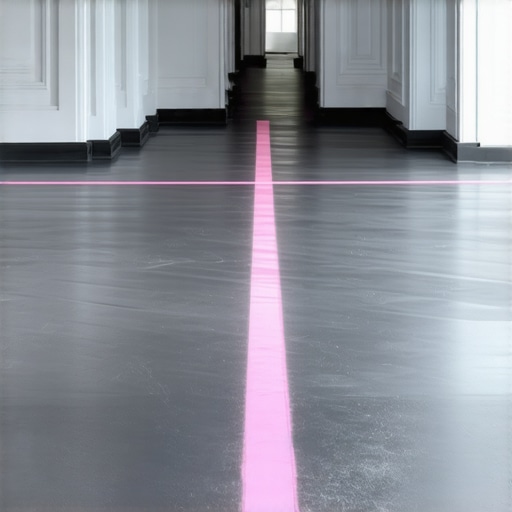
It happened to me during a recent renovation. I eagerly laid out my first tile line, confident I was following all the best practices. But when I stepped back to admire my handiwork, my stomach sank. The room, instead of looking sleek and balanced, appeared oddly skewed—almost like it was about to tumble over. That unsettling feeling was my lightbulb moment. The culprit? A simple chalk line mistake that, if overlooked, can make even the most carefully installed flooring look crooked and unprofessional.
The First Step to Seamless Floors: Mastering Your Chalk Lines
Many DIY enthusiasts and even some pros underestimate the power of proper chalk lining. It’s tempting to think that laying out a chalk line is quick, straightforward, and secondary to the actual installation. But in reality, this tiny line sets the foundation for the entire project. If it’s off, everything else tends to follow. From uneven tile patterns to misaligned hardwood planks, these mistakes can cost time, money, and your peace of mind.
Is Your Chalk Line Making Your Floor Look Crooked? Not Just a Small Error
Early in my career, I made the rookie mistake of assuming that a chalk line was a one-and-done deal. I didn’t double-check its accuracy—big mistake. That oversight resulted in a visible slope across the room. It’s worth noting that a misaligned chalk line can be so subtle that you only notice once your entire space looks off. This is why precision at this stage is crucial.
According to industry experts, even a small deviation in the initial layout can lead to a crooked appearance that’s hard to fix later. The key is ensuring your lines are perfectly straight and square before you start laying down tiles or hardwood. This might seem trivial, but it’s a small step that guarantees a flawless, professional finish.
Are you experiencing similar frustrations, or are you curious whether your current method is setting you up for failure? If so, I encourage you to revisit your chalk lining routine. Sometimes, the simplest adjustments—like using a good quality level or double-checking your measurements—can make a world of difference.
To get it right the first time, consider checking out detailed guides on floor leveling and layout techniques. For example, this comprehensive resource on mastering floor leveling offers invaluable tips that can help you avoid future pitfalls and achieve that smooth, even surface you envision—without surprises down the line.
Now that I’ve shared my own awakening, let’s dive into actionable steps that will help you avoid this common mistake and ensure your open rooms look perfectly balanced. Ready to straighten out your project and start seeing flawless results? Let’s go.
Secure Your Starting Point
Begin by measuring your room accurately, marking the center points along each wall with a pencil. Use these points to snap a chalk line across the room, ensuring your layout starts perfectly centered. I once skipped this and ended up with crooked tile edges near the door, which took hours to fix. Precise measurements here save you headaches later. For detailed measurements, consult this step-by-step flooring guide.
Use Quality Tools for Accuracy
Invest in a good chalk line reel and a reliable level. When I switched to a high-quality chalk line with a taut string and a sturdy reel, my lines stayed straight and didn’t sag. Imagine drawing a tight rope between two points; the tension ensures a flawless straight line. Applying a laser level can further improve precision, especially in larger rooms, making your layout perfectly square. Consider using a laser to check your lines before proceeding.
Achieve Perfect Square and Level
Identify the room’s boundaries and cross-check your measurements with the 3-4-5 triangle method—an industry standard. I once followed this technique, measuring 3 units, then 4 units perpendicular, and confirming it equals 5 units diagonally. This simple check prevents squaring errors that cause your flooring to tilt. For larger spaces, use a digital level or builder’s square to verify your lines are perfectly parallel and perpendicular.
Double-Check with Multiple Reference Points
Mark multiple reference points along your chalk lines. Take new measurements from these points to your starting corner. If discrepancies arise, adjust your lines accordingly. Personally, I’ve found that remeasuring after initial marking catches errors early, saving time and material. Think of it as tightening a loose cable—noticing slack before it causes ripples. This way, your tiles or hardwood will align flawlessly, avoiding uneven edges or slopes.
Confirm Your Layout Before Installation
Lay out a few tiles or planks along the marked lines, checking for gaps and alignment. Adjust your chalk lines if necessary. When I accidentally installed a row before verifying, I wasted hours fixing misaligned tiles. Always visualize the full pattern, ensuring your layout guides your installation. For complex patterns, consider creating a detailed diagram or using projection tools. This foresight helps maintain consistency across the entire space.
Following these concrete steps ensures your foundational layout is precise and sturdy, setting the stage for a professional-looking finish. Remember, an industry expert’s secret to flawless floors is in the details—double-checking measurements and verifying your lines before proceeding. For more in-depth tips, explore this guide on avoiding leveling mistakes and master your flooring project from start to finish.
Even seasoned professionals sometimes fall prey to misconceptions about floor leveling and installation. One common myth is that perfectly flat subfloors are always necessary; in reality, slight irregularities can be accommodated with proper techniques, saving time and effort. Overconfidence in self-leveling compounds like mortar or self-leveler can also lead to issues—these products require meticulous mixing and application to bond correctly, as emphasized by experts in floor leveling guides. The misconception that a level floor guarantees a straight tile layout overlooks the importance of accurate measurement, proper substrate preparation, and addressing subfloor movement. Many installers neglect to check for existing deflections or unstable areas, which can cause tiles to crack or loosen over time.
Have you ever wondered why certain projects still develop issues despite following standard procedures? The answer often lies in understanding the nuanced behaviors of building materials and substrate conditions. For instance, moisture levels in concrete slabs can significantly impact adhesion and curing; failing to test and mitigate moisture can result in delaminations or mold growth, despite appearing dry on the surface. Recognizing these subtle factors differentiates a good installation from a great one.
A particularly overlooked aspect is the importance of acclimation. Hardwoods and certain tile products need to adjust to the environment before installation; neglecting this can cause expansion or contraction later, leading to gaps or buckling. This is backed by research from the Wood Science Center, which highlights how insufficient acclimation can compromise flooring stability over time.
Furthermore, advanced practitioners understand the pitfalls of improper substrate preparation. For example, applying thinset or leveling compounds directly onto dusty, oily, or uneven surfaces will almost guarantee failure. Proper cleaning, priming, and patching are non-negotiable steps often underestimated by DIYers eager to expedite the process.
When planning your next project, remember that mastering the intricate details—like precise measurement, suitable material selection, and environmental considerations—sets apart amateurs from pros. To dive deeper into these nuances, check out detailed resources on flooring challenges and top mitigation strategies.
Are these common pitfalls familiar to you? Share your experiences or questions below! Improving awareness of these hidden factors will lead to longer-lasting, more flawless floors. For further insights, explore our comprehensive guide on floor leveling challenges and how to avoid them, ensuring your installation stands the test of time.
Keep It Working with the Right Equipment and Techniques
Ensuring your flooring remains flawless over the years isn’t just about initial installation; it requires proper tools and maintenance habits. From precision measurement devices to specialized cleaning equipment, choosing the right gear makes a significant difference in durability and appearance. My personal go-to tools include a laser level for maintaining perfect alignment during installation, ensuring that every plank or tile stays true over time. I also rely on a high-quality moisture meter to monitor substrate conditions, preventing issues like warping or buckling caused by hidden moisture levels. Investing in a professional-grade trowel with the appropriate notch size ensures consistent thinset coverage, which is crucial for long-term adhesion. For finishing, a buffer with fine-grit pads helps maintain the shine and smoothness of hardwood floors, extending their lifespan. As technology advances, I foresee smart sensor systems integrated with moisture and temperature monitoring becoming more commonplace, allowing proactive care before problems manifest.
How do I maintain my floors over time?
Regular cleaning with the right products, prompt addressing of minor damages, and periodic inspections of seams and finishes keep floors looking new for decades. For hardwoods, using a cleaner designed specifically for wood surfaces and avoiding excessive water prevents warping. For tiles, sealing grout lines annually helps resist stains and mold. Dedicated tools like a microfiber mop, soft brushes, and gentle cleaning solutions are essential for routine care without damaging the finish. Incorporating preventive measures such as felt pads under furniture and door mats reduces wear and tear. Remember, preventive maintenance is more cost-effective than repairs, so maintaining a routine can save you money and preserve your floors’ beauty. To enhance your maintenance routine, consider consulting comprehensive guides on hardwood floor care or tile upkeep. For example, this resource on hardwood floor care secrets offers expert advice on extending your flooring’s look and integrity—[Hardwood Floor Care Secrets to Longevity and Shine](https://tiletrendshop.com/hardwood-floor-care-secrets-to-longevity-and-shine).
One tip I highly recommend is using a polish or treatment that contains UV protectants especially for rooms with lots of sunlight. These products can help prevent fading and discoloration, keeping your floors vibrant. Plus, periodically checking for loose tiles or squeaky hardwood boards allows you to address minor issues before they evolve into costly repairs. Maintaining proper environmental conditions, such as stable humidity levels, is also critical; high moisture can cause wood to swell and contract, leading to gaps or buckling. By investing in quality tools, staying vigilant with routine maintenance, and embracing emerging technologies, you position yourself for flooring longevity. If you’re interested in a comprehensive approach, this guide on mastering floor-leveling techniques can be invaluable for keeping everything perfectly flat and preventing future issues—[Floor Leveling for a Flawless Finish](https://tiletrendshop.com/the-ultimate-guide-to-floor-leveling-for-a-perfect-finish).
Small Mistakes, Big Consequences I Never Saw Coming
One of the most eye-opening lessons I learned was how even a tiny deviation in my chalk line could ripple through the entire flooring project, causing misalignments that were tedious to fix later. This taught me the undeniable importance of double-checking every measurement and line before laying materials. Additionally, I realized that trusting tools blindly isn’t enough; verifying readings with multiple methods often saves hours of rework. Finally, I discovered that patience during the layout phase isn’t a sign of indecisiveness but a commitment to precision, resulting in professional-looking floors every time.
Tools and Resources That Raised My Flooring Game
My go-to tools include a laser level for ensuring perfect squaring, a high-quality chalk line reel with taut string, and a moisture meter to assess subfloor conditions accurately. I also rely on comprehensive guides like this detailed resource on leveling challenges which has helped me tackle problems I once thought unsolvable. For aesthetic inspiration and pattern ideas, this article on combining hardwood and tile expanded my design versatility. These resources consistently push me toward higher standards of craftsmanship.
Embracing the Challenge: Why Starting Is the Hardest Step
Taking that first step toward a flooring project often feels overwhelming, especially when technical details seem intimidating. But I’ve found that breaking the process into smaller, manageable tasks—such as accurately measuring, verifying lines, and checking subfloor conditions—makes the journey less daunting. Every successful step fuels confidence, creating a positive feedback loop that keeps you motivated. If you’re hesitating, remember: the only way to master flooring installation is by starting, mistakes and all. Once you get going, you’ll realize how rewarding this craftsmanship truly is, inspiring you to elevate your space with every plank and tile laid.