
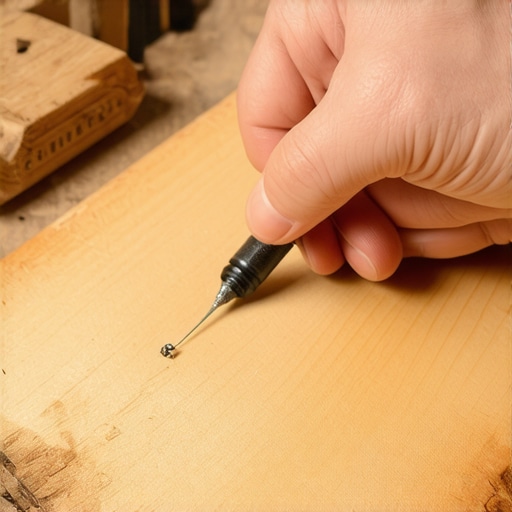
Imagine this: after finally installing that beautiful prefinished oak hardwood floor you’ve been dreaming about, you notice tiny nail holes scattered across the planks. Those little imperfections might seem insignificant, but they can be a real eyesore, especially when you’re aiming for a flawless finish. I remember the moment I discovered how a simple wax crayon could become my secret weapon against these tiny blemishes—game-changing, I tell you!
Why Filling Nail Holes Matters More Than You Think
If you’ve ever looked closely at your hardwood floors, you might notice that even the smallest nail holes can draw attention. They disrupt the seamless look you desire and can sometimes become collect points for dust and debris, making your floor look worn out prematurely. That’s why proper filling and touch-up are essential parts of hardwood flooring projects.
But, I’ll admit, I used to dread this step. I’d try paint, stain, or putty, only to find those areas stand out even more. It wasn’t until I learned about the wax crayon trick that everything changed. This method offers a quick, cost-effective way to disguise nail holes, blending perfectly with the natural color of your prefinished oak.
What’s even better? It’s a simple process that you can do yourself without special tools or skills. In the next sections, I’ll guide you through every step, ensuring that your floor looks pristine and professional—without the hefty price tag of hiring a pro.
Is the Wax Crayon Trick Really Worth the Hype?
Early on, I made the mistake of underestimating the importance of choosing the right wax crayon. I grabbed a random color from my craft stash, only to find it glaringly obvious once applied. Learning to select a wax crayon that matches your floor’s hue is crucial. Otherwise, you risk drawing more attention to the area instead of hiding it—something I definitely don’t recommend if you’re after a seamless look. Trust me; taking a moment to match your wax crayon properly makes all the difference. If you’d like more insights on achieving perfect finishes, check out this comprehensive guide on floor leveling.
Now that we’ve set the stage, let’s dive into the practical steps to master this simple yet effective trick, ensuring your floors look flawless and inviting.
Prepare Your Materials and Space for Precision
Before diving into filling those tiny nail holes, gather your supplies: a wax crayon matching your floor’s color, a putty knife or small spatula, a damp cloth, and optional touch-up stain. Clear the area of furniture or rugs to ensure unobstructed access. Think of this step like setting up a painter’s palette—having everything ready ensures a smooth process with no interruptions.
Match the Wax Crayon to Your Floor Color
Scan your floor under different lighting to identify the closest wax crayon hue. Hold the crayon against a plank to compare the shade—remember, natural light can alter perceived color, so check in your typical room lighting. I once mistook a slightly darker crayon, which ended up standing out more than the original nail holes, so take your time for an accurate match.
Apply Wax Crayon with Precision
Sharpen your wax crayon for accuracy, then gently rub it into the nail hole, applying just enough color to fill the hole without overdoing it. Imagine coloring within the lines—it’s about controlled, deliberate strokes. I recommend doing a small test on an inconspicuous area first to perfect your shading technique, especially if you’re new to this trick.
Smooth and Blend the Filled Area
Using a clean, damp cloth, lightly wipe over the filled nail hole to blend the wax into the surrounding wood. This step is crucial—think of it as blending makeup without leaving visible streaks. After wiping, examine the spot; if the color stands out, gently reapply more wax and smooth again. Remember, less is more; you can always build up color gradually.
Reinforce with a Touch of Finish for Seamless Results
If needed, dab a small amount of matching stain or finish over the filled spot to enhance blending. For example, if your floor has a natural oak tone, a quick touch-up with a matching stain will make the repair invisible. I once used a tiny brush to add stain after the wax, and it transformed a patchy fix into a virtually undetectable repair—a real confidence booster.
Tips for Better Results and Long-Lasting Repair
Always test colors and techniques on a hidden spot first. If your floor is highly variable in shade, consider using multiple wax crayons. Keep your wax crayon sharp to avoid uneven application. Store unused crayons in a cool, dry place to prevent melting or crumbling. Also, regular cleaning of the waxed area with a soft cloth keeps the repair smooth and shiny.
During my own repair project, I found that patience and attention to detail made the biggest difference. One mistake I made early on was rushing, which resulted in patches that looked more noticeable than the original nail holes. Taking my time, blending carefully, and gradually building up the color allowed me to achieve a seamless finish that I was proud of. For more advanced tips on finishing your floors smoothly, check out this guide on floor leveling.
Handle Larger or More Obvious Imperfections with Care
For larger nail holes or dents, consider layering wax crayon, then lightly sanding the area with a fine grit sandpaper. This smooths out any excess wax and helps blend the repair into the surrounding surface. Always clean the dust afterward to maintain a polished look. Keep in mind, if your project demands a near-perfect finish, professional touch-up or partial refinishing might be worth exploring.
With these steps, you’ll make minor nail holes virtually vanish, restoring your floors’ natural beauty. Remember, patience and matching the right color are your best tools in this process, turning an imperfect job into a professional-looking result.Many homeowners and DIY enthusiasts share common misconceptions when it comes to hardwood flooring, tiling, and floor leveling. One widespread myth is that choosing the thickest tile or the most expensive hardwood automatically guarantees durability and a flawless finish. However, expertise shows that proper installation practices often matter more than material quality alone.
What’s the Most Overlooked Mistake in Floor Leveling?
The biggest trap I see is neglecting meticulous subfloor prep before installing tiles or hardwood. Skipping steps like checking for moisture, addressing subfloor inconsistencies, or not using the right leveling compounds can lead to cracks, squeaks, or uneven surfaces—issues that are hard to fix later. According to industry experts, a well-leveled subfloor is the foundation of a successful flooring project. Estimating your prep needs accurately from the start prevents costly rework and enhances longevity. Don’t assume that a simple self-leveler will bond properly without proper surface cleaning or that a mismatch in subfloor material won’t cause future problems. Sometimes, people trust in quick fixes or shortcuts, which results in uneven tiles or squeaky hardwood. For comprehensive tips on avoiding these pitfalls, check out this detailed guide on floor leveling. Conversely, another misconception is that all adhesives work equally well for every type of tile or wood. The truth is that material-specific primers, mortars, and sealers significantly impact installation success. Choosing the right products, based on expert recommendations and correct application techniques, saves time and reduces repair costs. To get familiar with current best practices, visit this step-by-step installation guide. Remember, mastering these nuances isn’t just about avoiding mistakes—it elevates your craftsmanship and results in a truly professional finish. Have you ever fallen into this trap? Let me know in the comments and share your experience!
Keeping It Working: Tools I Recommend for Long-Term Floor Success
When it comes to maintaining and scaling your flooring projects, having the right tools can make all the difference. From ensuring a perfectly level subfloor to cleanly applying finishes, my go-to equipment is selected for precision and durability. One indispensable item in my arsenal is a laser level. Unlike traditional bubble levels, a laser level projects straight lines across your entire workspace, allowing for quick detection of uneven surfaces and ensuring consistent height levels—crucial when prepping for tile installation or refinishing hardwood. I personally favor the self-leveling laser level because of its accuracy and ease of use.
Next, I rely heavily on a quality floor scraper. Whether removing old vinyl or scraping off uneven patches of adhesive, a sturdy, ergonomically designed scraper minimizes fatigue and reduces the risk of damage to underlying surfaces. My preferred model features a replaceable blade and comfortable grip, saving time during prep work. For meticulous detail, I use a contour sander with variable speed—perfect for blending filler, smoothing out minor imperfections, or preparing wood surfaces before finishing. These tools help prolong the life of your floors by maintaining an even, smooth surface, which is crucial for both hardwood and tile projects.
Beyond hardware, software tools like visualization apps are transforming how we plan and scale flooring layouts. Virtual room planners enable me to experiment with tile patterns or hardwood placement without lifting a finger, reducing material waste and ensuring aesthetic harmony. For example, a current trend involves using augmented reality apps that overlay virtual tiles directly onto your space through your smartphone or tablet, helping you visualize the end result in real time.
Looking ahead, I see smart sensors becoming more integrated into flooring maintenance. Devices that monitor humidity levels, detect moisture leaks, or even track wear and tear could alert homeowners before problems escalate, significantly extending floor lifespan. This convergence of technology and flooring maintenance promises an exciting future where proactive care becomes the norm, empowering homeowners to address issues early and save money in the long run.
How do I maintain my flooring tools to ensure longevity?
The key to keeping your tools functioning optimally over time is regular cleaning and proper storage. After each use, I recommend wiping down blades and abrasive surfaces to remove dust and debris. Storing tools in a dry, temperature-controlled environment prevents rust and degradation. Additionally, replacing worn-out blades promptly maintains efficiency and prevents damage to your projects. For larger equipment like laser levels, calibrating periodically—based on manufacturer guidelines—ensures continued accuracy and reliable results. If you’re eager to keep your tools in top shape, check out this guide on flooring tool maintenance for more detailed tips. Remember, investing in well-maintained tools not only prolongs their life but also delivers professional-quality results with less effort. Why not test out a new contour sander on your next project? It might just become your new favorite tool for flawless finishes.
Lessons Only the Pros Pick Up About Flooring Magic
One of the most unexpected lessons I learned was that rushing the finishing touches often ruins the entire project. Patience truly becomes your best friend when making tiny nail holes vanish seamlessly. Another insight was that matching the wax crayon isn’t just about color—it’s about understanding the subtle undertones of your wood, which can make or break the disguise. My biggest lightbulb moment was realizing that even seasoned pros sometimes overlook the importance of surface cleanliness before applying filler; a dust-free area ensures an invisible repair. Lastly, I discovered that every floor has its own quirks—what works on a light oak might not suit a dark walnut—so adapting techniques creates the most natural look. These hidden lessons transformed my approach from trial-and-error to confident craftsmanship.
Tools and Sources That Elevate Your Flooring Game
Over the years, I’ve curated a toolkit that proves invaluable for hardwood and tile projects. A self-leveling laser level ensures your foundation is perfect, making everything else easier. I swear by a contour sander; it’s a game-changer for blending filled areas without visible ridges. For color matching, I trust my favorite color-matched wax crayons—they’re affordable, precise, and reliable. When it comes to learning all the nuances, I revisit comprehensive guides to stay sharp and avoid costly mistakes. Combining these tools and trusted resources keeps my work professional and my floors stunning.
Embrace the Journey and Bring Your Floors to Life
The path to beautiful floors is as much about the mindset as it is about the techniques. Every nail hole filled, every seam leveled, is a testament to your dedication. Remember, every scratch or imperfection is a chance to learn and refine your craft. Don’t shy away from experimenting with tools or tricks—each effort gets you closer to the finish line. I’ve found that sharing your progress, asking questions, or even documenting challenges can turn your project into a rewarding experience, inspiring others to elevate their own spaces. No matter your skill level, trust that with patience, the right resources, and a proactive attitude, your floors can truly transform your home environment. Ready to take on that next flooring project? Your beautiful, flawless floors are waiting—just start your journey today.