
Ever spent hours laying flooring only to find that installing the door jambs became a frustrating puzzle? I remember my first attempt—it looked perfect until I reached the doorways. That’s when I realized that the key to a truly professional finish isn’t just about the tiles or hardwood; it’s about those tricky door jambs. If you’ve ever struggled with uneven gaps or awkward cuts, you’re not alone. The good news? There’s a straightforward, tried-and-true way to get those jambs to sit flush, giving your space a sleek, finished look.
Why Proper Undercutting of Door Jambs Changes Everything
Is Undercutting Door Jambs Really Worth the Extra Step?
Now that we’ve established why this step is crucial, let’s dive into exactly how to do it right—so your doorways grace your home with a flawless finish and flawless transition.
Slice the Jambs with Precision
Start by removing the door from its hinges and placing it out of the way. Use a handsaw or a powered jigsaw with a fine-tooth blade to carefully cut along the bottom edge of the jamb that contacts the flooring. Think of this as trimming a piece of fabric; you want a clean, straight cut that follows the jamb’s outline. Secure the jamb with clamps or wedges to ensure stability as you work. Remember, the goal is to cut just enough to allow the flooring to slide underneath without creating a gap.
Set Up Your Cutting Guide
To ensure a consistent cut height, measure the combined thickness of your flooring plus underlayment. Mark this on a piece of scrap wood or a straight edge that you clamp to the jamb. This acts as a guide for your saw or blade depth, preventing you from cutting too deep and damaging the drywall or framing behind the jamb. Maintaining uniformity here is critical; uneven cuts will cause gaps or overlaps, compromising the look and protection of your floor.
Use the Right Tools for a Clean Cut
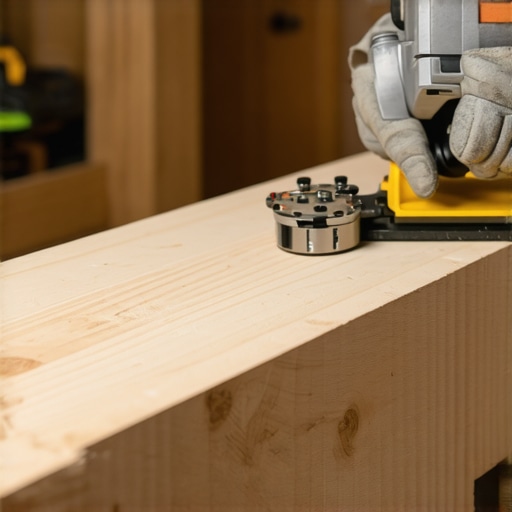
While a hand saw works, a jigsaw or a multi-tool with a fine blade offers greater control and cleaner edges. Proper tool selection makes a significant difference in achieving professional results. Before cutting, double-check your measurements and ensure the blade is sharp; dull blades can cause splintering and uneven surfaces, making the final fit sloppy.
Test Fit and Adjust
After making your cuts, dry-fit the flooring against the jamb. It should slide in snugly but without force. If there’s resistance, gently pare down any high spots with a hand plane or sanding block. This iterative process ensures the flooring will sit flush under the jamb, creating a seamless transition. I remember one project where I ignored the test fit—forcing the flooring in resulted in cracked tiles and a messy look. Taking the time for adjustments paid off, leaving a crisp, professional-looking edge.
Seal and Finish
Once satisfied with the cut and fit, apply a thin bead of caulk or paintable sealant along the top edge of the jamb before reinstalling the door. This seals any minor gaps and prevents dirt buildup, maintaining a clean appearance over time. Remember, the goal is a tight, seamless transition that enhances your overall flooring aesthetic and durability.
Many DIY enthusiasts believe that leveling a subfloor or choosing the right adhesive is all it takes for a perfect floor, but in my experience, there are nuances that often go unnoticed. One prevalent misconception is that all leveling compounds are the same — but in fact, selecting the wrong type or applying it improperly can lead to cracks, tile lippage, or even premature failure. Experts recommend consulting professional-grade leveling guides to avoid these pitfalls. Another myth is that hardwood floors can be installed directly over existing flooring without preparation; however, overlooking detailed assessments of moisture levels or subfloor integrity can result in warping or squeaks down the line. Advanced installers know that meticulous inspection and addressing moisture barriers are crucial to prevent these issues from developing over time.
Are there hidden pitfalls that even experienced installers often miss?
In fact, many underestimate the importance of proper acclimation of materials—allowing wood or tile to adjust to home conditions reduces joint movement and surface cracks. According to industry research, failure to acclimate can cause expansion and contraction cycles that compromise structural integrity, especially in variable climates. Paying attention to these subtleties ensures durability and a professional finish. If you want to avoid common mistakes, consider exploring subfloor conditioning techniques or seek expert advice on tile selection for your specific environment. Recognize that your choice of materials and the preparation process are learning curves—taking time to understand these details can save you costly repairs later. Have you ever fallen into this trap? Let me know in the comments.Maintaining your flooring installation equipment and refining your process is essential to achieve lasting, professional results. One of my top investments has been a high-quality laser level, such as the Bosch GSL10, which ensures perfectly straight lines and consistent leveling across large areas. It might seem like a luxury initially, but its precision reduces errors that can lead to costly rework. For measuring complex patterns or irregular spaces, I swear by a digital caliper, like the Mitutoyo Absolute, which provides precise measurements down to thousandths of an inch, ensuring tight cuts and seamless tile or hardwood transitions.
Proper cleaning tools are just as important. I always keep a dedicated grout float with a beveled edge for consistency in grout applications, preventing uneven joints that can crack over time. Additionally, a vacuum with HEPA filtration helps clear dust and debris after sanding or cutting, minimizing dust-related damage and health risks.
Software solutions have become game-changers in project management and material selection. I use TileSizer, a user-friendly CAD-like app, to visualize tile layouts and confirm measurements before starting. This preemptive check prevents wasted materials and misaligned patterns, especially in intricate mosaics or herringbone arrangements.
Long-term results depend heavily on routine maintenance. Regular inspection of expansion joints and caulk seals, using a flexible, paintable silicone like GE Silicone II, keeps gaps tight and prevents moisture intrusion. Scheduling periodic deep cleaning with gentle, pH-neutral cleaners enhances surface longevity without damaging finishes.
Looking ahead, I predict that the integration of smart tools—like Bluetooth-enabled laser levels and apps that remotely monitor moisture levels—will streamline installation and maintenance workflows even further, reducing human error and increasing precision.
How do I maintain my flooring tools and ensure long-lasting performance?
Adopting these habits not only prolongs your tools’ lifespan but also maintains their accuracy, saving you time and money on future projects. For example, mastering the use of leveling compounds, as discussed in our comprehensive ultimate guide to floor leveling, will be much more effective if your tools are reliable and precise. So, I challenge you to pick one tool you haven’t maintained recently—clean, calibrate, or update it today—and see how much smoother your next project will go.
The Hidden Wisdom I Wish I Knew About Door Jambs and Flooring
One of the most overlooked lessons in flooring installation is that the devil truly is in the details—especially when it comes to door jambs. I used to think that achieving a clean finish was just about perfect cuts, but experience taught me that the real magic lies in meticulous undercutting and precise measurements. Skipping this step results in gaps, uneven transitions, and extra frustration down the line. Now, I know that every successful install hinges on understanding how to cut and fit jambs properly, ensuring a seamless and professional look that lasts.
Discover the Tools and Tips That Elevate Your Flooring Game
Through trial and error, I’ve found that using a fine-tooth jigsaw or multi-tool with a depth guide makes all the difference in creating clean, accurate cuts. Pairing this with a measuring guide tailored to your flooring thickness ensures consistency across all jambs. For a comprehensive approach, I highly recommend consulting our ultimate guide to floor leveling, which emphasizes the importance of precise preparation—something that directly translates to flawless door transitions. Remember, investing in quality tools and taking your time during these details can elevate your entire project from good to exceptional.
Let Your Skills Shine and Transform Your Space
Now, as you approach your next flooring project, embrace the process of undercutting door jambs as an opportunity to showcase your craftsmanship. Every perfectly fitted jamb brings your space closer to that polished, professional appearance you admire. Don’t let small details like this hold you back—every step, from careful measurement to slow, deliberate cuts, pushes you toward mastery. Ready to take your flooring skills to the next level? Share your experiences or ask questions below—let’s build beautiful, lasting spaces together!