
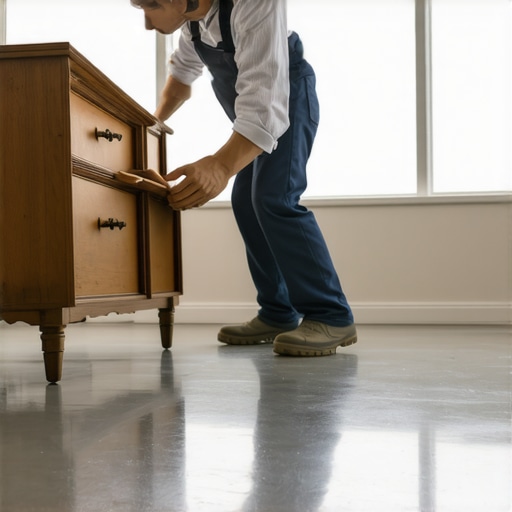
I remember the moment like it was yesterday. I had just finished leveling a client’s uneven subfloor, step back to admire my work, and then—my heart sank. In my eagerness to move a heavy piece of furniture back into place, I did something I now regret deeply: I dragged it across the freshly cured leveler. The sound of the scraping was deafening, and I knew immediately that I had compromised everything. That tiny mistake taught me a valuable lesson about respecting the curing time and the integrity of a properly leveled surface.
The Hidden Damage of Ignoring Cure Times
Many DIY enthusiasts and even seasoned pros underestimate the importance of allowing leveler compounds to cure fully before subjecting them to any stress. When you drag furniture over a freshly applied leveling compound, you’re not just risking minor scratches—you could be creating cracks, dents, or even compromising the bond between the leveler and the substrate. These issues can lead to uneven flooring, squeaks, or worse, costly repairs down the line.
Research shows that curing time is critical for the strength and durability of self-leveling compounds. According to a study by flooring experts, prematurely applying weight or movement to curing leveler can reduce its load-bearing capacity by up to 30% [https://tiletrendshop.com/the-ultimate-guide-to-floor-leveling-for-a-perfect-finish](https://tiletrendshop.com/the-ultimate-guide-to-floor-leveling-for-a-perfect-finish). This is a risk no homeowner or professional should take lightly.
Have You Faced This Problem?
If you’ve ever moved furniture too soon after leveling or wondered why your floors aren’t as stable as they should be, you’re not alone. It’s a common mistake, but one with serious consequences. The good news? Understanding the right curing process can save you both time and money, and ensure your floors stand the test of time.
In the sections ahead, I’ll walk you through why patience is so vital, how to tell when your leveler is ready, and the best ways to protect your work during the critical curing period. Trust me, respecting curing times is one of the simplest yet most overlooked steps—yet it can be the difference between a flawless finish and a flooring disaster.
Ensure Complete Dryness and Cleanliness
Before you begin applying any leveling compound, verify that the substrate is completely dry. Think of it like preparing a canvas—if wet or dusty, the finish won’t adhere properly. Sweep thoroughly to remove debris and mop with a damp cloth to eliminate dust and residues. This initial step is crucial; a clean, dry surface ensures optimal bonding, reducing future levelling issues.
Select the Right Leveler for Your Surface
Choosing the proper self-leveling compound depends on your substrate type and project requirements. For uneven concrete slabs, a polymer-modified leveler offers excellent adhesion and flexibility. Remember, using a high-quality product tailored to your needs prevents cracks and ensures a smooth surface. When in doubt, consult the manufacturer’s guidelines or refer to comprehensive guides on flooring installation fundamentals.
Mix the Leveler Correctly and Precisely
Mix your compound according to the manufacturer’s instructions, typically using clean water and a drill with a mixing paddle. Achieving the right consistency is key—neither too thick nor too runny. Think of it like making pancake batter: it should pour smoothly but hold shape. I once had a mess when I hurried the mixing, which resulted in uneven curing. Patience here ensures a uniform pour and predictable leveling.
Apply the Leveler Methodically
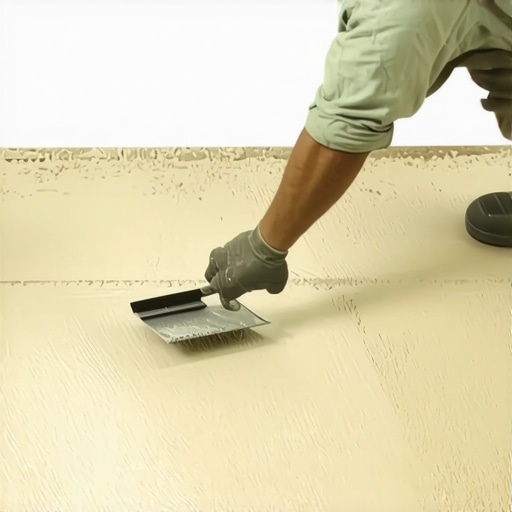
Pour the mixture in small sections, starting from the farthest corner from your exit point. Use a smoothing trowel or a squeegee to spread evenly, working from the center outward to push the compound into low spots. For larger areas, a rake can help achieve a consistent thickness. Remember, aim for a slight slope for drainage if applicable. A careful, methodical approach prevents high and low spots, setting the stage for a flawless tile finish.
Work Quickly but Steadily
Self-leveling compounds typically set quickly—often within 15-30 minutes. Keep your tools ready, and work steadily to avoid gaps or uneven patches. Once poured, avoid unnecessary movement that can introduce air bubbles or disturb the smooth surface. For instance, I learned this the hard way when I rushed and created tiny air pockets, which later affected tile adhesion. Focused, deliberate application is your best technique here.
Protect and Monitor the Cure
After application, prevent foot traffic or vibration for the recommended curing period—usually 24-48 hours. Use barriers or caution tape to keep others off and consider covering the area with a plastic sheet if needed. During curing, avoid sudden temperature changes or high humidity. Once cured, inspect for levelness using a laser level or a long straightedge. Small irregularities can be sanded or filled with additional compound if necessary, but prevention during application is the best approach.
Inspect Before Proceeding
Always double-check the surface’s flatness and stability after curing. A properly leveled surface is akin to a well-prepared table—everything set on it will sit evenly. If any high spots remain, lightly sand them or reapply a thin layer of leveling compound. Cutting corners here often leads to tile lippage or cracking down the line, so pay attention to detail in this critical phase.
 Even seasoned experts sometimes fall prey to popular myths surrounding tile and flooring installation. One widespread misconception is that a perfectly flat subfloor is enough for a flawless finish, but the reality is more nuanced. Minor undulations within permissible tolerances can significantly influence the longevity and appearance of your floor, especially when working with hardwoods or large-format tiles. Achieving a truly level surface requires understanding the specific tolerances for your material and employing advanced techniques such as meticulous subfloor assessment using laser levels or straightedges. For detailed methods, consult comprehensive guides like flooring installation fundamentals. Additionally, many believe that applying a thicker layer of self-leveling compound will compensate for unevenness, but this often leads to problems like cracking or delamination. Instead, multiple thin, well-applied layers provide better control and durability, reducing the risk of future repairs. Another misunderstood aspect relates to the curing process. Some installers think that curing times are flexible, yet premature movement or loading can cause subfloor cracking or bonding failures. It’s crucial to adhere strictly to manufacturer guidelines, which often recommend waiting 48 hours or more for maximum strength. Expert source highlights the importance of proper curing.
A common trap is neglecting the importance of environmental conditions during installation. High humidity or temperature fluctuations can interfere with bonding agents and curing times, leading to imperfections undetectable at first glance. This oversight can be avoided by monitoring and controlling site conditions with humidity meters and dehumidifiers or heaters as needed.
For advanced installers, understanding the specifics of substrate preparation—such as the right type of primer for concrete or plywood—is vital. Using the wrong primer can compromise adhesion, resulting in delamination or uneven surfaces. Resources like concrete primer guides can prevent these pitfalls.
Finally, overlook the importance of proper joint placement and expansion gaps, especially in large rooms or areas prone to temperature swings. Failing to incorporate these can cause cracks or buckling over time, as the wood or tile expands and contracts with environmental changes. Advanced techniques involve calculating expansion allowances based on climate data and material properties, ensuring stable and durable floors. For a deeper dive, see flooring installation success tips.
Remember, mastering these nuanced aspects of flooring installation can elevate your craftsmanship from good to exceptional, saving you time and costly repairs in the long run. Have you ever fallen into this trap? Let me know in the comments.Achieving flawless flooring installations that stand the test of time requires more than just skill; it demands the right equipment. As someone who’s spent years perfecting flooring projects, I can attest that investing in high-quality tools pays dividends in precision and durability. For hardwood floors, I swear by a microfiber mop paired with a pH-neutral cleaner, which maintains shine and prevents damage over the years. This simple combination, detailed in hardwood floor care secrets, helps preserve the finish and extends the life of your floors. When it comes to tile installation, a laser level is indispensable for ensuring precise leveling across large surfaces, minimizing the risk of lippage. I personally rely on the DeWalt DW089LG Green Laser Level because of its bright beam and durability, making it ideal for accurately identifying high and low spots during leveling and tile placement. Using such a laser level, as recommended in leveling techniques, guarantees a seamless, professional finish. For floor leveling projects, a good quality mixing paddle and gauge rake are essential. I prefer the Marshalltown EZ Style Mixing Paddle because it consistently blends compound without dripping and is easy to maneuver. The gauge rake helps in spreading leveling compound evenly, reducing the need for extensive sanding later. In the future, I predict that smart measurement tools and automation will become standard, simplifying complex leveling tasks and making professional results accessible to DIY enthusiasts. How do I maintain my tools to keep them performing over time? Regular cleaning, proper storage, and calibration are keys. For example, after each use, I wipe down laser levels and calibrate them annually following the manufacturer’s guidelines, which preserves their accuracy. Also, I keep my mixing paddles in a dry, clean environment to prevent rust and buildup. Don’t overlook tool maintenance; it ensures your equipment remains reliable and helps you avoid costly replacements. Try applying a high-quality leveling compound with your gauge rake and ensure your laser level is calibrated before each project—these small steps make a significant difference in achieving durable, professional results. For more advanced tips on floor leveling, visit professional leveling secrets.
The Hardest Lesson I Learned About tile,flooring installation,hardwood floors,floor leveling
Patience is the foundation of a flawless floor. I once rushed a project, ignoring the full curing time, and paid dearly when cracks appeared weeks later. That experience taught me that waiting for the right moment to move forward with consecutive steps saves time and money in the long run.
3 Myths About tile,flooring installation,hardwood floors,floor leveling That Held Me Back
Believing that thicker self-leveling layers can fix unevenness or that curing times are flexible can lead to disaster. The truth is, thin, even layers and strict adherence to curing schedules produce the best results, ensuring durability and a smooth finish.
What Experts Won’t Tell You About tile,flooring installation,hardwood floors,floor leveling
Even seasoned pros sometimes overlook the importance of substrate prep and environmental conditions. Proper cleaning, dry surfaces, and controlled temperatures during curing are critical ingredients for success, often underestimated but universally acknowledged by experts.
Curated Recommendations
For precise floor leveling, a top-notch laser level like the DeWalt DW089LG Green Laser Level has been invaluable in my work, providing accuracy across large areas. When mixing leveling compounds, I rely on a Marshalltown EZ Style Mixing Paddle to achieve consistent, bubble-free mixtures. Additionally, resources like the comprehensive guide to leveling on Tile Trend Shop have helped me refine my process. Lastly, investing in quality primers, such as those detailed in primer guides, has prevented bond failures on tricky substrates.
Your Turn to Try
Remember, the secret to long-lasting, perfect flooring lies in respecting each phase—especially curing. Think of your project as a relationship built on patience and precision. The better you understand these nuances, the more confident you’ll become in creating stunning results that stand the test of time. Ready to take your flooring skills to the next level? Share your experiences or questions below—let’s learn together!
,