
I’ll never forget the frustrating moment when I unveiled my freshly laid hardwood floor only to find it uneven, creaking, and downright unlivable. It was a cold Saturday morning, and after hours of meticulous sanding and finishing, I realized my mistake—my concrete slab beneath wasn’t as flat as I had assumed. That lightbulb moment taught me a crucial lesson: the secret to a flawless floor isn’t just in the final layer but in how well you prepare the foundation.
This experience led me down a path of trial, error, and eventual success in understanding the best way to patch a concrete slab before leveling. If you’ve ever faced similar issues—uneven floors, cracked tiles, or wobbly hardwoods—you know how crucial a proper patching job is. Today, I want to share with you proven strategies that will save your project from future headaches and ensure a sleek, durable finish.
Why Proper Patching Sets the Stage for Perfect Floors
A level, solid concrete slab isn’t just about aesthetics; it’s about structural integrity and longevity. When patches are poorly applied or uneven, subsequent layers can crack, shift, or fail prematurely. According to experts, uneven subfloors are among the most common flooring installation mistakes—something I learned the hard way. Proper patching ensures a seamless surface, preventing costly repairs down the line. If you’re like me, eager to get things right from the start, understanding the nuances of patching is essential.
Questioning the Hype: Is Patch Work Really Critical?
I used to think that a simple quick-fix would do—fill some gaps with a handful of self-leveling compound and call it a day. Boy, was I mistaken! The early mistake I made was rushing the drying process without properly cleaning the surface or choosing the right patching material. That oversight led to cracks and unevenness that only worsened over time. Since then, I’ve realized that effective patching is about much more than just filling gaps—it’s a meticulous process that, if done right, makes all the difference. Want to avoid similar pitfalls? Check out [this step-by-step guide to floor leveling success](https://tiletrendshop.com/floor-leveling-challenges-common-mistakes-and-how-to-avoid-them) for detailed insights.
Start with Precise Assessment of Your Surface
Before applying any patch, use a 2-foot straightedge to check for high and low spots on your slab. Walk the entire area, pressing the straightedge against the surface to identify irregularities. A common mistake is assuming the slab is flat; I once skipped this step and ended up with uneven tiles that cracked later. Take your time to mark problem areas with chalk for targeted repairs. Remember, the foundation determines the final look—skip this, and your floor might wobble or crack over time.
Prepare Your Materials for Guaranteed Success
Choose a high-quality, polymer-modified self-leveling underlayment suited for your slab’s condition. I initially went for a generic mix, which dried unevenly, causing future issues. Always read the manufacturer’s instructions carefully, especially mixing ratios and drying times. When mixing, use a clean, neutral bucket and a paddle mixer, avoiding over-agitating. Achieving a uniform, lump-free consistency is key for smooth application, much like blending paint for an even coat.
Apply Patch with the Care of a Sculptor
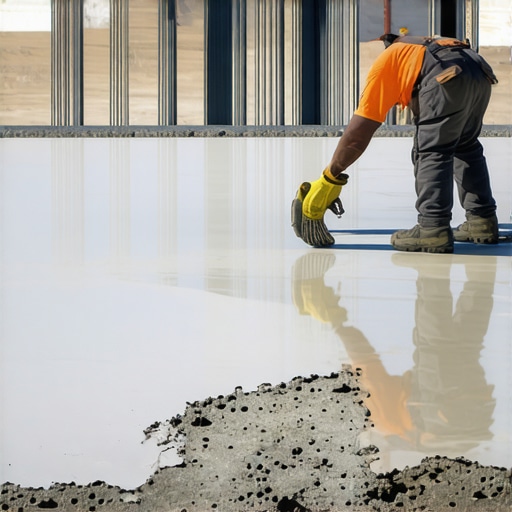
Pour the self-leveler at the lowest point and let gravity do the work—spread it slowly with a notched trowel or a finishing flat. I remember a time I hurried by just pouring and screeding; it resulted in air bubbles and an uneven surface. To minimize this, slowly pour from one side to the other, then use a gauge rake to guide the flow and settle the mix. For tricky corners or deep voids, fill in layers gradually, allowing each to set properly before adding the next. Think of this like sculpting: patience and precision are your best tools.
Level with Purpose Every Step of the Way
After pouring, use a long, straight 2×4 or a laser level to check for flatness. Place the board across the patch, applying even pressure, and look for gaps beneath. I once used a regular bubble level; the results were inconsistent. The laser level provides accuracy, especially over large areas, ensuring I didn’t miss subtle dips. Mark out deviations with chalk, then use a trowel to add more patch material or compact existing areas. Remember, the goal is to have a surface within 1/8 inch over 10 feet for tile or wood installation—this makes your subsequent work so much easier.
Finish with Attention to Detail
After the patch has dried (refer to the manufacturer’s drying time), sand high spots using a pole sander with coarse grit, then smooth out imperfections with finer grit. I once skipped sanding, which caused uneven tile adhesion. Clean the surface thoroughly to remove dust—use a vacuum and damp cloth—and inspect for dust or debris that can hinder adhesion. For large projects, renting a vibrator or using a roller helps eliminate trapped air, analogous to removing bubbles in a high-quality cake batter. This meticulous approach ensures your foundation remains sturdy and prepares it for flawless tiling or hardwood installation.
Many homeowners believe that leveling a floor is simply about applying a quick patch or smearing some self-leveling compound. However, the real nuance lies in understanding the subtleties that can make or break the entire project. One common myth I’ve encountered is that thicker patches always mean a better result. In reality, overbuilding with excessive patch material can lead to uneven surfaces, cracking, and future failures. The key is precision—not just volume—when patching for a flawless floor.
Another often overlooked detail is the quality and type of patching material used. Many assume that any commercial-grade compound will suffice, but specific formulations are designed for particular conditions. For example, polymer-modified underlayments provide better adhesion and flexibility, reducing the risk of cracks over time. Failing to select the right product can cause long-term issues, especially in environments with temperature fluctuations or moisture exposure. To truly master this aspect, I recommend checking out this comprehensive guide on achieving perfect floor leveling.
Are There Hidden Risks in Skipping the Preparation Stage? The Science Says Yes
Absolutely. According to a recent study by the National Tile Contractors Association, poorly prepared subfloors can lead to residual moisture, which causes adhesive failure and tile delamination over time. This underlines why proper assessment of moisture content and subfloor stability is not just a step but a cornerstone of successful installation. It’s tempting to overlook these factors when rushing to finish, but neglecting them often results in costly repairs down the line. Advanced professionals emphasize that irregularities smaller than 1/8 inch over 10 feet can compromise the entire flooring’s integrity, underscoring the importance of meticulous inspection and preparation.
Furthermore, neglecting to address minor imperfections with specific levelling techniques increases the odds of tile cracking or hardwood squeaks long-term. By investing time upfront using tools like laser levels and moisture meters, you ensure your flooring lasts for decades. For more insights on avoiding common pitfalls, exploring this detailed resource can be invaluable.
So, while it might seem like a small detail, mastering these nuances is what differentiates a professional-quality floor from an average DIY job. Remember, precision in patching and levelling sets the foundation for stunning and long-lasting results. Have you ever fallen into this trap? Let me know in the comments below or share your own tips for perfecting floor installation.
Prioritize Regular Equipment Care for Durability
One of the most overlooked aspects of maintaining beautiful and functional floors is the ongoing care of your tools. I personally swear by using a high-quality vacuum with HEPA filtration to remove dust and debris from my tools after each project. This simple step prevents particles from causing scratches or contaminating new layers of adhesive or sealants. For leveling tasks, I rely on a laser level like the Bosch GLL 550 to ensure subfloor flatness with pinpoint accuracy, reducing the need for future corrections. Investing in these reliable tools has paid dividends in the consistent quality of my ongoing projects.
Maintain Equipment to Prevent Future Failures
Regular calibration and cleaning of your laser levels and trowels maintain their precision over time. I remove lipid buildup from my notched trowel every few uses because residual adhesive can alter notched profiles, leading to uneven tile joints. For power tools like cement mixers, routine blade checks and lubrication are essential for smooth operation. These small steps extend the lifespan of your equipment, reducing unexpected breakdowns and costly replacements, thereby protecting your long-term investment in quality flooring installation.
Adopt Smart Storage Solutions for Long-Term Results
Proper storage of adhesives, grouts, and leveling compounds avoids premature curing or spoilage. I keep my adhesives in temperature-controlled environments, ensuring optimal adhesion qualities. Using airtight containers and stacking materials off the concrete floor prevents moisture absorption which might compromise their performance. Additionally, labeling storage areas for quick access minimizes project delays and keeps materials in peak condition.
Step Up Your Floor Maintenance Game Today
Incorporating these maintenance habits can dramatically improve the longevity and appearance of your floors. For example, regularly inspecting your leveling tools with a 3-foot level test ensures your foundation remains consistently flat during ongoing projects. Challenge yourself to dedicate 10 minutes weekly to tool inspection and cleaning — it’s a small task with huge benefits. These proactive steps are especially vital before undertaking any new flooring install, such as transforming your space with elegant tile designs, ensuring you get professional results every time.
Secrets I Wish the Pros Spilled
One of my biggest lightbulb moments was realizing that no matter how perfect your finish looks, a flawed foundation will always introduce problems down the line. I once rushed through patching a corner only to find it caused uneven tile adhesive later—lesson learned: patience with patches saves headaches. Additionally, I overlooked the importance of checking moisture levels, which led to future buckling in my hardwood floors. These lessons taught me that taking extra time to assess and prepare the slab is the best investment you can make for a long-lasting, flawless finish.
Another surprising insight was the importance of selecting the right patching material. Using a polymer-modified self-leveling compound changed my entire approach—its flexibility and adhesion minimized cracks and ensured a smooth surface. Lastly, I discovered that simple tools like a laser level and a 3-foot straightedge aren’t just for professionals—they’re game-changers for DIYers aiming for professional results. These lessons underscore that preparation is more than half the battle—it’s the foundation upon which quality floors are built.
Tools and Resources That Made a Difference
Over the years, I’ve come to rely on a handful of tools that make floor leveling less daunting. First, a reliable laser level like the Bosch GLL 550 ensures consistent flatness over large areas, drastically reducing guesswork. For assessing subfloor flatness, the 3-foot level test became my go-to because it quickly highlights dips and high spots. Additionally, high-quality moisture meters prevent me from unknowingly sealing in problems—an absolute must before any patch work. Combining these with excellent patching materials and careful inspection creates a workflow where success is almost guaranteed.
Furthermore, I learned that maintaining my tools—regular calibration and cleaning—preserves accuracy, saving me from costly rework. For example, a well-calibrated laser level keeps my floors consistently flat, and a clean trowel ensures even, bubble-free patches. For storage, airtight containers for adhesives and compounds keep materials in optimal condition, extending their lifespan. These small habits compound over time, making each project smoother and more satisfying.
Igniting Confidence for Your Next Project
If you’re standing on the edge of your flooring project and feeling uncertain about the foundation work, remember: every expert was once a beginner. Properly patched and leveled floors not only provide a sturdy base but also unlock the full aesthetic potential of your space—whether you’re dreaming of elegant tile designs or seamless hardwood transitions. Every step you take to improve your foundation makes subsequent layers easier to install and more durable in the long run. So go ahead—embrace the process, and soon you’ll be proud of a professional-quality finish that lasts for decades.
Have you ever struggled with patching or leveling a concrete slab? Share your experiences or ask for tips below—I’d love to hear what worked for you!
,