
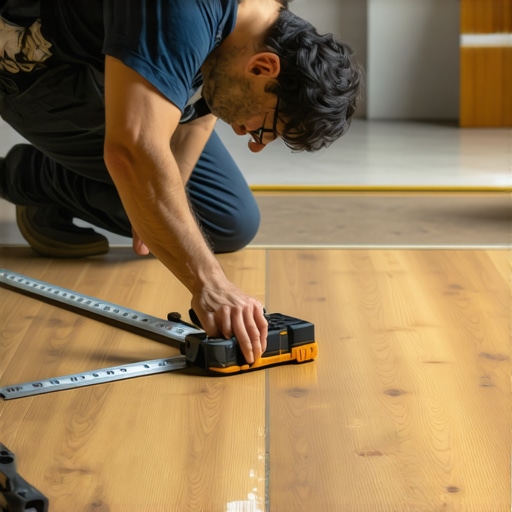
It was a moment of frustration I won’t forget. I had just finished laying a brand-new luxury vinyl plank floor in my living room, feeling pretty proud of myself. But when I stepped back to admire my handiwork, I noticed some glaring issues—uneven seams, gaps, and a couple of planks that looked warped. That sinking feeling hit me hard. Turns out, I had fallen prey to a common trap that can sabotage even the most enthusiastic DIYer: simple mistakes during installation.
If you’ve ever experienced something similar—money wasted, time lost, or a floor you’ll soon need to redo—you know how disheartening it can be. I learned the hard way that avoiding just a handful of critical pitfalls can make the difference between a flawless, long-lasting floor and a costly disaster.
Today, I want to share what I’ve discovered about the 7 mistakes that can ruin your luxury vinyl plank installation. I’ll guide you through the pitfalls to watch out for and how to sidestep them, so your new floor stands the test of time and looks stunning.
Why Skipping Preparation Can Lead to Disaster
Many DIYers dive into laying luxury vinyl planks without paying enough attention to the foundational steps. One mistake I made early on was neglecting proper subfloor preparation. I assumed that everything was smooth when, in fact, my concrete slab had high spots and moisture issues that I didn’t address beforehand. This oversight caused some planks to lift and buckle over time.
Properly leveling and testing your subfloor is essential. As explained in [Floor Leveling Challenges and Common Mistakes](https://tiletrendshop.com/floor-leveling-challenges-common-mistakes-and-how-to-avoid-them), a level surface prevents uneven wear and premature failure. Don’t rush this step. It might seem tedious, but it’s the key to ensuring a seamless, durable finish.
Have you faced issues with irregular subfloors? If so, you’re not alone, and the fix is easier than you think when you know what steps to follow.
Is Skipping Subfloor Preparation Really Such a Big Deal?
Absolutely—the foundation of your flooring directly impacts its lifespan. Without proper prep, even the best vinyl plank brands will struggle to perform.
Stay tuned, because next, we’ll explore how choosing the wrong adhesive or failing to allow enough acclimation time can further sabotage your project. Making these mistakes can be costly, but with the right knowledge, you can turn your installation into a success story.
Level Your Subfloor Like a Pro
Start by inspecting your subfloor with a long straightedge or a 3-foot level, checking for high and low spots. If you find uneven areas, mark them clearly. Use a self-leveling compound, following the manufacturer’s instructions, to fill in low spots or smooth out high ones. When mixing, avoid cold weather clumping by warming the mixer or ingredients beforehand. Work systematically across the entire surface, ensuring no dips or humps remain, which can cause planks to shift or buckle over time. I once waited until the last minute to repair a concrete slab—results were disastrous, with visible buckling after just a few months. Proper leveling, however, transformed my project into a flawless floor, emphasizing how vital this step really is.Many homeowners and DIY enthusiasts believe that understanding basic leveling techniques is enough to guarantee a flawless floor, but in my experience, there are nuanced pitfalls even seasoned pros occasionally overlook. One widespread misconception is that relying solely on self-leveling compounds is sufficient for perfect flatness. While these products are invaluable, assuming they can fix underlying structural issues without proper inspection is a mistake. For example, foundational problems like subfloor movement or moisture intrusion can cause leveling compounds to crack or peel over time, leading to costly repairs. According to industry experts, such as those who contributed to [Mastering Floor Leveling Secret Techniques](https://tiletrendshop.com/mastering-floor-leveling-pro-secrets-for-perfect-installations), identifying and addressing the root cause before applying leveling materials is crucial.To keep your flooring projects performing flawlessly over the years, investing in the right tools and embracing precise techniques is essential. I personally rely on a high-quality laser level, such as the Bosch PLL 360, which provides incredible accuracy when checking subfloor flatness, ensuring your foundation is impeccable before laying any material. This tool’s ability to project a 360-degree laser line simplifies complex leveling adjustments and saves time compared to traditional bubble levels, especially on larger surfaces.
For moisture testing, I recommend the Tramex CME4, a digital concrete moisture meter that delivers quick, reliable readings. Moisture issues are often the silent killers of floors, especially hardwood and tile installations. Using this meter regularly during prep, as advised in [Floor Leveling Challenges and Common Mistakes](https://tiletrendshop.com/floor-leveling-challenges-common-mistakes-and-how-to-avoid-them), can prevent costly failures down the line.
When it comes to mixing leveling compounds or adhesives, I use a variable speed drill with a paddle attachment—specifically, the Makita 6010DW. This combo ensures thorough mixing without introducing air bubbles, which can weaken the finished surface. Remember, manufacturers like [Mastering Floor Leveling Secrets](https://tiletrendshop.com/mastering-floor-leveling-pro-secrets-for-perfect-installations) emphasize the importance of proper mixing techniques for optimal adhesion and longevity.
In addition, proper safety gear such as NIOSH-approved respirators and knee pads should never be overlooked. Protecting yourself during preparation and installation not only ensures safety but also enables meticulous work, which translates into better long-term results.
Looking ahead, I believe that innovation in digital monitoring and automation will revolutionize flooring maintenance. Smart sensors embedded in floors could alert homeowners to issues like rising moisture or subfloor shifts before they escalate—much like predictive maintenance in other industries.
**If you want to elevate your flooring projects, try implementing a laser level for all your leveling checks. It’s a game-changer for achieving that perfectly flat surface that will support your flooring layers for decades to come.** For more detailed guidance on leveling and installation techniques, don’t hesitate to reach out via our [Contact Page](https://tiletrendshop.com/contact-us-2). Remember, mastery of precision tools directly translates into superior, lasting results—so gear up and start leveling smarter today!
The Hidden Pitfalls That Nearly Cost Me Everything
Looking back, one of the most valuable lessons I learned was how critical thorough subfloor inspection truly is. I once skipped moisture testing and thought a simple sweep would suffice—until my new hardwood finish began to bubble and peel within months. That experience taught me that investing time in proper prep is better than patching problems later. I’ve seen seasoned pros overlook seemingly minor flaws, only to face costly repairs down the line. If you’re serious about flawless flooring, prioritize identifying and addressing issues like subfloor cracks or moisture intrusion early, because these hidden flaws will always reveal themselves eventually. Don’t let convenience undermine your craftsmanship—learning to detect even faint signs of subfloor trouble can save your project from disaster.
Tools and Resources That Make the Difference
Over the years, I’ve recognized that the right tools elevate the quality of my work—no question. A laser level, like the Bosch PLL 360, has become my go-to for ensuring perfect flatness, especially on large surfaces. It saves time and prevents uneven seams, which is essential in floor leveling. Pair it with a moisture meter such as the Tramex CME4 to catch hidden moisture issues that could undermine your entire project. When mixing leveling compounds, I trust a high-quality drill with a paddle attachment; thorough mixing is key to avoiding weak spots. For reliable reading on subfloor moisture, I recommend tools that I use regularly—these are game-changers. For comprehensive guidance on leveling techniques, the resource Mastering Floor Leveling Secrets has been invaluable for me, and I suggest it for anyone aiming for professional results.
The Confidence to Elevate Your Floors
Designing or installing new floors can feel daunting, but remember: every expert was once a beginner willing to learn. The more you understand about proper leveling, moisture management, and tool mastery, the more confident you’ll become in your abilities. Your next project isn’t just about laying tiles or hardwood; it’s about creating a foundation that lasts. Embrace the learning curve, and celebrate each small victory—like a perfectly straight row or a seamless transition—because they build your skill and confidence. The future of flooring is exciting, with innovative tools and materials making flawless installations more achievable than ever. So, step out, gear up, and transform your space with floors that reflect your true craftsmanship. Your toughest project today is shaping the gorgeous home of tomorrow. Are you ready to take your flooring skills to the next level?