
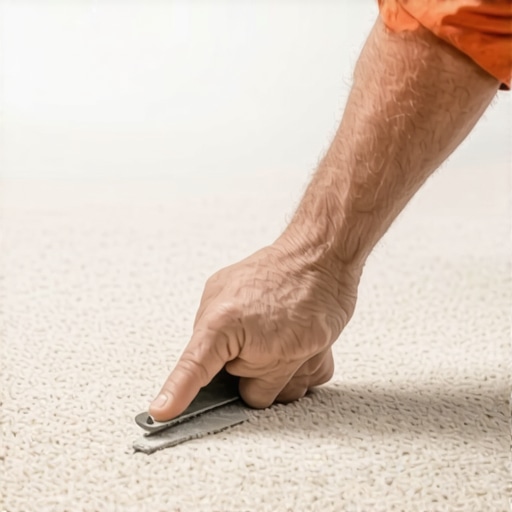
I remember the first time I really messed up a high-stakes commercial job. It was a boutique law office, and the lighting was merciless. I had cut my seams, used a standard iron, and walked away thinking I was a hero. Three days later, the client called. Under the morning sun, that seam looked like a scar running across the room. It was embarrassing, but it taught me a lesson I will never forget: in the world of commercial flooring, good enough is a recipe for a callback. Have you ever stood back from a finished room only to see that one glaring line mocking your hard work? If so, you are not alone, and I am here to help you bury those lines for good.
Make Those Carpet Lines Vanish Like a Pro
The secret to a perfect seam is not just about the cut; it is about the preparation and the chemistry. When you are dealing with heavy foot traffic, you cannot just rely on gravity. I have seen so many pros skip the seam sealer, only to wonder why your commercial carpet tiles are fraying at the seams just months later. It is a rookie mistake I made myself back in the day. Today, we are going to look at the transition from obvious to invisible by focusing on pile direction and the right adhesive temperature. If you are working with specific layouts, you might even find that why your commercial office needs modular carpet tiles instead of broadloom to simplify the process, but if you are committed to the roll, you need a plan.
Can You Really Make a Seam Disappear Completely?
Skepticism is healthy here. In a massive open-concept office, can you really hide every single joint? While invisible is a tall order, unnoticeable is absolutely within reach. According to the Carpet and Rug Institute (CRI), the use of a proper seam sealer is actually a mandatory requirement for most commercial warranties because it prevents the primary backing from unravelling. It is not just about looks; it is about structural integrity. Before you start your next project, ask yourself: have you ever had a seam fail even though you followed the standard steps? Leave a comment and let me know—I have probably made the same mistake. Using expert flooring installation tips means accepting that the environment, like humidity and subfloor prep, matters just as much as the carpet itself. We are going to dive into the tools that actually make a difference, from row runners to tractor rollers, and why your old iron might be sabotaging your results.
Get the Foundation Right Before Touching the Carpet
I remember a job in a local bank lobby where I rushed the prep. I figured since I was laying heavy-duty broadloom, the thickness would hide the minor divots in the slab. I was dead wrong. That tiny 1/8-inch dip caused the seam tape to bridge rather than bond, and within a month, the seam had popped under the weight of a heavy mail cart. I learned the hard way that even for soft flooring, how to achieve flawless floor leveling before tile laying provides the exact same principles you must apply to carpet. If your base isn’t flat, your seam is a ticking time bomb. Before you even roll out the goods, you need to check the subfloor for moisture and profile. If you’re dealing with an old renovation, knowing the best way to prep a painted floor for new tile often translates to carpet too—you need a clean, mechanical surface for your adhesive to grab. If you find a massive deviation, don’t ignore it; learn how to level a floor that has a 2 inch drop across the room to ensure your seams don’t have to fight gravity.
Cut Like a Surgeon with Row Running
Forget freehanding with a utility knife if you want professional results. In the commercial world, we use a row runner. Think of it like a train on tracks; you find a specific row of fibers and follow that valley religiously. If you cross-cut or jump rows, you’re creating a jagged edge that will never disappear. Use a sharp blade for every single cut—I change mine every 20 feet of seam. Once the edges are cut, you must seal them. This is the ‘liquid insurance’ of the flooring world. Apply a thin bead of latex seam sealer to both edges to bond the primary and secondary backings together. This prevents the edges from unraveling, which is exactly why your commercial carpet tiles are fraying at the seams when prep is skipped. It’s a messy step, but it is the difference between a three-year floor and a twenty-year floor.
The Chemistry of the Perfect Bond
Setting your iron temperature is like cooking a steak; too high and you scorch the backing, too low and the ‘meat’ stays raw. For most commercial carpets, a setting between 2.5 and 3 on the dial is the sweet spot. You want the adhesive on the tape to reach a molten state without smoking. Move the iron slowly—about one foot per minute—and follow it immediately with your hands to tuck the fibers. If you find the carpet is shifting, it might be an issue with the subfloor bond, a common problem where why your floor primer is peeling off like a sunburn causes the entire system to fail from the bottom up. Keep your iron clean; any burnt adhesive on the baseplate will drag and ruin the pile.
Roll It Like You Mean It
Once the heat has passed, the work isn’t done. You need to use a star roller or a tractor to ‘knit’ the fibers together while the glue is still tacky. Think of this like kneading dough—you are forcing the two pieces of backing to become one single unit within the adhesive. If you are working over a complex subfloor, you might benefit from mastering floor leveling pro secrets for perfect installations to ensure the tractor has a perfectly flat plane to press against. For those working with mixed media, such as transitioning from carpet to a hard surface, using the leveling secret for installing plank flooring over tiles can help you manage height variances that often make carpet seams look prominent at the doorways. A properly rolled seam should be flat to the touch and virtually invisible to the eye, even under harsh fluorescent office lighting.
A lot of people think the hard part is over once the carpet is rolled or the tile is set, but the real secret to a floor that lasts decades—not years—lies in the ‘invisible’ layers. Most installers will tell you that self-leveling underlayment is a ‘set-it-and-forget-it’ miracle. In my experience, that is a dangerous myth. If you do not help the leveler, it will not help you. I have seen countless projects fail because the installer assumed gravity would do the work of a gauge rake. According to the Tile Council of North America (TCNA), subfloor preparation is responsible for over 80% of flooring failures. If you skip the mechanical abrasion or the proper primer, you are just pouring money down the drain. Have you ever had a beautiful pour turn into a cracked mess by morning? Let me know in the comments—I have been there, and it is usually because of one tiny detail we are about to cover.
Stop Trusting Gravity to Level Your Floors
One of the biggest ‘traps’ is the water ratio. It is tempting to add an extra splash of water to make the leveler flow better, especially when why your self-leveler is drying faster than you can pour it becomes a frantic problem on-site. But that extra water dilutes the polymers, leading to a chalky surface that will never achieve a true bond. This is often the root cause of why your floor primer is peeling off like a sunburn; the substrate was either too contaminated or the mix was too weak to stay anchored. When I am mastering floor leveling pro secrets for perfect installations, I use a spiked roller not just for air bubbles, but to ensure the chemistry is consistent across the slab. If you ignore this, you’ll end up with flooring installation mistakes to avoid for lasting results that haunt you through ‘telegraphing’—where every imperfection in the subfloor eventually ghost-shadows through your expensive finish.
Beyond the mix, there is the ‘pinhole’ effect. When you pour leveler over unprimed concrete, the air trapped in the concrete pores escapes through the liquid, creating tiny volcanoes. By the time it dries, your floor looks like the surface of the moon. This is where the roller selection that prevents air bubbles in leveler becomes your best friend. Professional installers often skip the ‘easy’ route of a cheap mop-on primer and instead use a scrub-in method to ensure the primer actually penetrates the concrete pores. It is messy, and it takes longer, but it is the only way to guarantee the leveler stays put.
Why Does Your Subfloor Still Bounce After Leveling?
This is the advanced question I get all the time from DIYers and even seasoned pros. The leveler might be flat, but if the wood subfloor underneath has deflection (bounce), the leveler will eventually snap like a cracker. You must address the structural integrity first by checking joist spacing and subfloor thickness. This is a common nuance when people wonder why your lvp floor is showing telegraphing from the subfloor or why their rigid tiles are suddenly popping months later. You have to be a bit of a detective before you become a craftsman. Have you ever fallen into this trap of fixing the surface but ignoring the structure? Share your horror stories below—I want to hear how you fixed it.
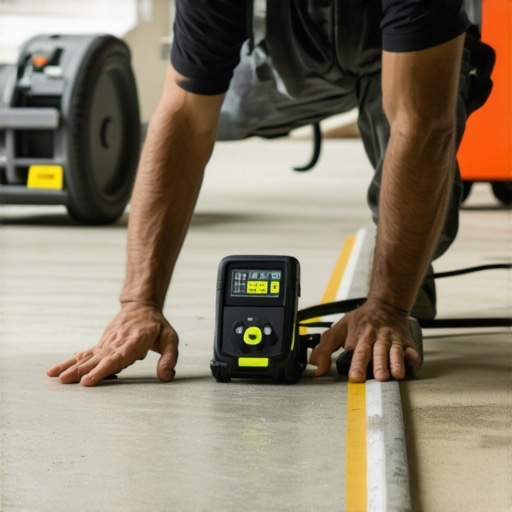
Once you have handled the structural physics of the subfloor, you are ready to transition into the phase that defines a master installer: the precision stage. I have spent years refining my toolkit, and if there is one thing I have learned, it is that your eyes can lie to you, but your sensors won’t. I used to trust my gut when it came to whether a concrete slab was ‘dry enough,’ but after a nightmare job where a high-end oak floor cupped within weeks, I never work without a high-quality moisture meter. Knowing how to use a moisture meter before you lay wood floors is not just a suggestion; it is your primary defense against nature. If the moisture content of your subfloor and your wood planks is not within a 4% margin for solid wood, you are inviting a disaster that no amount of fancy adhesive can fix.
Precision Tools That Separate the Amateurs from the Pros
Beyond moisture sensing, I cannot stress enough the importance of a professional-grade dust extraction system. If you are doing renovations in occupied homes, the old way of just ‘hanging plastic’ is dead. I personally use a HEPA-certified vacuum hooked directly to my sanders and saws. It is why clients specifically ask for the dust-free move for hardwood floor refinishing in Kansas City and beyond. It keeps the workspace breathable and ensures that no microscopic debris settles into your wet finish. According to the National Wood Flooring Association (NWFA) Technical Manual, proper dust control is critical for achieving a ‘Table Top’ finish—that perfectly smooth, glass-like surface that defines premium work. If you are still using a shop vac and a broom, you are leaving money and reputation on the table.
How can I ensure my floors stay beautiful for decades?
Maintenance is where most homeowners—and many pros—fall short. I always leave my clients with a specific care kit. The most common error I see is the ‘cleaner’ used by homeowners. I have seen beautiful stone installations ruined because someone fell for the vinegar mistake that eats through your natural stone tiles. Acidic cleaners are the enemy of grout and natural finishes. Instead, I advocate for pH-neutral cleaners and a strict ‘no steam mop’ policy on wood or LVP. To really keep that investment protected, you need to share hardwood floor care secrets to longevity and shine with the client, such as maintaining a consistent 35-55% indoor humidity. This prevents the seasonal gaps and cracks that make a floor look aged before its time.
The Future of Flooring is Smarter and Cleaner
Looking ahead, I see the industry moving toward more sophisticated ‘smart’ underlayments and moisture-sensing technology built directly into the adhesive layers. We are already seeing a massive shift toward high-performance modular systems. Following a step-by-step guide to flooring installation and leveling success now requires an understanding of hybrid materials that didn’t exist five years ago. Sustainable, low-VOC (Volatile Organic Compound) adhesives are no longer a niche luxury; they are the standard. The pros who will dominate the next decade are the ones who stop relying on ‘how my dad did it’ and start embracing the chemistry of modern materials. Before you mix your next bucket of leveler or cut your next plank, I challenge you to go out and buy a pinless moisture meter. It is the single most important investment you will make this year to protect your work and your peace of mind.
Hard Lessons From Three Decades in the Trade
Looking back, the most expensive mistake I ever made wasn’t a bad cut; it was a simple lack of patience. I have learned that if you feel the urge to rush the adhesive drying time, that is exactly when you should take a lunch break and walk away. Another lightbulb moment was realizing that the subfloor always speaks to you—if it sounds hollow when you tap it with a hammer, it will sound hollow when the client walks on it later. Finally, the environment is your boss. If the HVAC system isn’t running, your moisture readings are just numbers on a screen, not the reality of the slab. Avoiding these flooring installation mistakes to avoid for lasting results is what differentiates a true craftsman from a weekend contractor.
The Pro-Grade Tools That Live in My Truck
I do not leave the shop without a few non-negotiable tools that have saved my reputation more than once. I trust a pinless moisture meter to give me the definitive go or no-go signal on every concrete slab. For leveling, I never rely on a bucket mix alone; I always use a heavy-duty mixer to ensure the polymers are fully hydrated and consistent. If you want to replicate professional results, I suggest following this step-by-step guide to flooring installation and leveling success to keep your workflow efficient. I also suggest keeping a set of specialized spiked rollers for your self-leveler to eliminate the tiny pinholes that can ruin a finish. These are the tools that ensure my precise floor leveling techniques to achieve flawless surfaces stay consistent from one job to the next.
Craft a Floor That Stands the Test of Time
Every time you pack up your tools and turn off the lights on a job site, you should be able to stand back and know that the floor is as solid as the foundation beneath it. Real mastery in flooring installation comes from the quiet satisfaction of knowing the seams are sealed, the moisture is managed, and the leveler is locked in properly. You are not just laying down planks or tiles; you are creating the surface where families live their lives. Do not be afraid to take that extra ten minutes to double-check your work—it is the hallmark of a professional who cares about longevity. Have you ever had a specific tool or a strange subfloor quirk completely change how you handle a project? Let me know in the comments below!