
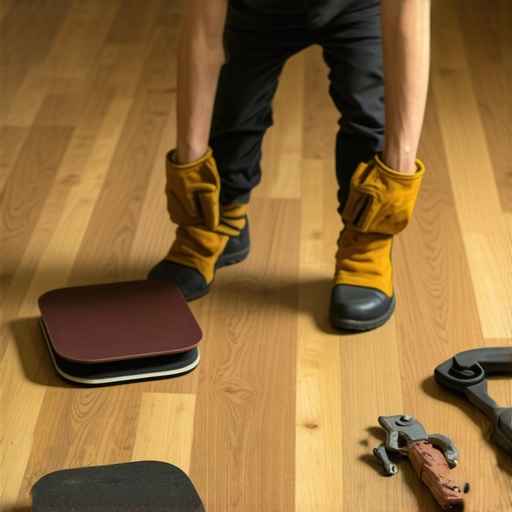
I remember the exact moment I realized I was sanding my hardwood floors the wrong way. I had spent hours, dust swirling around me, desperately trying to smooth out a stubborn patch. Despite my efforts, the finish looked uneven, and I doubted my entire project. That lightbulb moment hit me hard—I was doing more harm than good, just because I didn’t know better. If you’ve ever been in a similar situation, you’re not alone. Many DIYers and even seasoned pros stumble into this trap, believing that aggressive sanding will make their floors flawless. But here’s the truth: less can actually be more.
Why You Should Rethink Sanding Your Hardwood Before Reading This
The world of flooring is full of misconceptions, and one of the biggest myths is that more sanding equals better results. I used to believe that if I sanded harder and longer, I’d get a mirror-like finish. Turns out, that’s not only false but can damage your wood. Over-sanding can lead to uneven surfaces, shallow or thin finishes, and even permanent damage to your precious floors. The good news? You don’t have to risk all that. You can achieve stunning, durable results without turning your home into a dusty disaster zone.
This post isn’t about throwing away your sander. Instead, I’ll share proven techniques to help you level, sand, and finish your floors smarter and safer. If you’ve been frustrated with streaks, scratches, or uneven patches, stick around—I promise, the solution is closer than you think. For more tips on maintaining your hardwood’s shine, check out this guide.
Is Sanding the Only Way to Bring Your Floors Back to Life?
Early in my DIY journey, I made the mistake of believing that aggressive sanding was the only answer. I thought, “If I don’t sand enough, my floors will look patchy; if I sand too much, I’ll ruin them.” That kind of all-or-nothing thinking led to uneven results and a lot of unnecessary work. I wish I’d known earlier that proper floor leveling and finishing techniques can save you time, money, and a lot of headaches. Modern methods focus on precision and patience rather than brute force. When I discovered the secrets to seamless floor leveling—like using the right tools and applying techniques from this expert guide—everything changed for me. And it can for you, too.
To get started on the right foot, it’s essential to understand what really makes a floor look professional—and it’s not endless sanding. Stay tuned, because we’re about to dive into practical steps that will revolutionize your hardwood floor refinishing process.
,
Start with a Thorough Inspection and Surface Preparation
Before jumping into any sanding or leveling, I recommend examining your subfloor and existing hardwood for high spots, dips, or damaged areas. During my first project, I found a particularly stubborn ridge near the doorway, which caused uneven finish. Marking these areas with a pencil helps visualize problem spots. Remove all furniture, debris, and old finish residues for a clean surface. This step is crucial because attempting to level over dirt or loose materials leads to uneven results and wasted effort. Use a moisture meter if you’re unsure about the subfloor’s dryness, as moisture issues can cause future warping or failure.
Apply a Floor Leveler to Correct Subfloor Imperfections
If your subfloor shows irregularities, a self-leveling underlayment is your best friend. Mix the leveling compound carefully, following manufacturer’s instructions—remember, the right consistency is thick but pourable, similar to heavy cream. I once rushed mixing in cold weather, which caused the compound to set instantly. To prevent this, warm the mixing water slightly and mix in small batches, ensuring bubbles don’t form. Pour the leveler starting at the low points, allowing gravity to guide the flow into dips. Use a gauge rake or notched trowel to spread the compound evenly, and immediately squeegee or lightly vibrate the surface to remove air pockets and promote smoothness. For intricate projects, exploring this comprehensive guide offers deeper insights.
Handle Common Leveling Challenges
One challenge I encountered was the leveler setting too quickly, especially in cold conditions. To combat this, work in small sections and extend drying time with warm towels or a space heater. Don’t forget to tape off edges and use a plastic dam at expansion joints to contain the fluid. Once dried, use a long straightedge or a spirit level to verify smoothness; minor imperfections can be sanded down if necessary.
Use Proper Trowel and Sanding Techniques for Finishing
For the smoothing process, select the right notched trowel based on your tile or hardwood thickness—larger notches for thicker layers. My mistake was using a small notch on a thick bed, leading to uneven bonding and a wavy surface. After the leveling compound cures, inspect the surface visually and run your hand over it to feel for high or low spots. If you find any, lightly sand with an orbital sander equipped with fine grit, taking care not to gouge the surface. This precision ensures your hardwood planks sit flat and stable, avoiding future squeaks or gaps. Remember, patience here yields the best results—rushing causes uneven flooring and frustrated finishes. For more expert tips, check out this resource.Many DIY enthusiasts believe that proper flooring results hinge solely on choosing quality materials and following basic installation steps. However, I’ve found that an often-overlooked aspect is understanding the subtle interplay between subfloor conditions and flooring expansion, which can make or break a project. Contrary to the common myth that a perfectly level subfloor guarantees flawless installation, small variations and unaddressed moisture issues can lead to gaps, cracks, and even cupping over time.
One crucial nuance is recognizing that every type of flooring—be it tile, hardwood, or laminate—has specific requirements for subfloor preparation and acclimatization. For example, hardwood floors require a stable, dry, and well-ventilated environment to prevent dimensional changes after installation. Without this awareness, homeowners frequently encounter issues like warping or squeaks down the line.
Why Do So Many Get It Wrong Installing Floors Over Uneven Subfloors?
In my experience, the mistake often lies in neglecting minor imperfections or rushing through leveling work. Many assume that leveling compounds or thinset can correct all irregularities, but these solutions have limits and can introduce new problems if not applied properly. The key is understanding that minor low spots or high ridges should be addressed with precise grinding or patching techniques rather than relying solely on overlay materials. For advanced insights on achieving a seamless look, check out this detailed guide.
Additionally, paying attention to joint expansion gaps and climate-controlled environments during installation can prevent future buckling or gaps. A common pitfall is failing to maintain consistent humidity levels during and after installation, which makes flooring materials expand or contract unpredictably. According to experts in flooring science, such as those referenced in this research, controlling ambient conditions is vital for long-lasting results.
On the other hand, some installers overlook the importance of correct substrate preparation, especially when working over older or problematic subfloors. The mistake of skipping moisture testing or ignoring existing damages can lead to a host of issues, from mold growth to adhesive failure. Ensuring that the subfloor is dry, clean, and free of debris is a fundamental step that should never be compromised, as highlighted in this comprehensive resource.
In summary, mastering the hidden nuances—like addressing subfloor imperfections meticulously and understanding material-specific environmental needs—distinguishes a professional finish from a botched job. So, the next time you plan your flooring project, ask yourself: Have I accounted for these subtle factors? Let me know in the comments. For more advanced strategies to elevate your installations, explore these expert tips.
Keeping It Working: Essential Tools and Maintenance Strategies
Achieving a flawless floor is just the beginning; maintaining its beauty and durability over time requires the right tools and consistent care. From specialized equipment to smarter upkeep routines, I’ve learned that investing in quality tools and adopting systematic maintenance can extend the life of your floors significantly.
One tool I strongly recommend is a high-quality cordless orbital sander with fine grit pads. I personally prefer models with variable speed controls because they allow for gentle polishing during refinishes or light touch-ups without risking damage. This flexibility is essential when dealing with hardwood finishes, as aggressive sanding can ruin the surface or remove protective coatings prematurely. For tile, a grout cleaning brush with ergonomic design helps keep grout lines pristine, preventing dirt buildup that can compromise waterproofing and aesthetics.
Another invaluable asset is a moisture meter—especially vital when working over existing concrete or during ongoing projects—since moisture levels deeply influence how floors respond to installation or refinishing. Proper moisture readings from a device like Tramex or Protimeter can save countless headaches from warping or cupping down the line. Properly monitoring humidity during the entire process ensures your floor’s longevity, which you can explore more in this care guide.
For long-term care, I swear by a microfiber dust mop combined with a gentle cleaning solution tailored for your floor type. Regular sweeping prevents dirt and grit from scratching surfaces, and a consistent cleaning routine helps maintain shine and prevents wear. Technological advancements suggest integrating floor-coating maintenance software, which tracks your cleaning schedules and alerts you when refinishing or sealing are due, aligning with trends toward smarter home care.
How do I maintain flooring over time to preserve that just-installed look?
Consistency is key. Using the right tools like a buffer for hardwood or a steam cleaner designed for tiles can keep surfaces in top shape, but equally important is understanding your environment. Controlling humidity with dehumidifiers or humidifiers prevents dimensional changes that cause gaps, cracks, or warping. Protect high-traffic areas with rugs or pads—this simple step can drastically slow down wear and tear.
The future of flooring maintenance looks promising, with IoT-enabled sensors and app-based monitoring becoming more accessible. These innovations will provide real-time data on environmental conditions, making preemptive maintenance more efficient than ever. But for now, implementing a routine with quality tools, like top-grade buffers and moisture meters, will give your investment years of stunning performance.
If you want a practical tip to elevate your routine today, try applying a light buff with a soft pad after your weekly cleaning. This quick step can refresh your finish, boost shine, and minimize micro-scratches. It’s an advanced move that pays off long-term: consistent upkeep isn’t complicated, but it’s crucial to keep floors looking great for years. Ready to give it a shot? Incorporate a buffer into your toolkit and enjoy the results!
,
Looking back, the most valuable insight I gained from my hardwood flooring projects is that perfection isn’t about doing more—it’s about doing the right things with patience and precision. The lightbulb moments I experienced revealed that rushing through surface preparation or skipping meticulous leveling can undo months of careful work. Now, I prioritize quality over quantity, attention to detail over speed, and understanding over assumptions. Your floors will thank you for embracing the subtle nuances—like addressing minor subfloor imperfections or controlling environmental conditions—that separate a professional-looking finish from a novice’s attempt. Remember, every stubborn ridge, uneven patch, or tiny gap is an opportunity to learn and improve your skills. For a deeper dive into these expert principles, explore