
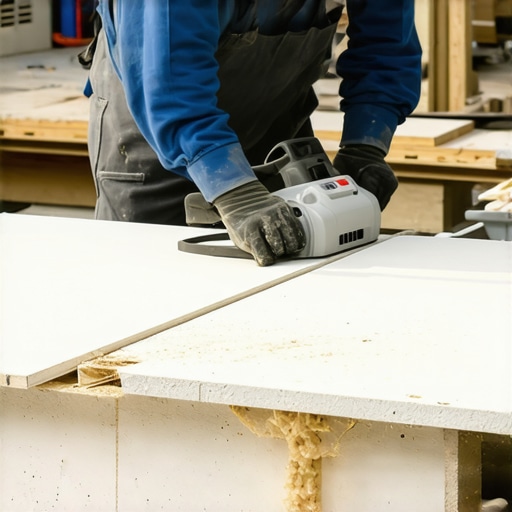
It was a frustrating morning when I finally decided to install new porcelain tiles in my kitchen. As I clutched my tile cutter, I felt that familiar pang of dread—am I going to crack this beautiful tile before I even lay it down? That moment of hesitation, the fear of ruining a perfectly good piece, is something many DIY enthusiasts and pros alike face. Missteps and broken tiles can turn a sleek renovation into a nightmare, and let’s be honest—nothing kills the vibe faster than a cracked tile after hours of work.
Why Cutting Porcelain Can Feel Like Walking a Tightrope
Porcelain tiles are known for their durability and elegance, but that toughness also makes them tricky to cut. A slight miscalculation or using the wrong tools can result in shattered pieces that lead to wasted time and money. I learned this the hard way early on, making the mistake of rushing through the cut without proper preparation. The crack ran right through the middle of my tile, leaving me debating whether I should start all over again or accept a less-than-perfect finish. Trust me, I’ve been there—if you’re tackling a backsplash or flooring project, you want every cut to be smooth and flawless. That’s where mastering the trick of cutting porcelain without cracking comes into play.
Select the Right Tools for Perfect Cuts
Start by choosing a high-quality diamond blade designed specifically for porcelain. Think of it like a chef selecting a sharp, precise knife—without the right blade, clean cuts are nearly impossible. I once attempted to cut a large porcelain slab with a standard glass cutter, resulting in a shattered piece and wasted time. Switching to a wet saw with a diamond blade transformed my experience, delivering smooth, clean cuts every time.
Measure and Mark Accurately to Avoid Waste
Use a tape measure combined with a fine-tip marker or a soapstone pencil to outline your cut lines precisely. When I measured a backsplash tile for an outlet cut, I double-checked my measurements, marked carefully, and scored the line before cutting. This attention to detail prevented misalignments and unnecessary tile loss. For dark tiles, a soapstone pencil creates visible marks that fade less over time, guiding your cut accurately.
Prepare the Tile and Workspace Efficiently
Secure the tile on a stable, flat surface—think of it as anchoring a piece of wood before sawing. For slabs larger than your workspace, support the tile edges with scrap wood or a sturdy table. I recall struggling with a porcelain tile that kept slipping, causing jagged edges. Clamping it down with occasional helper assistance made all the difference. Clean the workspace regularly to prevent debris from affecting your cuts, and never rush—patience ensures flawless results.
Master the Cutting Technique
Score Before Cutting
Use a manual tile scorer or a angle grinder with a diamond wheel to score a deep, straight line along your marked edge. Press firmly but gradually, mimicking a steady hand guiding a paintbrush. When I scored my tile slowly and confidently, it prevented chips and cracks along the cut line. The key is maintaining consistent pressure—any hesitation can cause jagged or uneven cuts. For larger cuts, consider marking multiple scoring lines to deepen the score for an easier snap.
Use a Wet Saw for Precision
If available, a wet saw is your best friend. Fill the reservoir, turn it on, and let the water cool and lubricate the blade. Guide the tile steadily through the cut, aligning with your marked line. Keep the movement slow and controlled—rushing causes vibrations that can lead to cracks. I once made a long, straight cut on a porcelain backsplash, and the steady, gentle feed resulted in a perfect edge, ready for installation. Remember, always wear safety glasses and ear protection when operating power tools.
Handle Edges Carefully to Prevent Cracking
After cutting, gently smooth rough edges with a diamond file or an abrasive pad. This prevents stress points that could crack later. When I finished my last cut, a quick smoothing eliminated the sharpness, avoiding future breakage during placement. Additionally, avoid exposing freshly cut tiles to extreme temperature changes or moisture, which can cause expansion and cracking.
Final Tips for Crack-Free Cuts
Test on scrap tiles before making your final cuts—think of it as a dress rehearsal. Use a piece of similar porcelain to practice scoring and cutting techniques; this builds confidence and prevents costly mistakes. Also, consider using masking tape along your cut line to minimize chipping—this simple trick can save your project from unnecessary flaws. With patience and the right approach, cutting porcelain becomes a straightforward task rather than a nerve-wracking challenge. When in doubt, explore detailed strategies at this comprehensive guide.Even experienced contractors sometimes overlook the subtleties that make a flooring project truly flawless. Many believe that choosing the right subfloor is enough, but in reality, achieving a perfectly level and stable surface requires attention to details that often go unnoticed. For instance, improper assessment of substrate moisture levels can lead to adhesive failure and tiles cracking over time, a mistake highlighted in recent industry studies. Additionally, many DIYers assume that thicker underlayment always translates to better sound insulation or floor stability, but in some cases, it can introduce new problems like height discrepancies or substrate instability.
A common myth involves the idea that a perfectly flat surface is always achieved by merely screeding the floor; however, without proper substrate preparation, even the best leveling compounds can fail. The key lies in understanding the specific requirements of each flooring type—whether it’s porcelain, hardwood, or luxury vinyl—and tailoring your approach accordingly. For example, managing expansion joints and understanding the importance of a cohesive transition between different flooring materials can prevent future cracking or buckling, as emphasized in expert guides on floor installation.
For advanced practitioners, mastering the nuances of substrate porosity and moisture vapor emission rates can drastically improve longevity. A failure to account for these factors may cause adhesive delamination or tiles to pop up after installation. To avoid these pitfalls, testing concrete porosity and moisture levels, then choosing compatible adhesives and sealants, is essential. According to flooring science experts, neglecting these steps can cut a project’s lifespan short, leading to costly repairs and rework.
What about the application of leveling compounds? Many assume that they are foolproof; however, improper mixing or applying a layer that is too thick can cause cracks and uneven surfaces. The optimal use of self-leveling underlayment involves precise mixing techniques and understanding drying times, which are critical for ensuring a flawless finish. For detailed strategies, reviewing comprehensive guides like the one offered on floor leveling fundamentals can elevate your skills.
Furthermore, advanced installers recognize the importance of controlling environmental conditions during installation—temperature, humidity, and airflow—which can influence curing times and adhesion quality. Ignoring these factors might seem minor but can lead to subtle, long-term issues such as warping or surface deformation.
In summary, appreciating these nuances—not just the basics—sets seasoned professionals apart. Precision in measuring, substrate preparation, environmental control, and understanding material properties are critical to flooring success. Have you ever fallen into this trap? Let me know in the comments. For those eager to refine their techniques, exploring dedicated guides on [floor leveling success](https://tiletrendshop.com/step-by-step-guide-to-flooring-installation-and-leveling-success) can be a game-changer.
Keeping Your Flooring in Peak Condition
Investing in quality tools and adopting proper maintenance routines are essential for ensuring your tile, hardwood, or level flooring remains stunning and durable over time. The right equipment not only streamlines installation but also minimizes the risk of future issues like cracking or buckling. Regular upkeep eliminates debris and prevents minor damages from escalating into costly repairs. For example, using a high-quality microfiber mop for hardwood floors helps maintain a polished finish without scratching the surface, while a grout haze remover keeps tiled surfaces looking brand new.
Essential Tools for Ongoing Care
One of my favorites is the 320-grit abrasive pad. This versatile tool gently buffs out scuffs and minor scratches on hardwood floors, restoring their sheen without harsh chemicals. Additionally, a weighted roller — originally used during installation — can be employed periodically to press down loose tiles or vinyl planks, preventing shifts that lead to cracks. Invest in a reliable vacuum with soft brush attachments; it keeps your floors free of grit that could cause surface damage during cleaning.
Software for Floor Maintenance Tracking
While physical tools are vital, employing maintenance software that schedules regular inspections can make a noticeable difference. Apps like ‘FloorPlan Manager’ enable you to log cleaning dates, note any signs of wear, and set reminders for professional inspections or recoating. This proactive approach extends the lifespan of your flooring investments and helps detect issues before they become serious problems.
Future Trends in Flooring Upkeep
Looking ahead, incorporating IoT-enabled sensors into flooring materials might revolutionize maintenance. These sensors could monitor humidity, temperature, and structural integrity in real-time, alerting homeowners to potential problems instantly. Think of it as having a health monitor directly embedded into your floor—minimizing surprises and guiding timely interventions. As technology progresses, expect smarter solutions that solidify the importance of regular upkeep for lasting beauty and performance.
How do I maintain my floors over time?
To keep your floors looking their best, stick to a consistent cleaning schedule tailored to your flooring type and use the specially recommended tools. Avoid harsh chemicals; instead, opt for pH-neutral cleaners suited for hardwood or tile. Regular inspections allow you to catch early signs of damage like cracked grout or loose tiles. Remember, preventative maintenance is always more cost-effective than repairs. Develop a routine that includes gentle cleaning, prompt spill cleanup, and periodic professional assessments—your floors will thank you. For expert advice on refinishing and long-term care, consider reviewing these expert tips.
Don’t Leave Maintenance to Chance
Remember, flooring is a significant investment, and maintaining it is an ongoing process. By choosing the right tools and adopting a proactive approach, you set yourself up for decades of beauty and function. Try implementing a scheduled routine using a mix of physical tools and digital tracking—see how much easier it becomes to keep things flawless. For advanced strategies, explore the detailed insights available at this comprehensive guide and elevate your maintenance game.
What I Wish I Learned Sooner About Tile and Hardwood Mastery
- Every project taught me that patience trumps haste; rushing through cuts or leveling can lead to cracks and frustration, but a calm, measured approach ensures perfection.
- Tools are the silent heroes—investing in high-quality diamond blades and proper wet saws transformed my results from guesswork to precision craftsmanship.
- Measuring twice, cutting once isn’t just a saying—it’s the golden rule that saved me from costly mistakes and unnecessary stress, especially on dark tiles or large-format slabs.
- I discovered that preparing the substrate is like laying a strong foundation; neglecting moisture tests or uneven surfaces only invites future failures and repairs.
- Learning to use masking tape and soapstone pencils for marking saved countless tiles from chipping and helped me achieve seamless, professional-looking results.
Tools and Resources That Changed My Flooring Game
- Diamond Blade for Porcelain—A must-have; it’s like a magic wand that makes clean cuts effortless, especially on tough materials. I’ve relied on brands recommended by >this expert guide< and haven't looked back.
- Reliable Wet Saw—My go-to for precision; it provides smooth edges, and I trust models that feature adjustable speeds and water flow controls, which you can find at this resource for refining technique.
- Accurate Measuring Tools—Digital calipers and soapstone pencils are integral to my success; they keep my cuts flawless and my measurements unerring, critical for intricate projects.
- Substrate Testing Kits—Prevent future cracking by ensuring your base is solid; something I overlooked once, which led to a costly fix, but now I always check with this recommended guide.
- Professional Guidance—Books and tutorials from seasoned experts have provided insights into nuances that salvage or elevate a project. Investing in these resources has paid off handsomely.
Your Turn to Build Confidence and Vision
Embarking on a tile or hardwood project is both a challenge and a chance to create something truly special. With patience, the right tools, and a willingness to learn from experience, you can achieve results that rival professionals. Remember, each mistake is a stepping stone to mastery—don’t shy away from testing on scrap pieces or practicing tricky cuts. If you’re eager to take your craftsmanship further, explore this comprehensive guide to refine your floor leveling skills.
What has been your biggest lesson in flooring installation so far? Share below—I’d love to hear your story and help you troubleshoot the next step on your journey.