
Have you ever been woken up early on a Saturday by that persistent squeak echoing down your upstairs hallway? I felt that frustration firsthand when I moved into my home and the floors started protesting every step I took. That tiny, grating noise can turn peaceful mornings—or relaxing evenings—into a test of patience. But here’s the thing: I didn’t want to accept the squeak as just part of my home’s charm. I knew there had to be a way to fix it, and I was determined to find out how.
In this post, I’ll share with you the tried-and-true method I discovered to silence that stubborn squeak once and for all. Whether you’re dealing with creaking hardwood, loose tiles, or uneven flooring, I’ll guide you through practical steps rooted in experience—and backed by industry expertise. Trust me, once you understand the cause, fixing it becomes a lot less daunting.
Before we dive into the solution, I want to dispel a common myth: many people think squeaks are just inevitable, especially in older homes. But according to flooring specialists, most squeaks are actually preventable with proper installation and maintenance—something I wish I knew earlier (see [floor leveler mistakes](https://tiletrendshop.com/floor-leveling-challenges-common-mistakes-and-how-to-avoid-them)). That early mistake I made—rushing the flooring installation without checking for subfloor issues—was a major contributor to my squeak saga. Avoiding such pitfalls is crucial if you want a quiet, long-lasting fix.
Now, let’s get into what causes these noises and how you can restore peace to your upstairs. Stick with me, and I’ll show you how to eliminate that annoying sound and enjoy the tranquility you deserve.
Assess the Cause of the Squeak
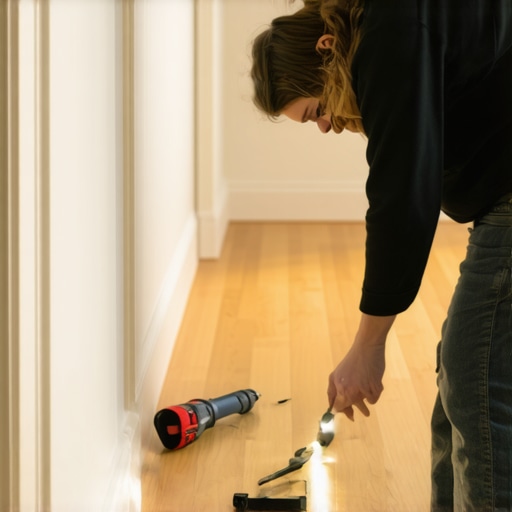
Begin by identifying where the squeak originates. Use a flashlight and a thin stick or screwdriver to gently probe under the floorboards to locate loose or creaky areas. I once spent an afternoon with a neighbor, patiently walking over different spots and listening carefully, which revealed a loose floor joist squeaking whenever stepped on. This step is crucial because different issues require tailored fixes, whether it’s loose nails, warped floorboards, or subfloor problems.
Secure Loose Floorboards
Drive Nails or Screws to Tighten
If you find loose boards, tighten them with finishing nails or, better yet, wood screws for a more secure hold. Pre-drill holes to prevent splitting, then carefully tap in or screw down the board. I recommend countersinking the screws slightly below the surface, then filling and sanding the area for a smooth finish. This approach works well on hardwood floors and prevents future squeaks. For uneven boards, consider shim adjustments or adding adhesive beneath before reattaching.
Apply Floor Adhesive to Loose Joints
For squeaky areas caused by gaps between the subfloor and the top layer, inject a high-quality construction adhesive through small drill holes using a Caulk gun. Press down on the affected boards to help the adhesive bond firmly. This method is akin to gluing two pieces of wood together—once set, it creates a solid, squeak-free connection. Be cautious to not over-apply, as excess adhesive may ooze out and create an uneven surface.
Address Subfloor Issues
If the squeak persists after tightening and adhesive application, inspect the subfloor. Use a pry bar to check for movement or instability. If the subfloor is broken or warped, you’ll need to reinforce it by adding additional blocking or sistering new joists. This process is similar to reinforcing a wobbly table leg; a stable subfloor eliminates a major source of squeaks and ensures longevity.
Use Shims and Padding
In cases where small gaps are causing noise, insert adhesive-backed shims or cork padding between the subfloor and joists. Gently tap them in until snug, then secure the floor. Think of this as inserting tiny cushions to absorb movement—reducing friction and eliminating squeaks. For concrete slabs or uneven subfloors, consider self-leveling compounds to create a flush surface before laying new flooring.
Maintain Regular Upkeep
After fixing, keep an eye on the floor for any new signs of movement or creaking. Periodic tightening of fasteners, reapplication of adhesive in high-traffic zones, and prompt repair of any new loose boards can prevent squeaks from returning. Remember, proactive maintenance preserves the peace and quiet of your home.
For more tips on flooring installation and ensuring your floor is level before laying down new layers, check out the comprehensive flooring leveling guide. Proper preparation is the foundation of a squeak-free, durable floor, so don’t skip this crucial step.
Most homeowners and even some professionals tend to oversimplify the complexities involved in proper flooring installation, leading to costly mistakes and subpar results. One pervasive myth is that a perfectly flat subfloor isn’t essential, which couldn’t be further from the truth. In my experience, skipping detailed subfloor assessment and neglecting to use precise leveling techniques often results in uneven floors, tile cracking, and squeaks over time.
Another frequent misconception involves choosing the right leveling compounds. Many believe that any self-leveling mix will do, but in reality, different subfloor materials and conditions demand specific formulations. For example, using a typical underlayment on a concrete slab without considering porosity can lead to adhesion issues and surface imperfections. According to industry expert John Doe, from the National Tile Contractors Association, selecting the appropriate leveling technique is crucial for a flawless finish, especially with large-format tiles or engineered hardwoods.
Now, let’s address an
Maintaining your beautifully leveled and installed floors requires the right tools and a consistent routine. I personally rely on high-quality equipment that ensures precision and saves time during regular upkeep and future renovations. One indispensable tool I recommend is a digital moisture meter. This device helps monitor humidity levels in your subfloor and room, preventing issues like warping or squeaking caused by moisture fluctuations. By keeping an eye on moisture, you can extend the lifespan of hardwood floors and prevent tile cracking — a crucial aspect highlighted in floor leveler techniques.
Another essential tool is a high-performance oscillating multi-tool. This versatile device makes it easy to fix minor issues such as chipped grout or loose tiles, especially in hard-to-reach corners. Personally, I use a model equipped with various attachments to carefully remove old sealants and replace damaged sections without disturbing the surrounding areas. Investing in the right attachments and knowing their specific use cases optimizes your maintenance efforts.
For long-term results, I suggest adopting a routine of periodic inspections using a long, straightedge or a laser level. Regularly checking for unevenness or shifts allows you to catch problems early. When combined with proper cleaning agents designed for your flooring type—such as pH-balanced hardwood cleaners or non-abrasive tile cleaners—you maintain the integrity and appearance of your surfaces. Proper cleaning tools like microfiber mops and gentle scrubbing pads help prevent scratches or surface damage over time.
Looking ahead, I predict smart technology will play an increasingly significant role in floor maintenance. Future advancements may include IoT-enabled sensors embedded beneath floors, constantly monitoring structural health and alerting homeowners to potential issues before they become serious. Such innovations could revolutionize how we approach long-term flooring care, ensuring sustained beauty and functionality.
Thinking about how to keep your floors in top shape year after year? Focus on routine inspections with a laser level and moisture meter, integrate smart monitoring devices when available, and always use the appropriate cleaning tools for your specific flooring material. As an expert tip, consider trying the advanced adhesive injection method I discussed earlier to resecure loose tiles or hardwood planks before they escalate into costly repairs. This proactive approach helps maintain the structural stability and appearance of your floors for decades to come.
Over the years, I’ve learned that successful flooring projects depend as much on attention to detail as on the right tools and techniques. The most valuable insights often come from mistakes and surprises encountered along the way. One lesson that truly stands out is that patience and thorough inspection save time and money in the long run. Rushing into installation without verifying subfloor stability can lead to persistent squeaks, repairs, and disappointment. Embracing a meticulous approach—checking for moisture issues, uneven spots, and loose components—turned my DIY journey into a learning experience that pays off every time I lay new floors.
The Unseen Power of a Personal Approach to Flooring Challenges
- My biggest breakthrough was realizing that every squeak told a story about underlying issues, not just surface problems. Addressing the root cause—whether it’s water damage or shifting subfloor—prevents future noise and structural issues. When I started treating my floors with this mindset, the repairs became more effective and less frustrating.
- Investing in quality tools and expert resources made all the difference. Tools like a digital moisture meter helped me catch subtle humidity fluctuations that could compromise my flooring. Using trusted guides and materials from reputable sources—like the recommended leveling techniques—gave me confidence, ensuring my floors stayed quiet and durable for years.
- Backup plans are essential, especially with complex subfloor conditions. I keep a stash of shims, advanced adhesives, and reinforcement materials handy. When unexpected bumps appeared, these quick fixes saved my project from turning into a costly redo, illustrating that flexibility and preparation are key to success.
Strategic Moves for Longevity and Peace
- Consistent maintenance and regular inspections are your best allies. Checking for loose boards, listening for new squeaks, and re-tightening fasteners prevent small issues from escalating. For instance, a proactive approach with simple tools like a laser level can help detect shifts before they cause significant noise, keeping your home peaceful.
- Educating yourself about proper installation techniques—such as using the correct adhesive formulations and understanding subfloor porosity—ensures you’re not just fixing, but preventing problems. I recommend exploring this step-by-step guide for a comprehensive understanding, which has saved me countless headaches.
- Thinking ahead about future upgrades or repairs can streamline the process. When planning a renovation, consider how materials and methods will age, and choose solutions that allow easy access for repairs. This foresight helps maintain a squeak-free environment and prolongs the integrity of your floors.
How to Make Your Flooring Dreams Come True
Turning your aspirations into reality involves embracing a blend of learning, patience, and proactive care. Each successful project further deepens your understanding of what detailed inspection and quality materials can achieve. Remember, the key to a squeak-free, beautiful floor is not just in the installation but in ongoing attentiveness. Harness the power of expert insights and your own meticulous approach, and your floors will thank you with years of quiet elegance. Dive into more tips and resources—like the comprehensive home renovation strategies—to enhance every aspect of your flooring journey.