
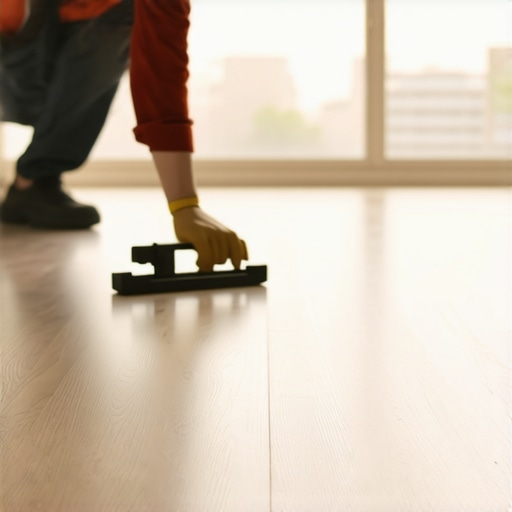
If you’ve ever stepped into a room and felt that uneasy tilt under your feet, you know the frustration of a sloping floor. I remember the moment I realized my hardwood was uneven—standing on one side felt like I might tip over! That lightbulb moment struck when I was hosting friends, and every step felt unstable. It’s more than just an aesthetic concern; an uneven floor can compromise the longevity of your flooring and even pose safety risks. But here’s the thing—adding wall anchors or heavy subfloor reinforcements isn’t the only answer, especially if you’re worried about adding too much weight to an already fragile structure.
Why Leveling Your Floor the Right Way Matters
The reality is, a sloping floor isn’t something you should ignore. Over time, uneven surfaces can lead to cracks, misaligned tiles, creaky hardwood, and even structural issues. The good news? There are effective, lightweight methods to correct this problem, preserving your home’s integrity without turning your living space into a construction zone. And trust me, I’ve learned from early mistakes—like trying to pour excessive self-leveling compound without proper prep, leading to a dusty, uneven mess. So, I know firsthand how crucial it is to follow the right steps from the start.
Is a DIY Fix Worth the Hassle or Just a Waste of Time?
Many initially believe they need heavy equipment or costly professionals to get a level floor. However, with the right tools and techniques, you can achieve a perfectly level surface without overwhelming your space or budget. The key is understanding which methods are lightweight and effective. If you’re skeptical about whether small-scale adjustments will hold or if they’re even possible without adding weight and bulk, you’re not alone. I’ve seen folks shy away because of that fear—and honestly, I was there too. But, I found that attention to detail and proper technique make all the difference. For more insights on common pitfalls, you might want to check out this guide on flooring installation mistakes.
Now, let’s dive into how you can correct a sloping floor efficiently, safely, and effectively—no heavy lifting required.
Start with a thorough assessment
My first real attempt to level my uneven hardwood involved measuring the slope with a long straightedge and a level. I placed the level on different sections, noting variations. Think of it like tuning a guitar string—you need to identify where the tension is uneven before adjusting. This step ensures you address the specific high and low spots accurately, preventing unnecessary work.
Prepare your workspace and materials
Clear the area completely, and protect surrounding surfaces with painter’s tape and plastic sheeting. Gather lightweight self-leveling compounds, a clean bucket, mixing paddle, and a trowel. I once used a 5-gallon bucket and a drill attachment, which made mixing quick and uniform. Remember, quality matters—avoid cheap self-levelers that crack easily, as described in this guide.
Mix the self-leveling compound correctly
The key is the right sand-to-mix ratio; follow the manufacturer’s instructions closely. I used a 1:3 ratio—one part water to three parts powder—and mixed until smooth. To prevent lumps, I added the powder gradually, similar to making pancake batter. Use a drill with a mixing paddle to achieve consistent smoothness and avoid cracks, as improper mixing can cause issues explained in this article.
Apply the compound in manageable sections
Pour the mixture in low spots, starting from the furthest corner, working toward the doorway. I gently poured it over the high spots, allowing gravity to even out the surface. Think of it like filling a bathtub—small amounts at a time prevent overflow and ensure control. Use a spike roller (see this tip) to eliminate bubbles and smooth the surface.
Level and smooth the surface
After pouring, spread the compound with a long trowel, working quickly before it begins to set. My goal was to feather the edges and create a flat, even surface. Moving the trowel at a consistent angle, like a pro, prevents ridges. Keep an eye on the level, rechecking periodically. For larger areas, a laser level can help maintain accuracy, as discussed in this resource.
Let it cure properly
Patience is vital. I waited at least 24 hours, avoiding foot traffic. A quick touch test can verify if the surface is hard enough—press lightly in different spots; it should feel solid. Avoid rushing, as premature loading can cause cracks or unevenness. This step ensures a durable, level surface for your flooring installation.
Final checks and adjustments
Once cured, double-check the levelness with a long level or straightedge. Minor dips can be filled with additional compound, applied carefully, and smoothed out. I found that small touch-ups are easier after the main pour, similar to patching a small dent in drywall. These precise adjustments make all the difference in ensuring a flawless finish, like in this guide.
Even seasoned DIYers often fall prey to misconceptions about flooring and tile installation, leading to costly mistakes. One pervasive myth is that leveling compounds are foolproof for quick fixes. In reality, many overlook the importance of proper subfloor prep; as emphasized in this guide, skipping slab prep can cause leveling compounds to crack or bubble within months. Another trap is believing that a single technique works universally. For instance, while self-levelers are excellent for small imperfections, they can fail in high-traffic areas if not applied correctly—highlighting the importance of tailored strategies, like meticulous mixing ratios detailed in this article.
Keeping It Working: Essential Tools for Longevity
Achieving a flawless floor isn’t just about technique—having the right tools makes all the difference. I’ve found that investing in specific, high-quality equipment pays dividends in the long run, ensuring your work remains durable and looks professional. For instance, a laser level isn’t just a luxury; it’s an indispensable device that guarantees straight, even tiles over large surfaces. Why settle for less when precision is critical? Personally, I rely on models like the Bosch GPL 3 because of its reliability and ease of use, especially when checking for slab high spots before setting tiles. Explore this guide to learn how laser levels can elevate your flooring game.
Similarly, when it comes to floor leveling, I swear by a spike roller. Not just for removing air bubbles in self-leveling compounds, but also for ensuring the material fully contacts the substrate. This small investment saves time and prevents future cracks, as detailed in this resource. Be cautious—missed bubbles can lead to uneven surfaces and awkward tile lippage.
For mixing compounds, I advocate for a solid electric drill with a mixer attachment. Manual mixing can be inconsistent, leading to lumps and weak spots. I prefer models like the DeWalt DWE Dual Paddle Mixer because of its strength and smooth operation. Proper mixing ensures proper curing and adhesion, a critical step outlined in this guide. As a tip, invest in a paddle with variable speed control to tailor mixing intensity to the compound’s properties.
How do I maintain floors over time?
Long-term maintenance begins with understanding your materials. For hardwood floors, regular cleaning with a microfiber mop and periodic application of a quality polish like this technique keeps the surface shiny and resistant to scratches. For tiles, sealing grout annually prevents staining, while inspecting for cracks early avoids costly repairs. Remember, preventative care extends the lifespan of your floors significantly. For more strategic tips, visit this resource.
Why invest in quality tools for installation?
Using the right tools isn’t just about ease; it’s about ensuring consistent, high-quality results. For example, employing a proper trowel size minimizes lippage and ensures even thinset application, as discussed in this article. Moreover, a good float for grout application prevents foggy, uneven finishes. I always recommend high-quality rubber floats because they’re easier to control and produce a cleaner look. Remember, the investment in professional-grade tools creates a more forgiving installation process with fewer mistakes—saving you time and money in the future.
Looking ahead, the trend toward smart tools—including digital moisture meters and automated leveling systems—will revolutionize DIY flooring. For now, mastering fundamental equipment like laser levels and spike rollers is your best bet for flawless results. Ready to upgrade your toolkit? Try integrating a laser level into your next project and see how it transforms your workflow!
The Hardest Lesson I Learned About Tile, Floor Leveling, Hardwood Floors, and Flooring Installation
One of the most eye-opening lessons in my DIY journey was realizing that proper subfloor preparation is the bedrock of a successful installation. Skipping this step, even with the best leveling compounds, often led to cracks, uneven tiles, and frustration. Patience and meticulousness upfront save countless headaches later, underscoring that quality results demand quality prep.
Three Myths About Floor Leveling That Held Me Back
- Self-Leveler is a Silver Bullet: I used to think that pouring self-leveling compound alone would fix all imperfections. Turns out, it’s just one piece of the puzzle—without proper mixing and substrate prep, it’s doomed to fail.
- All Tools Are Created Equal: Believing that any trowel or roller will do led to uneven surfaces and wasted effort. Investing in the right, high-quality tools made a profound difference in the final look and durability.
- Quick Fixes Save Time: Cutting corners with rushed applications seemed tempting initially, but ultimately caused more work and repair. Slow, deliberate work ensured a lasting finish and peace of mind.
What Experts Won’t Tell You About Flooring Success
From my experience, the secret often lies in the small, overlooked details—like checking slab moisture with a blue tape test or ensuring proper primer adhesion. These nuanced steps, though easy to dismiss, determine the longevity of your flooring project.
Curated Resources to Elevate Your Skills
- Precision Tools for Perfect Results: A laser level, such as the Bosch GPL 3, helps maintain accuracy over large surfaces—trust me, it’s a game-changer for tile straightness and evenness.
- Expert Guides that Clarify Complex Steps: The comprehensive Ultimate Guide to Floor Leveling provides step-by-step insights that prevent common mistakes and ensure a professional-looking finish.
- Quality Tools for Longevity: A good spike roller, like those discussed in this resource, ensures no air bubbles ruin your surface—saving you time and rework in the long run.
- Community and Support: Visiting forums and online communities, such as those linked in home improvement tips, can provide real-world insights and encouragement as you progress.
Seize the Moment: Your Floor Deserves It
Embarking on a tile or hardwood flooring project is more than just a task—it’s a chance to transform your space and boost your confidence. With the right knowledge, tools, and patience, you can achieve results that rival professionals. Remember, every step you take toward mastering these techniques not only improves your home but also builds skills that last a lifetime. So, are you ready to bring your dream floor to life? Start today, and don’t hesitate to share your journey below—your experience might just inspire someone else to take that first step.