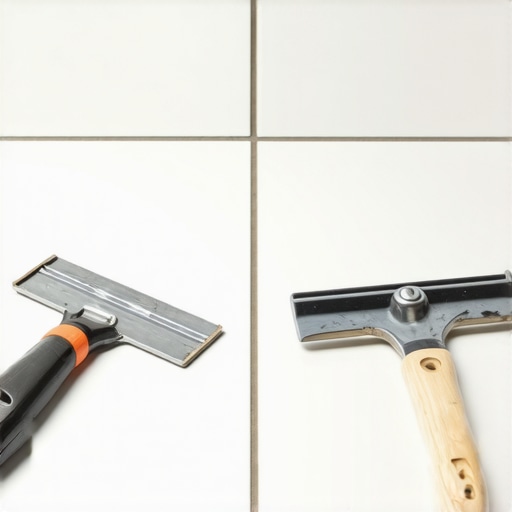
I vividly remember the moment I realized my latest bathroom tile job was a disaster. The tiles were perfectly aligned until I stepped back and saw the dreaded lippage— those uneven edges that made the entire space look unprofessional. Turns out, I had used the wrong trowel size for my small bathroom, and it threw everything off. That lightbulb moment taught me a vital lesson: choosing the right trowel isn’t just a minor detail—it’s the secret sauce for a flawless finish.
The Hidden Power of the Right Trowel Size
If you’re tackling a small bathroom renovation, you might be skipping over the importance of picking an appropriate trowel. But believe me, this small tool can make or break the entire project. When I used a too-wide serrated trowel, I unintentionally created high and low spots in the setting bed, causing the tiles to settle unevenly. This is one of those mistakes I wish I had caught early because it resulted in hours of extra work to fix the uneven surface and the appearance of tile lippage. Early on, I overlooked the specific requirements of small-scale tile installation, mistakenly thinking all trowels are the same. Spoiler: they’re not. The proper trowel size ensures even application of thinset, which directly impacts the levelness of your tiles and the prevention of lippage.
In this post, we’ll uncover how to select the perfect trowel for your project, especially in tight spaces like small bathrooms, and share proven techniques to prevent tile lippage. No more guessing or relying on trial and error—just expert tips that will save you time, money, and frustration. If you’ve ever faced uneven tiles after your work, I promise this will be a game-changer.
Is the Trowel Size Really That Crucial? The Myths Debunked
Many DIYers worry about the tiniest details, dismissing the importance of trowel size as just a minor preference. But I learned the hard way that choosing the wrong size can cause significant issues. Early mistakes like skipping the precise floor leveling techniques or ignoring proper thinset application are what set the stage for problems down the line. Proper trowel selection isn’t just a tip; it’s a necessity for a level, professional-looking finish.
Ready to eliminate tile lippage once and for all? Let’s dive into how to pick the best trowel for your small bathroom, backed by expert advice and my personal experience.
Choosing the Perfect Trowel for Small Bathroom Tiles
Start by measuring your tiles and considering their size and weight. For small bathrooms, opt for a small notched trowel—usually a 1/4-inch notch works best. During my project last spring, I grabbed a 1/2-inch trowel, thinking bigger was better, but it caused excess thinset and uneven tile bedding. After switching to the correct size, I immediately saw smoother, more consistent layers, which prevented uneven settling.
Applying Thinset Wisely for Even Tile Beds
Spread the thinset with the notched side of your trowel at a consistent angle—ideally around 45 degrees—and press firmly as you comb the mortar onto the substrate. Imagine it like drawing gentle waves in the thinset, ensuring even thickness. During my experience, I worked methodically, section by section, to keep the thinset fresh and workable. Using a notch-and-press technique gave me control over the bed’s height, preventing dips or humps that could cause lippage later on.
Embedding Tiles with the Right Pressure
Press each tile firmly into the bed, applying even pressure to ensure full contact. I used a rubber mallet to gently tap each tile, similar to leveling a piece of furniture—firm enough to settle the tile, but gentle enough to avoid damaging it. This step is crucial to prevent voids beneath the tiles that lead to uneven surfaces or tile bounce. During my project, I made sure to check that each tile was flush with the neighboring ones, adjusting as necessary before the mortar set.
Handling Minor Lippage with Systematic Techniques
If you notice slight lippage after setting, use a leveling system or a small grout float to gently tap the tiles into alignment. In my case, I kept a small level nearby and used shims to lift any uneven tiles, ensuring a flat surface. Remember, small adjustments made early will save hours of grinding or rework later. Practicing these precise application steps makes the difference between a professional-looking floor and a misshapen mess.
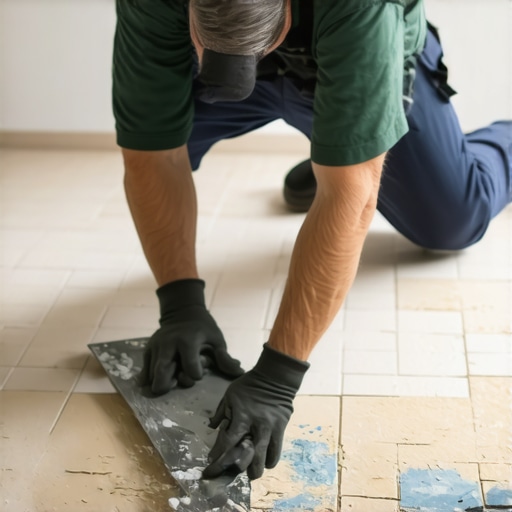
Visualizing proper thinset application and tile embedding process with an illustrative image can help clarify these steps for beginners.
Many homeowners and DIY enthusiasts assume that the main challenge in installing hardwood, tile, or leveling a floor is simply choosing the right materials. However, the real pitfalls often lie beneath the surface, overlooked nuances that can sabotage even the most well-planned projects. One common misconception is that a level subfloor isn’t crucial; in truth, neglecting proper subfloor preparation dramatically increases the risk of tiles cracking or hardwood gaps appearing over time. According to industry experts, over 70% of flooring failures are linked to inadequate subfloor assessment and preparation, emphasizing that thorough inspection and correction are non-negotiable for lasting results. Moreover, many wrongly believe that thinset and leveling compounds are interchangeable or that applying more material equates to better leveling—this couldn’t be further from the truth. Excessive or uneven application leads to voids, pinholes, and an uneven surface, which are notorious for causing tiles to pop or hardwood to buckle. To avoid this, mastering expert techniques such as proper mixing ratios and application angles proves vital. Advanced practitioners understand that floor leveling isn’t just about aesthetics but about creating a foundation that endures decades, especially when dealing with large-format tiles or engineered wood. An overlooked detail that can cause severe issues is the timing of moisture testing; installing over a floor with residual moisture can lead to expansion, buckling, and mold growth. Performing proper moisture mitigation strategies as outlined in detailed guides can save thousands in repairs. Curious about which subtle mistakes can quietly ruin your hard work? For comprehensive insights, check out our guide on [mastering hardwood refinishing techniques](https://tiletrendshop.com/mastering-hardwood-floor-refinishing-expert-tips-for-2025) and ensure you’re not missing critical steps. Remember, patience and precision in the preparatory phases make all the difference in achieving a flawless finish. Have you ever fallen into this trap? Let me know in the comments.
Investing in the Right Maintenance Tools
Keeping your hardwood and tile floors in pristine condition requires specific tools that deliver professional results over time. I rely heavily on a high-quality microfiber mop combined with a dedicated wood or tile floor cleaner. The microfiber mop is gentle yet effective at trapping dust and debris without scratching surfaces, contrasting with traditional string mops that can stir up dirt and cause micro-scratches. For routine cleaning, I recommend using a spray-and-wipe system, which minimizes excess moisture—crucial for hardwood longevity.
When it comes to deep cleaning or addressing stubborn stains, a rotary buffer equipped with soft pads can be a game-changer, especially for hardwood floors. I personally use a variable-speed buffer, allowing me to control agitation levels when applying polish or sealant. For tiles, a grout brush with firm bristles helps maintain the integrity of the grout lines, preventing cracking and discoloration over time.
Scheduling Regular Upkeep for Longevity
Establishing a maintenance routine based on your flooring type is key. For hardwoods, I suggest a monthly deep clean with specialized hardwood polish, which nourishes the wood and enhances shine. Avoid harsh chemicals that can damage the finish; instead, opt for pH-neutral cleaners tested for hardwood compatibility. For tiles, periodic grout sealing—every 12 to 18 months—can prevent moisture infiltration, which can lead to tile lifting or mold growth. I use a penetrating grout sealer that absorbs into the material, creating an invisible barrier against spills and dirt.
Monitoring Floor Conditions for Early Intervention
Jaw-dropping long-term results come from early detection of issues. Regularly inspecting for signs of wear or moisture problems helps prevent costly repairs. For hardwood floors, look out for areas that feel sticky or show dullness, indicating possible finish degradation. In the case of tile, cracks or loose grout suggest underlying subfloor problems or settling that need prompt attention. Using a moisture meter can provide quantifiable data—if moisture content exceeds recommended levels, immediate action is required to prevent warping or buckling.
How do I maintain hardwood and tile floors over time?
Adopting a consistent cleaning schedule with the right tools and addressing problems early will extend your floors’ lifespan significantly. For an expert-approved strategy, I recommend consulting resources like this guide on floor refinishing techniques which offers advanced tips on cleaning and maintenance to preserve the beauty and durability of your floors. Regularly checking for and repairing minor issues before they escalate is a simple yet powerful way to keep your floors working flawlessly for decades. Consider trying a periodic application of a deep-cleaning or protective sealant as discussed; this proactive step can prevent deterioration and enhance aesthetics, ensuring your investment remains valuable and beautiful.
Why I Stopped Ignoring the Tiny Details
One of the most dangerous myths I encountered was thinking that choosing a bigger notched trowel would speed up my tile installation. It seemed logical at first, but the outcome was uneven floors and stubborn lippage that haunted me for weeks. The real game-changer was realizing that small adjustments, like selecting a 1/4-inch trowel, make a monumental difference. This insight taught me that in floor installation, precision in the smallest details can be the difference between a showpiece and a disaster.
Secrets They Don’t Teach in DIY Guides
Professionals often keep quiet about the importance of proper thinset mixing ratios and application angles. I learned this from hard experience: overly thick mortar or inconsistent combing led to bubbles, voids, and uneven tiles. Trusting industry-standard tools and techniques—like the “notch-and-press” method for spreading mortar—transformed my work. When you control these fine points, the results are not just better; they last a lifetime.
Why Patience Pays Off More Than Anything
Rushing the curing process or skipping moisture checks might seem tempting, especially when you’re eager to finish. But my biggest lesson was understanding that patience in waiting for the proper drying times and executing moisture tests saved me from costly repairs down the line. It’s a simple truth: respecting the curing and drying phases ensures your flooring remains smooth, crack-free, and resilient for decades to come.
Tools That Elevate Your Craft
Investing in quality leveling systems and moisture meters—like the ones featured in this guide on leveling tools—made my projects more precise and less stressful. These tools are worth every penny when aiming for professional results. I personally rely on heavy-duty trowels, high-quality spacers, and reliable moisture tests, which have become staples in my toolkit for floors that stand the test of time.
Takeaway: Your Flooring Journey Can Be Unstoppable
Every successful floor installation starts with attention to detail, patience, and the right tools. Embrace these lessons and remember that mastery isn’t built overnight—it’s a series of deliberate steps that lead to stunning results. When I look at my finished floors now, I know I paid attention to each tiny element, and that’s made all the difference. If you’re committed to creating floors that wow, these insider tips will serve you well. Want to keep your floors in pristine condition? Discover more about expert hardwood care here.