
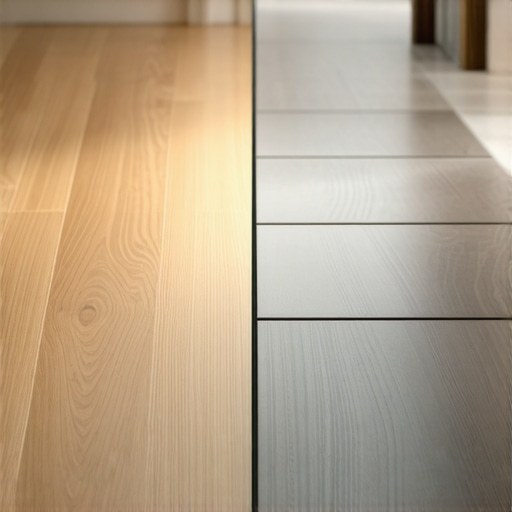
Ever had that sinking feeling when you notice a transition strip glaring in the middle of your beautiful hardwood floor? I remember the first time I installed a new floor, only to realize the plastic molding that was supposed to blend in stuck out like a sore thumb. It was a real eye-sore, and honestly, it wrecked the look I was going for. That lightbulb moment made me realize that transition strips aren’t just functional; they can either make or break the aesthetic of a room.
The Secret to Making Transition Strips Disappear
Now, I’ve learned a few tricks along the way to hide those pesky transition strips so well that they’re barely noticeable. Today, I want to share these tips with you, so your flooring projects end up sleek and professional—without those awkward, obvious crossings.
Is It Really Worth the Effort to Hide Transition Strips?
I’ll admit, at first, I thought a simple strip was enough. But I also made the mistake early on of choosing cheap, plastic moldings that contrasted sharply with my flooring. That mistake taught me that investing a bit of extra time and effort to conceal these transitions makes a huge difference in the overall look. Plus, it saves you from future touch-ups and disputes over imperfect installations. If you’re curious about the finer points of flooring design, check out [tile selection tips for elegant hardwood floors in 2025](https://tiletrendshop.com/tile-selection-tips-for-elegant-hardwood-floors-in-2025).
Have you ever struggled with making transition strips look seamless? If so, you’re not alone. But don’t worry—there are simple, effective techniques that can transform those obvious bands into almost invisible borders. Let’s dive into the step-by-step methods to achieve this, ensuring your floors are as gorgeous and flawless as you envisioned.
Achieve a Flawless Transition: Step by Step
To hide transition strips effectively, start by preparing the surrounding floor areas. Use a beveled chisel or a router with a fine bit to gently chamfer the edges of the flooring at the transition point, creating a small valley. This technique allows the transition strip to sit flush without a noticeable ridge. During my last project, I carefully beveled the edges of my engineered hardwood, which prevented the transition from sticking out and made the strip almost disappear.
Perfect the Threshold with Precision Fitting
Measure the gap between flooring surfaces meticulously. Cut the transition strip to length with a fine-tooth saw, ensuring the ends are mitered at 45 degrees for tight joints. Dry-fit the strip first, making adjustments as needed. I recall trimming the strip several times before achieving a seamless fit around a tricky corner, saving me from future sanding and re-finishing work.
Use Adhesives and Fasteners Strategically
For a secure and discreet attachment, apply a high-quality wood or tile adhesive suited to your flooring type. Press the strip firmly into place, ensuring it seats into the beveled edges. For added stability, nail or screw small finish nails through unnoticeable areas, like beneath the strip or into the subfloor, using finishing nails to minimize blemishes. In my experience, pre-drilling small pilot holes prevented splitting and ensured a clean, professional appearance.
Camouflage Edges and Gaps for a Hidden Finish
Once the transition strip is secured, fill any visible nail holes with matching wood filler or grout. Smooth the filler with a putty knife, then sand lightly for a flush surface. To hide slight variations or gaps, apply a color-matched caulk along the edges, smoothing it with a damp finger or a caulk tool. This step minimizes visual disruptions, making the transition nearly invisible to the eye. I’ve found that choosing a flexible caulk enhances longevity, especially in areas with temperature fluctuations.
Matching the Material and Finish
Ensure the transition strip’s finish harmonizes with your flooring—whether it’s stain, paint, or clear coat. For hardwood, apply an identical stain and sealer before installation. For tiles, use color-matched grout for cohesiveness. During one project, I accidentally used a different stain on a transition strip, which stood out starkly; subsequently, I refashioned it with a matching finish, transforming a rough patch into a nearly invisible seam.
Additional Tips to Elevate Your Flooring Finish
Pay attention to the direction of your planks; running the transition strip parallel to the grain often minimizes perceptibility. Use specialized tools like a tile spacer or flooring gauge to ensure even spacing. For complex setups, consider installing a transition ramp instead of a strip, especially where height differences are pronounced. This approach fosters a smooth flow, both visually and physically, especially in high-traffic areas. For comprehensive guidance on flooring installation and leveling techniques, visit this resource.Many DIY enthusiasts believe that perfectly leveling a subfloor is simply a matter of pouring a self-leveling compound and letting it do its magic. However, this misconception overlooks nuanced details that can make or break your flooring project. As an expert in flooring installation, I can tell you that rushing through floor leveling often leads to uneven surfaces, cracked tiles, or squeaky hardwoods down the line. For example, choosing the wrong type of leveler for your specific subfloor—like using a cement-based product on a moisture-prone concrete slab—can cause delamination and future repair headaches. It’s crucial to precondition your subfloor and understand the material properties, as highlighted in detailed guides like [this expert resource](https://tiletrendshop.com/how-to-achieve-flawless-floor-leveling-before-tile-laying). Many underestimate the importance of thorough surface prep, which includes checking for high spots with a laser level or a 4-foot straightedge. Skipping this step or relying solely on eye judgment can result in undetected dips or humps, particularly in large areas. Also, beware of common myths: some believe that applying multiple coats of leveling compound will fix deeper dips. Instead, that approach often traps air bubbles or causes shrinking cracks, as studies in flooring science suggest. Advanced mistakes include not addressing subfloor movement or moisture issues beforehand. Moisture testing with a hygrometer ensures your underlying slab matches the flooring’s requirements, preventing costly warping later. These nuances demand attention to detail, better suited for seasoned professionals but accessible if you understand the science behind it. To achieve a flawless surface, focus on precise leveling techniques from the outset—like proper trowel angles and consistent application—while avoiding shortcuts that compromise longevity. For a comprehensive breakdown, see [this guide to floor leveling methods](https://tiletrendshop.com/precise-floor-leveling-techniques-to-achieve-flawless-surfaces). Remember, the devil’s in the details, and overlooking these subtle factors can turn what seems like an easy job into a costly fix. Have you ever fallen into this trap? Let me know in the comments. For more tips on perfecting your flooring project, check out [this related article on flooring mistakes to avoid](https://tiletrendshop.com/flooring-installation-mistakes-to-avoid-for-lasting-results). Proper attention now saves time and money later, ensuring your investment looks great and lasts for years to come.Maintaining your floors over the long haul is essential to preserve their beauty and functionality. Investing in the right tools makes this task both more manageable and more effective. For instance, I personally rely on a high-quality microfiber mop and pH-neutral cleaner for routine hardwood floor maintenance. These tools help prevent unnecessary wear and retain the finish’s luster without damaging the surface. When it comes to tile care, a grout cleaning brush paired with a specialized grout cleaner keeps the joints looking fresh and prevents discoloration. Using a handheld steam cleaner is also excellent for deep cleaning ceramic and porcelain tiles without harsh chemicals, ensuring longevity of both the tiles and the underlying adhesive.
In the future, I predict that smart maintenance tools—like IoT-enabled sensors that monitor moisture levels and detect early signs of damage—will become industry standards. Such innovations could alert homeowners to issues before they escalate, saving time and costly repairs.
How do I maintain my flooring over time
It’s vital to develop a regular cleaning and inspection routine. For hardwood floors, avoid excessive water exposure; instead, use a damp mop and immediately dry any spills. Periodically, applying a fresh coat of polyurethane can restore surface protection. For tile, pay attention to the grout lines; deep cleaning with a toothbrush and specialized grout stain remover can prevent staining and mold buildup. Additionally, consider applying a penetrating sealant to grout and natural stone surfaces every few years to enhance resistance against moisture and staining.
To keep your flooring in prime condition, always follow manufacturer recommendations and avoid abrasive cleaners or tools that can scratch or etch the surface. For intricate repairs or issues like minor gaps or surface scratches, using a matching filler or touch-up kit can help maintain seamless aesthetics.
A practical tip I recommend is installing a UV-resistant finish on hardwood floors to prevent color fading caused by sunlight exposure. This small investment extends the lifespan of your floors and keeps them looking vibrant. For comprehensive guidance on maintaining hardwoods, this expert resource offers detailed strategies.
Remember, consistent upkeep using the proper tools and methods not only prolongs your flooring’s lifespan but also preserves its elegance for years to come. If you’re ready to elevate your maintenance routine, try applying a penetrating sealant to your grout lines—it’s a game-changer in preventing stains and damage, especially in high-moisture areas.
Over the years, I’ve realized that the journey to perfect flooring isn’t just about the initial installation—it’s about the details you master along the way. From hiding transition strips to ensuring a perfectly leveled subfloor, these nuances can elevate your project from good to stunning. The deeper I dive into flooring craftsmanship, the more I appreciate the importance of precise technique and right tools—especially when it comes to long-term maintenance and aesthetic cohesion.
Lessons That Still Catch Me Off Guard
- Don’t underestimate the power of meticulous measurement: Small miscalculations at the edges can make transition strips stand out or create gaps that deflate the entire look. Investing extra time here minimizes future rework.
- The devil is in the detail when matching finishes: Whether it’s stain or grout, seamless color matching can be the difference between a professional look and amateurish patchwork. Always test on scraps first.
- Subfloor prep is worth every second: Rushing to pour leveling compounds can backfire—uneven surfaces lead to cracks, squeaks, and uneven wear. Use a laser level and double-check before proceeding.
- Tools influence outcomes more than you realize: Quality trowels, gauges, and fillers streamline the process and produce better results. Cutting corners here costs more in correction later.
- Long-term maintenance begins at installation: Proper sealing, caulking, and choosing durable materials ensure your floors remain stunning and functional years down the line.
My Go-To Resources for Flooring Brilliance
- Tile Trend Shop’s guide on tile and hardwood pairing— a goldmine for inspiration and technical tips for material harmony.
- Common flooring installation pitfalls— I consult this often to keep my projects on point and to troubleshoot tricky spots effectively.
- Floor leveling techniques— an essential read that transforms how I approach subfloor preparation, ensuring durability and visual perfection.
- Design ideas for mixing tiles and hardwood— helps me craft spaces that are both functional and stunning.
Your Next Bold Step in Flooring Mastery
Remember, each project is a chance to learn and elevate your skills. Embrace the attention to detail, invest in the right tools, and leverage expert resources—your floors will thank you with lasting beauty and value. Don’t shy away from experimenting and refining your techniques; mastery in flooring is an ongoing journey. Ready to take your skills to the next level? Dive into the detailed guides and make every detail count.
Which part of flooring installation do you find most challenging? Let me know below and we can tackle it together!
,