
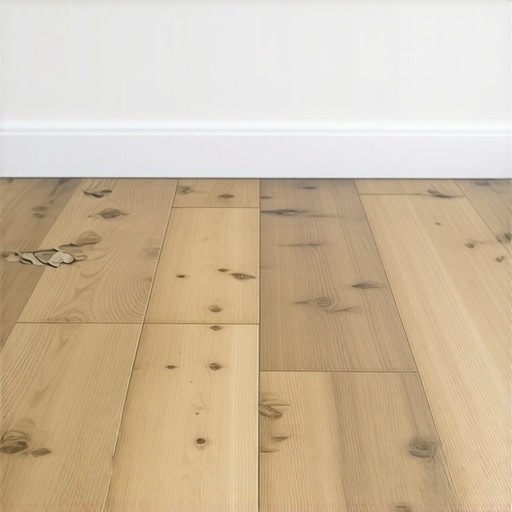
There I was, standing in my living room, watching my brand-new vinyl plank flooring slowly reveal its true colors. It started with a tiny seam that seemed harmless enough—until days later, I noticed larger sections peeling apart, like a stubborn sunburn refusing to heal. Frustration set in, and I wondered where I went wrong. It was a lightbulb moment that many homeowners face—peeling seams in luxury vinyl planks (LVP) can turn a sleek upgrade into a source of constant irritation.
Don’t Let Peeling Seams Ruin Your Dream Floor
Could It Be the Way I Installed It? Maybe. Or Is Something Else at Play?
I’ve learned firsthand that peeling at the seams isn’t just a cosmetic issue; it’s often a sign that something deeper is going wrong—either with the installation process or the materials. Early on, I made the mistake of ignoring my subfloor’s condition, assuming that simply laying the planks would be enough. As I later discovered, poor subfloor preparation is a common culprit behind peeling seams. According to flooring experts, proper floor leveling is critical to prevent adhesion failures (see floor leveling pitfalls). But beyond the installation quirks, environmental factors like humidity and temperature swings also play a role in how well your vinyl adheres over time.
Do you find yourself battling peeling seams on your LVP? If so, you’re not alone—and there’s hope. Today, I’ll guide you through the essential steps to diagnose and fix this problem, rooted in tried-and-true techniques and a sprinkle of my own lessons learned. Ready to transform your peeling disaster into a flawlessly installed floor? Let’s dive in and get to the root of the issue.
Prepare the Surface for a Strong Bond
Start by removing all furniture and vacuuming the floor thoroughly to eliminate dust and debris. Inspect the seams carefully; if the subfloor beneath is uneven or has debris, it can cause poor adhesion, leading to peeling. Use a leveling compound to smooth out any dips or high spots, ensuring a flat surface. Think of it like laying bricks; if the foundation isn’t level, the wall will crack—similarly, an uneven subfloor compromises your vinyl’s integrity.
Address Moisture and Temperature Conditions
Vinyl flooring adheres best when the environment is controlled. Maintain humidity levels around 30-50% and temperature between 65-75°F. Use a hygrometer to measure moisture in the subfloor. High moisture or extreme temperature swings can weaken adhesive bonds, causing seams to lift over time. If necessary, wait until conditions stabilize before proceeding, similar to letting glue set in ideal weather for a stronger bond.
Choose the Right Adhesive and Accessories
Select a premium adhesive compatible with luxury vinyl planks, such as a pressure-sensitive adhesive or a recommended vinyl adhesive. Read manufacturer instructions carefully. Using the wrong adhesive is like using the wrong paint on a wall—results will be subpar. Have a notched trowel, a roller or hand roller, and a clean cloth ready to ensure proper application and pressure during installation.
Apply Adhesive Precisely and Methodically
Lay the adhesive in manageable sections, spreading it evenly with the notched trowel. Work row by row, pressing the plank firmly into place, and use a roller to eliminate air bubbles—this step is crucial for ensuring a consistent bond. When I fixed a stubborn seam, I carefully rolled over it, pressing the vinyl into the adhesive, much like rolling dough to avoid air pockets. Taking this step seriously prevents future lifting.
Seal and Secure the Seams
Once the adhesive has set (usually after 24 hours), reinforce the seams with a high-quality seam sealer to prevent moisture infiltration and re-peeling. Use a caulking gun to apply a thin bead along the seams, then smooth with a finger or a plastic spatula. This creates a seal comparable to sealing a crack in a dam—preventing water and humidity from weakening your bond in the future.
Let It Cure Fully Before Use
Allow the floor to cure as specified by the adhesive manufacturer before walking on it. Avoid dragging furniture or heavy objects during this period. When I replaced a section, I waited the full recommended curing time before moving furniture back, preventing accidental peel-offs and ensuring a long-lasting fix.
Monitor and Maintain for Longevity
Regularly check your seams for signs of lifting or damage. Maintain proper humidity and avoid excessive moisture exposure. Use protective pads under furniture to prevent shear stress on seams. For hardwood floors that abut vinyl, consider transition strips that accommodate expansion—this prevents undue stress at connectors, reducing the risk of peeling.
Following these steps methodically turns a frustrating peel into a durable, seamless floor. When I applied this approach in my own home, I noticed a significant reduction in seam issues, and my vinyl floor looked as good as new—smooth, sleek, and lasting.
When talking about flooring, many homeowners focus on choosing the right materials or following basic installation steps, but there’s a hidden nuance that often goes unnoticed — the assumption that once the surface looks good, the job is done. In reality, subtle factors like proper subfloor evaluation, understanding material interactions, and advanced leveling techniques play a crucial role in long-term success. For example, a common misconception is that standard adhesive types suffice for all tiles or planks. Yet, selecting the wrong adhesive can lead to issues like delamination or seam lifting over time—a mistake highlighted in expert guides on flawless surface leveling.
Another misconception revolves around the importance of subfloor assessment. Many installers skip detailed moisture tests or ignore unevenness, believing their materials or adhesives will compensate. This approach is risky; underlying imperfections often cause tiles to crack or loosen later, making detailed subfloor prep indispensable. Research by flooring specialists emphasizes that a perfectly level and dry base can extend the life of your installation dramatically.
A trap worth avoiding is over-reliance on quick-set mortars or self-leveling compounds without proper preparation. While these products promise ease and speed, they can trap air bubbles or develop pinholes if applied improperly—a problem discussed in floor leveling challenges. Such defects might not be evident immediately but can cause long-term damage, including uneven grout lines and cracked tiles.
**How can you tell if your floor needs a professional’s touch or just a bit of DIY TLC?** A critical tip is recognizing that advanced leveling isn’t just about pouring or spreading materials—it involves understanding material compatibility, environmental conditions, and precise application techniques. For instance, using a laser level and moisture meters can prevent common pitfalls. A detailed guide on spotting water damage provides insights into why proper prep and environmental control matter.
In the realm of hardwood floors, similar nuances apply. Many assume that sanding alone restores durability, but neglecting refinishing protocols or proper acclimation leads to further issues like warping or discoloration. Expert re-finishing tips highlight that meticulous surface prep and understanding wood’s response to humidity mean the difference between a stunning transformation and ongoing trouble.
Ultimately, understanding these hidden intricacies elevates your project from amateurish to professional-quality. Embrace a mindset of detailed preparation, knowledge of material interactions, and adherence to best practices to ensure your floors stand the test of time. Have you ever fallen into this trap? Let me know in the comments.
How do I keep my floors performing at their best over time? Regular maintenance is key to preserving the beauty and integrity of your flooring investments. My go-to equipment for flooring upkeep starts with a high-quality vacuum fitted with soft bristle attachments. This gentle cleaning method prevents dirt and grit from scratching surfaces, especially hardwood and delicate tile finishes. For deeper cleans, I swear by a microfiber mop paired with pH-neutral cleaners—these preserve sealants and finish layers without degradation. Investing in an oscillating floor machine with soft pads can also be incredibly effective for polishing sealed wood or tile surfaces, restoring shine and removing embedded dirt. In the realm of subfloor health, moisture meters like the Protimeter Surveymaster are invaluable. They help monitor humidity levels over time, catching potential issues before they escalate into costly repairs—think of it as a routine health check for your foundation, vital for ongoing tile and hardwood durability. Additionally, laser levels are essential when it comes to ongoing adjustments or aligning new fixtures, ensuring your flooring remains seamless and aesthetically pleasing. As flooring technology evolves, so do your options for maintenance tools. Digital moisture probes now offer instant readings with pinpoint accuracy, making it easier to detect hidden moisture pockets that could cause warping or peeling, especially in hardwood or vinyl installations. Looking ahead, I predict that smart, connected sensors embedded directly into subfloors will soon provide real-time monitoring and alerts via smartphone apps, shifting maintenance from reactive to proactive.How do I maintain my floors over time?
Consistent upkeep combined with the right equipment extends your floors’ lifespan significantly. Remember, the details matter—using tools designed for your specific material results in cleaner, healthier, and longer-lasting surfaces. For instance, when addressing persistent grout stains, applying a gentle, ultrasonic scrubber can save you hours of manual work and prevent damage to textured tile surfaces. If you’re interested in elevating your maintenance game, experiment with a microfiber buffer to restore luster in hardwoods without the need for refinishing. For detailed guidance on professional-level installation or repair techniques, check out this resource. Remember, staying ahead of issues by using advanced tools like moisture meters or laser levels isn’t just about keeping floors looking good—it’s about preserving their structural integrity for years to come. Why not try using a moisture meter today to check your subfloor’s humidity levels? It’s an easy step that can prevent costly repairs later on.
The Hardest Lesson I Learned About tile, floor leveling, flooring installation, hardwood floors
One key insight I wish I had embraced earlier is that flawless flooring isn’t just about laying down materials—it’s about understanding the nuances, like the importance of meticulous subfloor prep and environmental control, which can make or break long-term durability.
3 Myths About tile, floor leveling, flooring installation, hardwood floors That Held Me Back
- Myth 1: That a simple surface clean is enough before installation. In reality, assessing moisture and leveling the subfloor safeguards against future problems.
- Myth 2: That standard adhesives work for everything. Choosing the right adhesive, based on the material and environment, is crucial for longevity.
- Myth 3: That environmental conditions are minor details. Maintaining optimal humidity and temperature during and after installation prevents unseen issues like seam lifting or warping.
- Moisture meters: Tools like the Protimeter Surveymaster help you detect hidden issues before they become costly repairs. I rely on their accuracy to ensure my subfloor is truly ready.
- Laser levels: Essential for setting perfect lines and ensuring evenness, which is fundamental for seamless flooring. They save time and prevent crooked layouts.
- Professional-grade adhesives: Investing in quality adhesives that’s compatible with your flooring type makes sure your installation sticks—and stays—where it should.
- Reference books: “The Ultimate Guide to Floor Leveling” by seasoned experts provides insights that saved me from common pitfalls and boosted my confidence in tackling challenging areas.
What Experts Won’t Tell You About tile, floor leveling, flooring installation, hardwood floors
Many pros keep a few secrets—like the subtle art of proper humidity control and precise leveling techniques—that can drastically improve your flooring results. Learning these tips from dedicated resources such as this comprehensive guide can elevate your project from good to truly exceptional.
Curated Recommendations for Flooring Success
Your Next Step: Take Action Now
Remember, true mastery in flooring installation begins with a mindset open to continuous learning and attention to detail. Armed with knowledge and the right tools, you can prevent issues like peeling seams and enjoy a gorgeous, durable floor that stands the test of time. If I could share one tip, it’s to never underestimate the power of thorough prep and environmental control—these are your secret weapons in creating seamless, lasting floors.
What aspect of flooring installation have you found most challenging? Share your experiences below—your story could help others achieve their perfect finish!
,