

I remember the moment vividly—walking into my kitchen after rearranging furniture, only to notice a tiny but stubborn chip on one of my favorite ceramic tiles. It was like a small wound on a beloved family member. At first, I thought about replacing the entire tile, but the cost and hassle quickly made me feel overwhelmed. Have you ever faced that frustrating dilemma? That sense of despair when a simple chip threatens to ruin your entire floor?
Why a Tiny Chip Can Feel Like a Big Disaster
Poorly handled, a small chip can lead to cracks, water intrusion, and even more damage over time. But here’s the truth—most chips can be fixed effectively without the need for a costly replacement. Repairing a chipped tile is not just about aesthetics; it’s about preserving the integrity of your flooring and saving yourself a pretty penny. Trust me, I’ve learned this from experience, and I want to share some solid, real-world tips so you won’t have to face the same headache.
Is DIY Repair Really Worth the Effort?
Early on, I made the mistake of thinking I could handle it with household glue and a quick patch. Spoiler alert: it looked terrible, and the repair didn’t last. But I also discovered that with the right techniques and materials, you can achieve a seamless fix that blends right into your tile. Handling repairs yourself can be satisfying and cost-effective—if you know what you’re doing. Want to learn how? Stay tuned, because I’ll walk you through the steps to fix that chip without replacing the tile. For more detailed insights on tile repairs, check out this comprehensive guide.
Before diving into the how-to, let’s address the common fears you might have—like making things worse or ending up with a noticeable patch. Trust me, I’ve been there, and with a little patience and the right approach, you can restore your tile to almost-new condition.
Start with a Clean Surface
Before you repair, clean the area around the chip thoroughly to remove dirt, dust, and loose debris. Use a soft brush or vacuum to ensure no particles interfere with adhesion. I once overlooked this step and ended up with a patch that popped off in a week.
Choose the Right Repair Material
Match the repair compound to your tile type—epoxy for ceramic, or a suitable ceramic crack filler. For my kitchen, I used a colored epoxy that blended seamlessly, making the repair almost invisible. Visit this guide for detailed options.
Prepare the Filler
Mix the filler according to manufacturer instructions. Use a clean mixing tool and work in small batches. If necessary, tint the epoxy with a color pigment to match your tile. I mixed a tiny amount of acrylic color into the epoxy, which resulted in a near-perfect match.
Apply the Repair Material
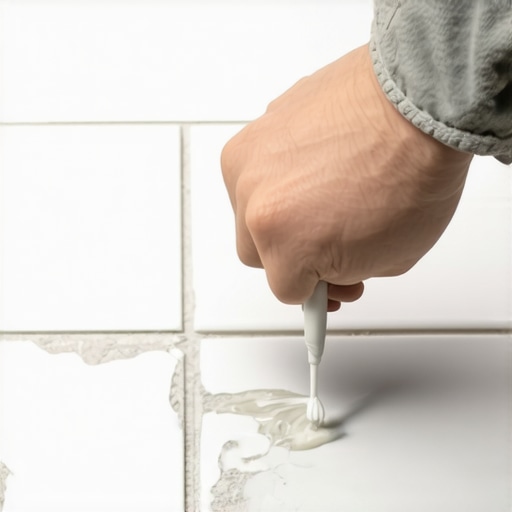
Using a fine-tipped applicator or toothpick, carefully fill the chipped area, slightly overfilling to allow for smoothing. Press gently to ensure good adhesion. I found that a steady hand and patience yielded the best results, avoiding air bubbles or unevenness.
Smooth and Finish
Once filled, level the surface with a damp finger or a plastic spatula. For larger chips, a spatula works better to create a flush finish. After curing (usually 24 hours), lightly sand the area with fine-grit sandpaper if needed for a seamless look. I learned that rushing this step can cause the repair to be noticeable.
Seal the Patch
Seal the repaired area with a matching grout or sealant to protect it from moisture and stains. This step is crucial for durability. In my experience, sealing preserved the integrity of the repair, preventing water damage over time. For additional insights, check this detailed tutorial.
Remember, patience and attention to detail are your best tools when fixing a tile chip. Rushing the process often leads to worse results. If you encounter any unusual issues, don’t hesitate to contact professionals through this contact page for expert advice.
 Even seasoned DIYers often fall for misconceptions about flooring installation, leading to costly mistakes and subpar results. One prevalent myth is that all subfloors are equally suitable for tile or hardwood—truth is, surface preparation is critical, and neglecting it can cause future issues like cracking or delamination. Many believe that floor leveling is a trivial step, but improper leveling can result in uneven surfaces and tile lippage that shouts amateur work. For an advanced understanding, check out this expert guide.
Another misconception is that hardwood floors are inherently durable and forgiving of minor imperfections—yet, subtle subfloor inconsistencies can lead to squeaks, gaps, and uneven wear over time. A common trap is assuming a quick fix like over-tightening nails or staples will suffice; instead, precise installation techniques and climate control are essential for longevity. Rushing through these steps increases the risk of damage, especially with engineered hardwood, which is sensitive to moisture fluctuations. For tips on preventing such pitfalls, see this detailed advice.
When it comes to tile, many think that thinset should be applied as thick as possible for better adhesion. Conversely, excessive thinset can cause uneven surfaces and increased lippage, especially with large-format tiles. Using the right trowel size and technique is vital—this ensures a flat, professional finish. For a more technical approach, review this expert tutorial. And remember, addressing these nuances upfront can save you hours and money in repairs later.
### Are There Hidden Mistakes That Even Experts Overlook?
Many experienced installers overlook the importance of expansion joints and perimeter gaps, which are often dismissed as insignificant. Yet, failing to incorporate proper movement accommodation can lead to buckling or cracking in extensive floors, especially in climates with varying humidity. This is a nuanced step many skip, believing it’s only necessary for commercial projects. However, even residential installations benefit from precise joint placement, ensuring durability and aesthetic integrity. According to research from flooring innovation specialists, neglecting these details accelerates wear and tear. For more on this, visit this resource.
Understanding these often-missed details can make the difference between a mediocre floor and a true masterpiece. Are you aware of all the pitfalls that might trip you up? Let me know your experiences in the comments! Incorporate expert techniques and avoid common mistakes to elevate your projects—not only will they look better, but they’ll last longer, saving you time and money in the long run.
Tools I Recommend for Flooring Projects
Having the right tools can make all the difference in achieving professional-quality results that stand the test of time. I personally rely on a high-quality, calibrated laser level, such as the Spectra Precision Laser Level, because it ensures precise leveling across large areas, reducing the risk of uneven surfaces or lippage. Additionally, a diamond-tipped trowel is essential when applying thinset for large-format tiles; it provides uniform mortar coverage, preventing voids that can cause cracks later on. For floor leveling, I use a self-leveling underlayment like the Spiked Roller, which helps remove air pockets and ensures smooth, flat surfaces—this tool is vital when dealing with uneven subfloors.
Keep Your Equipment Functioning with Proper Maintenance
Regular maintenance extends the lifespan of your tools and guarantees accurate performance—saving you money and headaches. For power tools like drills, saws, and mixers, always clean dust and debris after each use and check for worn brushes or blades that may need replacing. Lubricate moving parts as recommended in the manufacturer’s manual to prevent overheating or mechanical failure. For laser levels and other electronic devices, keep the batteries charged and store them in a controlled environment to prevent damage from humidity or temperature fluctuations.
When it comes to chemical-based tools like primers, adhesives, or sealants, always follow storage guidelines—typically in a cool, dry place—and ensure they are sealed tightly to prevent curing or contamination. Properly cleaning your tools after each project not only preserves their accuracy but also prevents cross-contamination that could compromise future installations.
Future Trends in Flooring Maintenance and Tools
The industry is shifting towards smart tools equipped with digital diagnostics and IoT integration, enabling real-time performance monitoring. For example, laser levels with internal calibration checks or moisture meters connected via Bluetooth will become standard, making it easier to maintain optimal conditions throughout your projects. As technology advances, investing in these smart tools now can streamline workflows and improve long-term results.
One advanced tip I highly recommend is using a spiked roller during the curing process of self-leveling compounds. This minor step dramatically reduces air bubbles and ensures a perfectly flat surface—an essential detail that improves the longevity and appearance of the finished floor. Give it a try on your next project and see the difference it makes!
How do I maintain my flooring tools over time?
Consistency is key—regularly inspecting, cleaning, and storing your tools properly will keep them performing accurately for years. Replace worn-out parts promptly and calibrate your electronic devices periodically based on manufacturer recommendations. Developing a routine maintenance schedule ensures your tools are always ready when you need them, leading to smoother installations and fewer surprises down the line.
Over time, even the most diligent homeowners encounter the dreaded small chip or crack in their ceramic tiles. My own experience taught me that those tiny imperfections are not just superficial—they can lead to bigger issues if ignored. The real lesson? Proper repair techniques can turn a potential disaster into a simple fix, preserving both your floor’s beauty and your budget.
Sneaky Lessons From Past Repairs
- Never underestimate the importance of surface preparation; a clean, debris-free area ensures better adhesion and a seamless finish.
- Matching your repair material precisely to your tile type and color is more art than science—take the time to tint or choose the right filler for invisibility.
- Patience is key—rushing through filling, leveling, or sealing steps often results in noticeable patches or recurring damage.
- Investing in quality tools, such as a fine-tipped applicator or a damp finger for smoothing, makes a significant difference in repair quality.
- Sealing the repair area with matching grout or sealant is not optional; it enhances durability and prevents water-related issues down the road.
Top Tools and Resources That Changed My Approach
- Use a high-precision laser level, like the Spectra Precision Laser Level, to ensure flat surfaces across large areas, greatly reducing tile lippage.
- For repairs, a comprehensive guide to tile repair helped me understand the nuances of color matching and filler application.
- Don’t skip the spiked roller during leveling—this step eliminates air pockets and ensures a solid foundation for the repair.
- The right trowel and adhesive make all the difference in ensuring a flush, durable surface.
Your Next Step Towards Flawless Floors
Repairing small tile chips is more than just a quick fix—it’s a chance to embrace craftsmanship that extends the life of your flooring and enhances your space. With patience, the right tools, and knowledge, you can master these repairs and transform a potential eye-sore into a near-invisible patch.
Are you ready to tackle your own tile repair project? Share your experiences below or ask questions—I’m here to help you avoid common pitfalls and achieve professional results.