
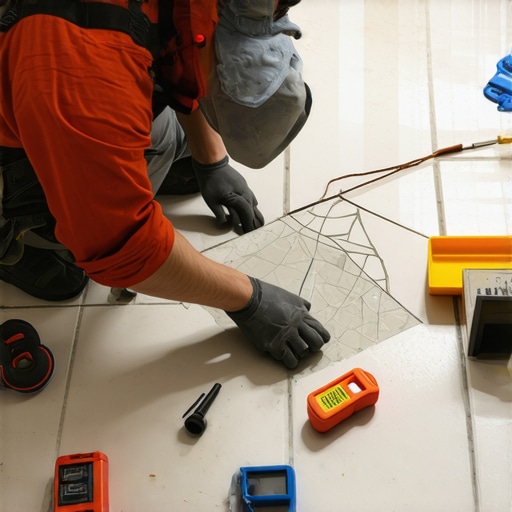
I remember the exact moment I noticed it. A hairline crack running across my beautiful kitchen tile, like a tiny scar marring a cherished face. My heart sank. The whole floor seemed to shout, “This is a disaster waiting to happen!” It was that creeping realization that a small flaw can quickly spiral into a costly and chaotic renovation if you don’t act wisely. But here’s the lightbulb moment: I didn’t need to rip out the entire floor. There are practical, less invasive ways to repair those pesky cracks and restore your tile’s beauty without turning your home upside down.
Why It’s Worth Repairing That Cracked Tile Now
Cracks in tile aren’t just about aesthetics—they can lead to bigger problems like water seepage, further damage, or even structural issues if left unattended. The good news is, addressing a crack early can save you money and hassle later. Plus, a well-executed repair can be almost invisible, keeping your space looking pristine. I learned this the hard way when a neglected crack turned into a noticeable flaw, forcing me into a costly full-floor replacement. Trust me, it’s smarter to tackle it head-on with a sensible fix.
Is Repairing a Cracked Tile Actually Worth the Hype?
Early on, I believed that a crack meant I had to replace the entire tile or floor. Not true! I made the mistake of assuming all fixes are complicated or temporary. In reality, there are effective ways to repair a crack that are both affordable and durable. The key is knowing which method suits your specific situation. For example, a tiny surface crack can often be patched seamlessly, but a deeper one might need a slightly different approach. Curious about the most reliable repair techniques? I’ll guide you through them, so you won’t have to worry about your cracked tile turning into a bigger problem.
If you’ve ever hesitated, wondering if a small crack is worth fixing or if it’s time to call in a pro, you’re not alone. I’ve been there, and I want to help you avoid costly pitfalls. In fact, a common mistake I made early on was trying to use just household glue—trust me, it doesn’t hold up! Instead, there are specialized repair kits and techniques that professionals swear by, such as epoxy fill-ins and surface sealers.
Ready to make that crack vanish without a full tear-up? Let’s dive into the practical steps I used, which you can easily replicate. You might also find it helpful to check out our guide on [floor leveling](https://tiletrendshop.com/the-ultimate-guide-to-floor-leveling-for-a-perfect-finish) to ensure your floor stays even and beautiful after repairs. Now, on to the step-by-step process that made my floor look flawless again.
Prepare Your Workspace and Gather Necessary Supplies
Start by clearing the area around the cracked tile, removing furniture or any obstacles. Wear gloves and goggles to protect yourself. For supplies, you’ll need a honing tool or putty knife, epoxy or tile repair compound, a small brush, fine-grit sandpaper, and a damp cloth. Having everything ready ensures a smooth repair process and minimizes delays.
Clean the Damaged Area Thoroughly
Use a damp cloth to wipe away dust, dirt, and grease from the cracked tile and surrounding grout. For stubborn grime, a mixture of mild detergent and water works well. Ensuring a clean surface allows the repair materials to adhere properly, preventing future cracks or detachment.
Remove the Cracked Pieces Carefully
If the crack has caused small pieces to break off, gently remove them with a putty knife. Be cautious not to damage the neighboring tiles. Think of it as carefully chiseling away a small chipped stone without disturbing the foundation—precision matters to ensure a seamless finish.
Sand the Edges for Better Adhesion
Lightly sand the edges of the crack with fine-grit sandpaper. This creates a rough surface that helps the repair compound bond more securely. Imagine scuffing a wall before applying paint—altering the surface slightly improves the final look and durability.
Apply the Repair Material Precisely
Mix the epoxy or tile repair compound according to manufacturer instructions. Using a small spatula or needle applicator, carefully fill the crack, pressing the material into the gap to eliminate air pockets. Smooth out the surface with the edge of the spatula. Think of it as sealing a tiny wound—the key is filling it completely and evenly for a nearly invisible result.
Let It Cure Fully Before Proceeding
Allow the repair to cure as specified, generally 24 hours. During this time, avoid walking on or applying pressure to the area. Rushing the curing can compromise the repair, resulting in a weak or uneven surface. Patience ensures your fix sustains use and looks flawless afterward.
Sand and Finish for a Seamless Look
Once cured, lightly sand the area with fine-grit sandpaper to blend the repair with the surrounding tile. Wipe away dust with a damp cloth. For an extra layer of protection and shine, consider applying a tile sealer or topcoat. This step is like polishing a gemstone, making the repair virtually indistinguishable from the original surface.
Inspect and Maintain Your Repaired Tile
After completing the repair, regularly check for signs of new cracks or damage. Maintaining proper cleaning routines using recommended tile-care products, like those described in hardwood floor care secrets, can extend the lifespan of your tile and prevent future issues. Quick intervention at the first sign of trouble saves costly repairs later.
By following these precise steps, you’ll restore your cracked tile effectively, avoiding costly replacements and preserving your home’s beauty. Remember, patience and attention to detail are your best allies in achieving a flawless finish.
Many homeowners assume they fully understand how to select and install flooring, but real craftsmanship involves navigating nuanced details most people overlook. A common mistake is trusting the so-called “rules of thumb,” like always choosing the thickest hardwood or the largest tiles, without considering the specific demands of the space or the subfloor conditions. For example, thicker hardwood isn’t necessarily better if your subfloor isn’t properly prepared; it can lead to issues like gapping or cupping. Likewise, bigger tiles look stunning but require meticulous substrate leveling and precise installation to prevent lippage, which many underestimate.
One pervasive myth is that self-leveling compounds are foolproof; however, improper application can cause peeling or uneven surfaces. Many make the mistake of assuming these products are a silver bullet, but mastering their use involves understanding the substrate’s porosity, moisture content, and proper mixing techniques. For instance, a common ‘oops’ is applying self-leveler over a damp or unprimed surface, leading to failure. Experts recommend conducting thorough pre-installation tests, like the moisture vapor emission rate measurement, to ensure compatibility and longevity of your flooring.
What steps can advanced homeowners take to avoid typical flooring pitfalls?
To truly excel, homeowners should get familiar with the subtle factors that influence flooring success, such as environmental conditions and material behaviors over time. For example, wood expands and contracts with humidity changes; neglecting proper acclimation and expansion gaps can result in buckling or gaps. This nuance trip up many, especially in variable climates. According to flooring professionals, understanding and implementing proper acclimation protocols, like those detailed in floor leveling techniques, is crucial. Additionally, the use of quality primers, spacers, and correct trowel sizes significantly impacts the final result, and availing yourself of expert tips can save thousands in repairs later.
Avoid the trap of rushing installation without thorough subfloor prep; even a slight misjudgment here can cause long-term problems. Regular maintenance routines, like proper cleaning with gentle products and sealing techniques, also extend your floors’ lifespan, as outlined in hardwood floor care secrets. Do not rely solely on DIY guides or generic advice—consult with flooring professionals and stay informed on industry standards to ensure your investment stands the test of time.
Remember, mastering floor installation isn’t just about aesthetics; it’s about understanding the underlying mechanics that ensure durability and beauty. Let me know: have you ever fallen into this trap? Share your experience in the comments and let’s learn together.Maintaining your flooring investments requires more than just routine cleaning; it involves selecting the right tools and adopting effective maintenance strategies. Investing in high-quality equipment ensures your floors stay pristine and structurally sound over the years. For hardwood floors, I personally rely on a microfiber dust mop, such as the Bona Microfiber Floor Mop, which effectively traps fine dust particles without scratching delicate surfaces. This tool is lightweight, easy to maneuver, and ensures that dust and debris are removed regularly, preventing scratches and grit buildup that can accelerate wear. For deeper cleaning, I recommend using a pH-neutral wood floor cleaner like the Murphy Oil Soap diluted according to manufacturer instructions. It cleans without stripping the finish, preserving your floor’s luster and durability.
Lessons That Changed My Approach to Flooring
One surprising insight was the importance of patience during curing processes; rushing repairs guarantees a less seamless finish. I also learned that a seemingly minor crack could be a sign of deeper subfloor issues, which means addressing the root is more cost-effective than temporary fixes. Another lightbulb moment was discovering that proper acclimation of flooring materials before installation prevents future gaps and warping—a step I previously overlooked but now swear by. Lastly, I realized that investing in quality tools and materials makes repairs easier and results more professional-looking, saving time and frustration in the long run.